
Clinical Topics
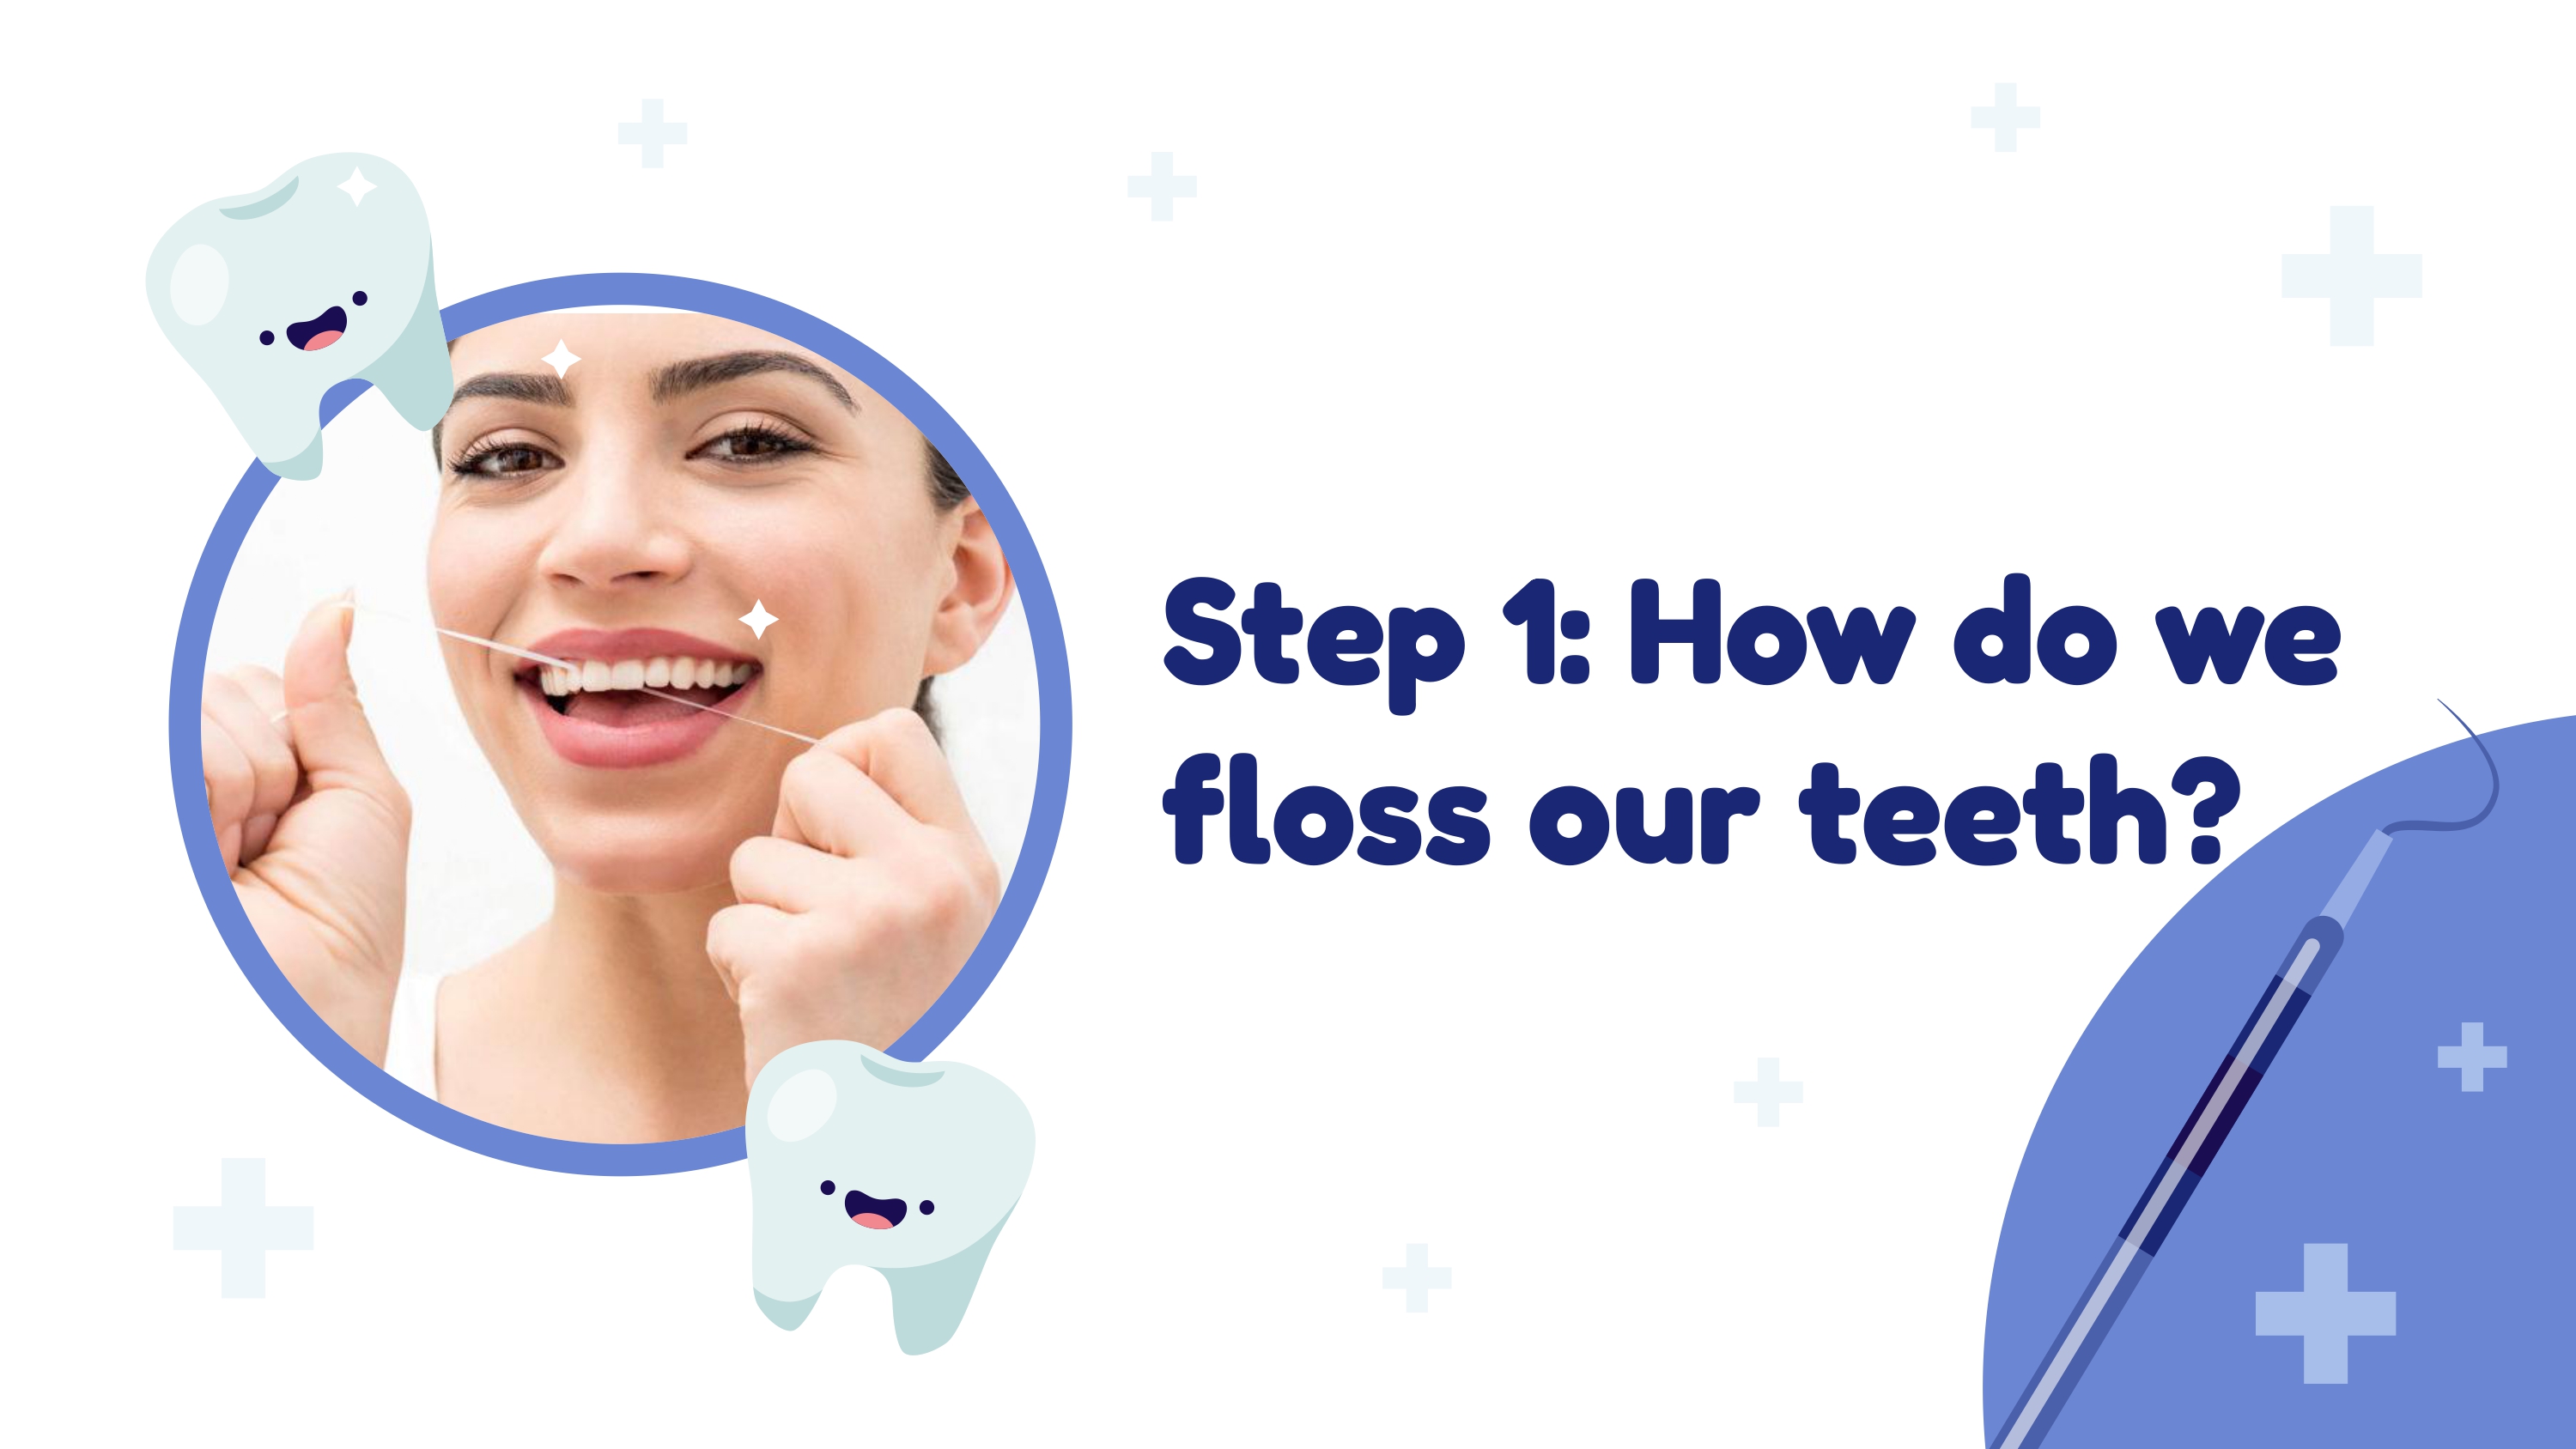
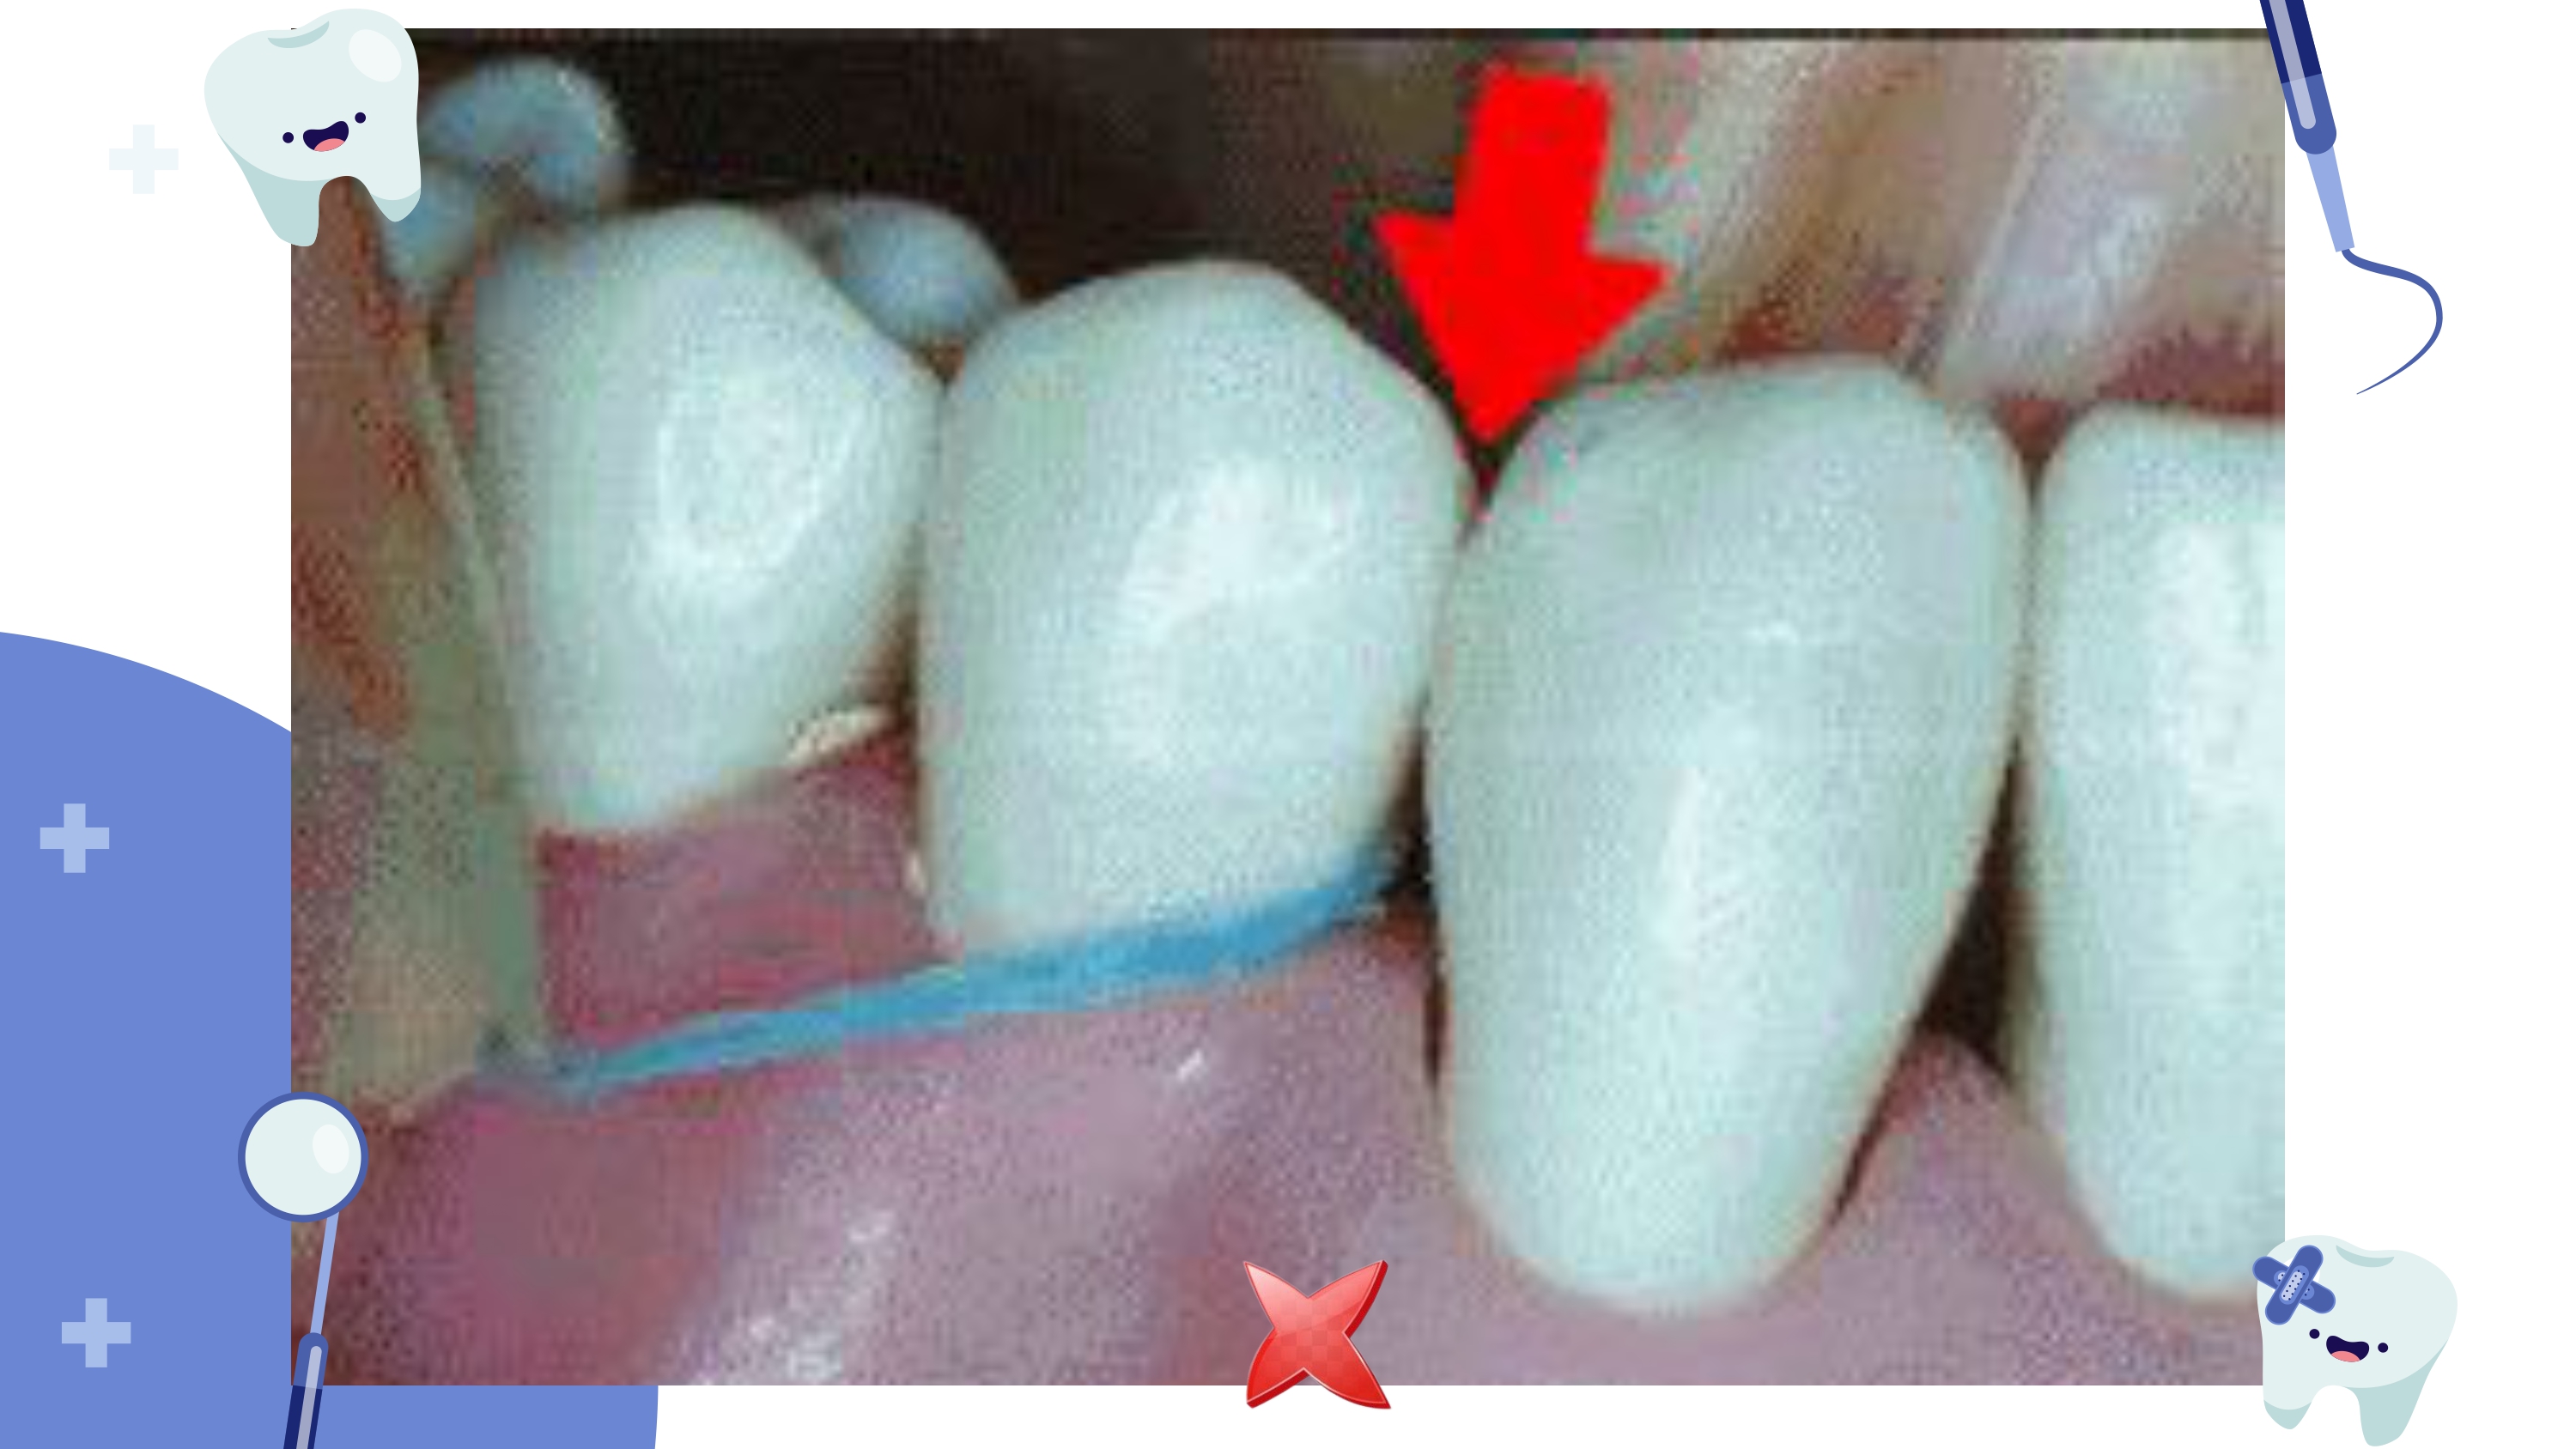
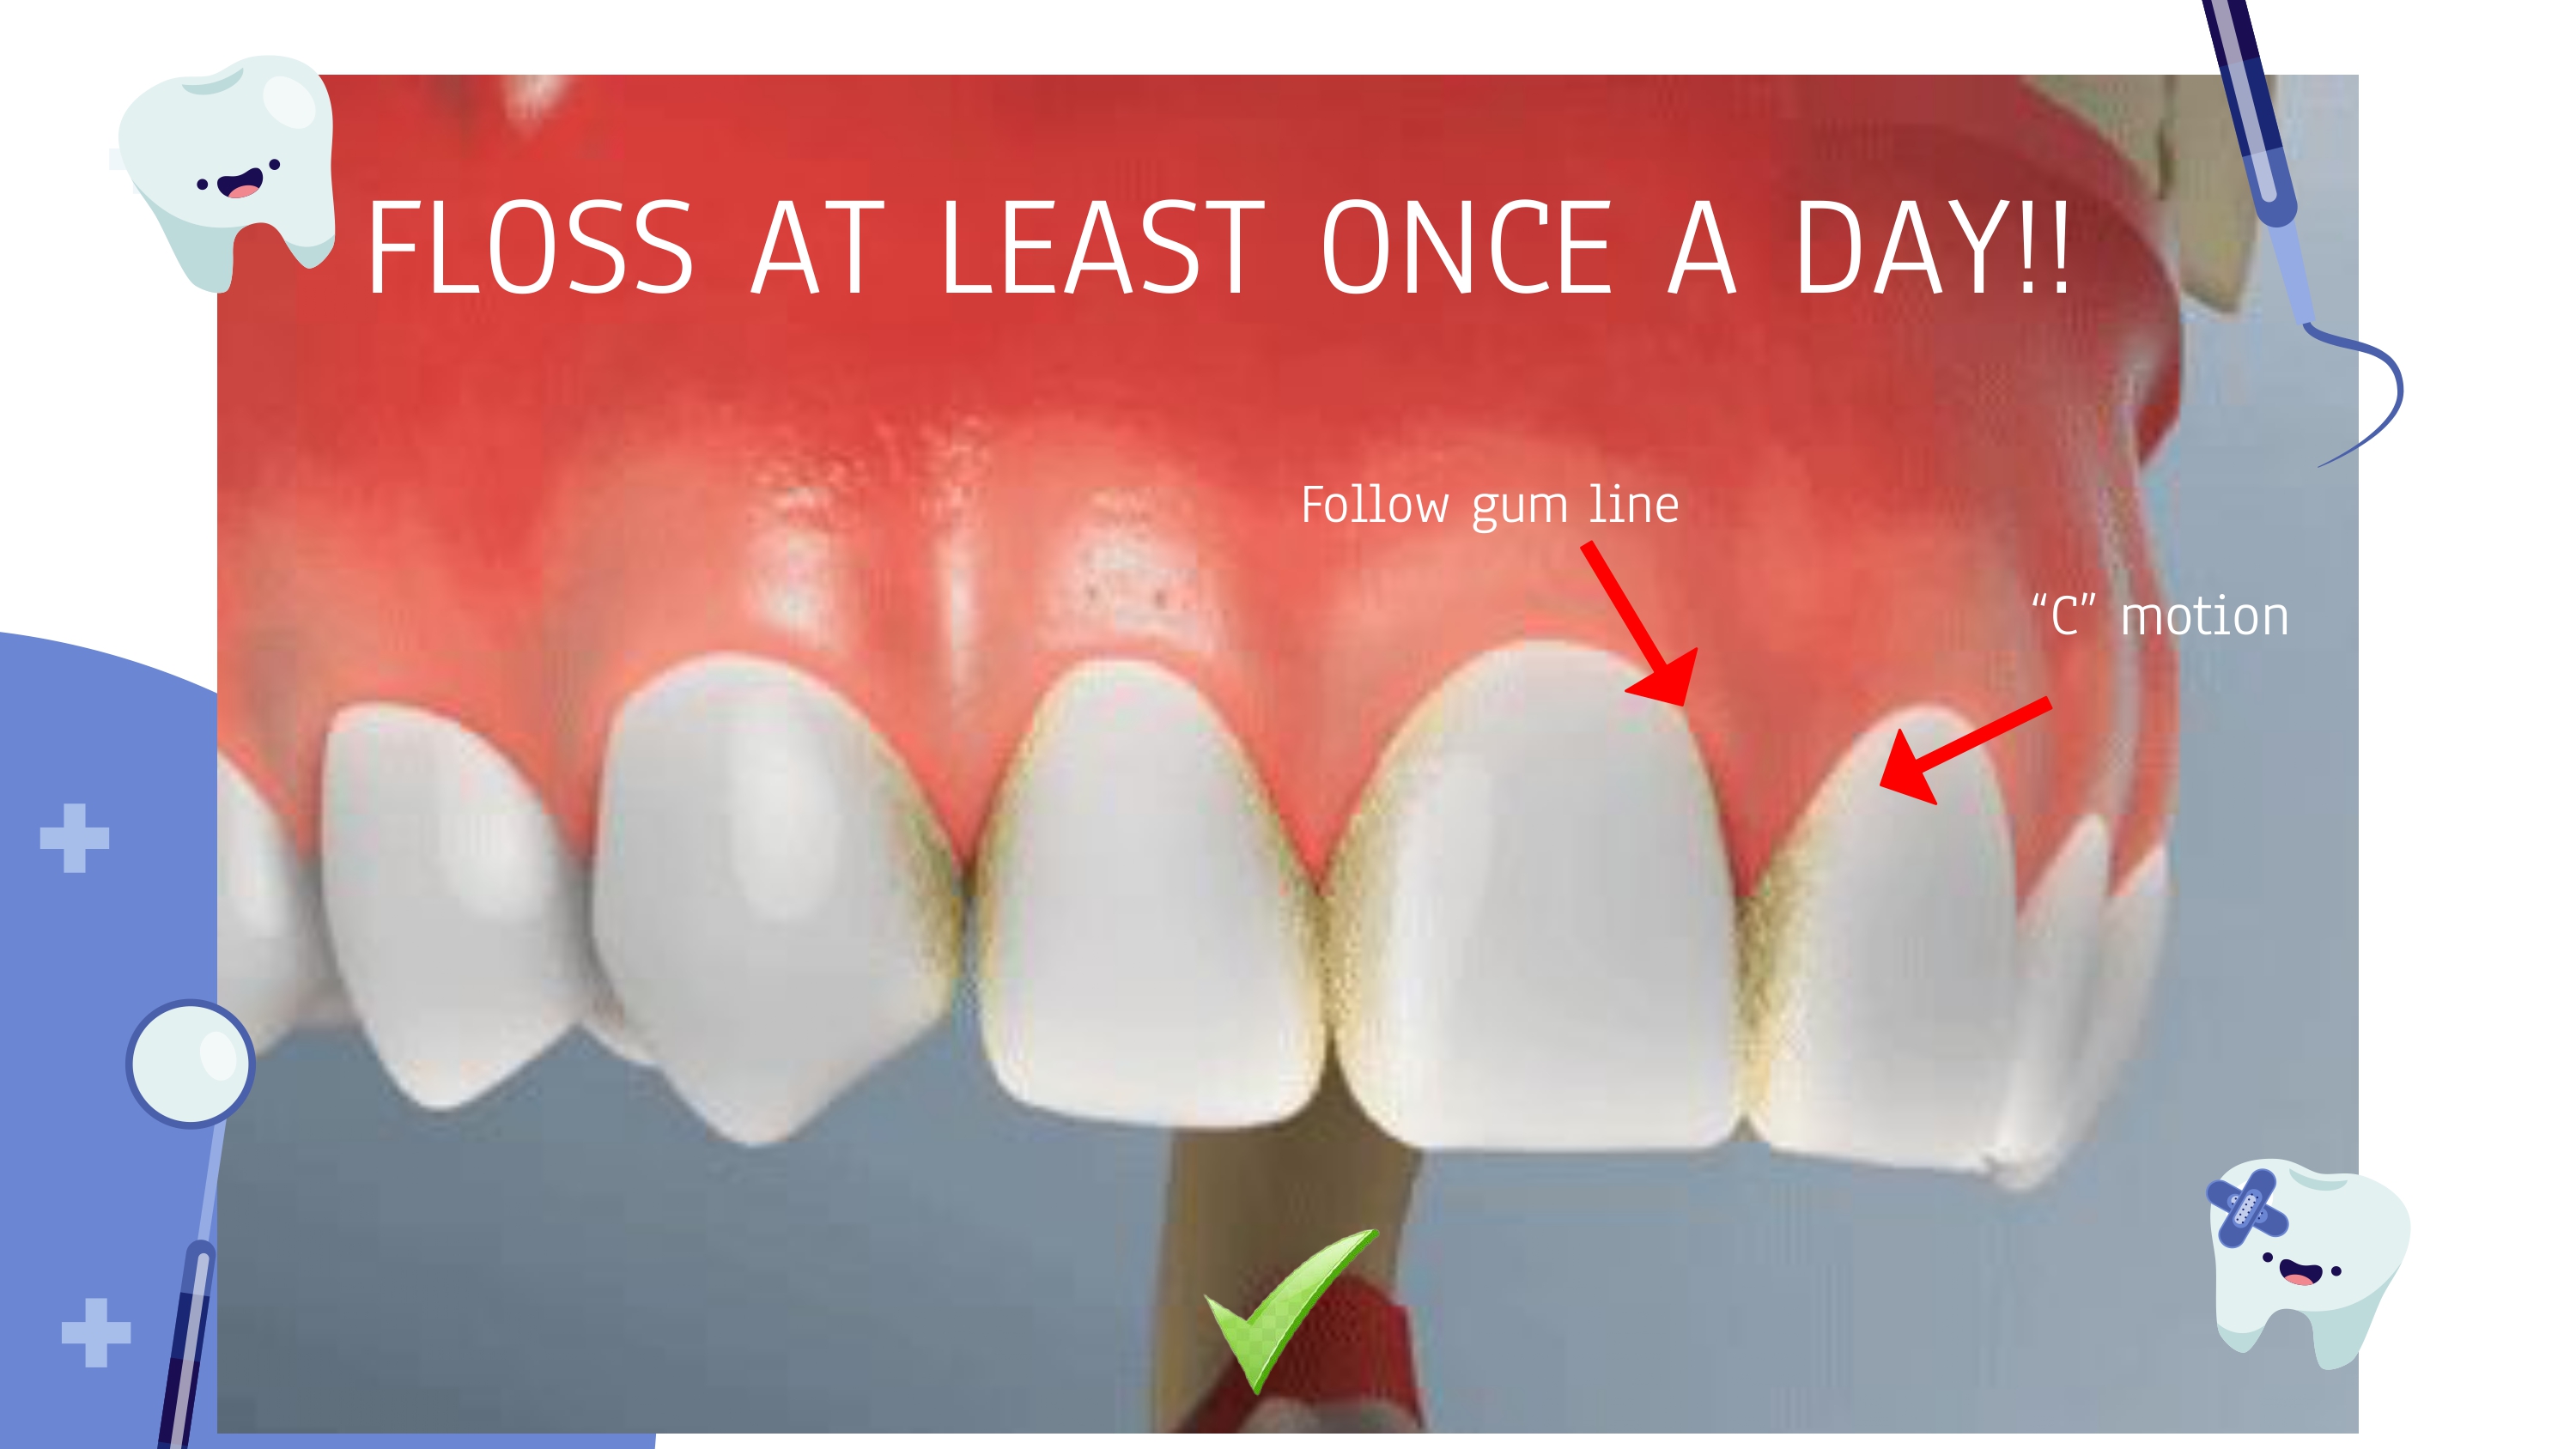
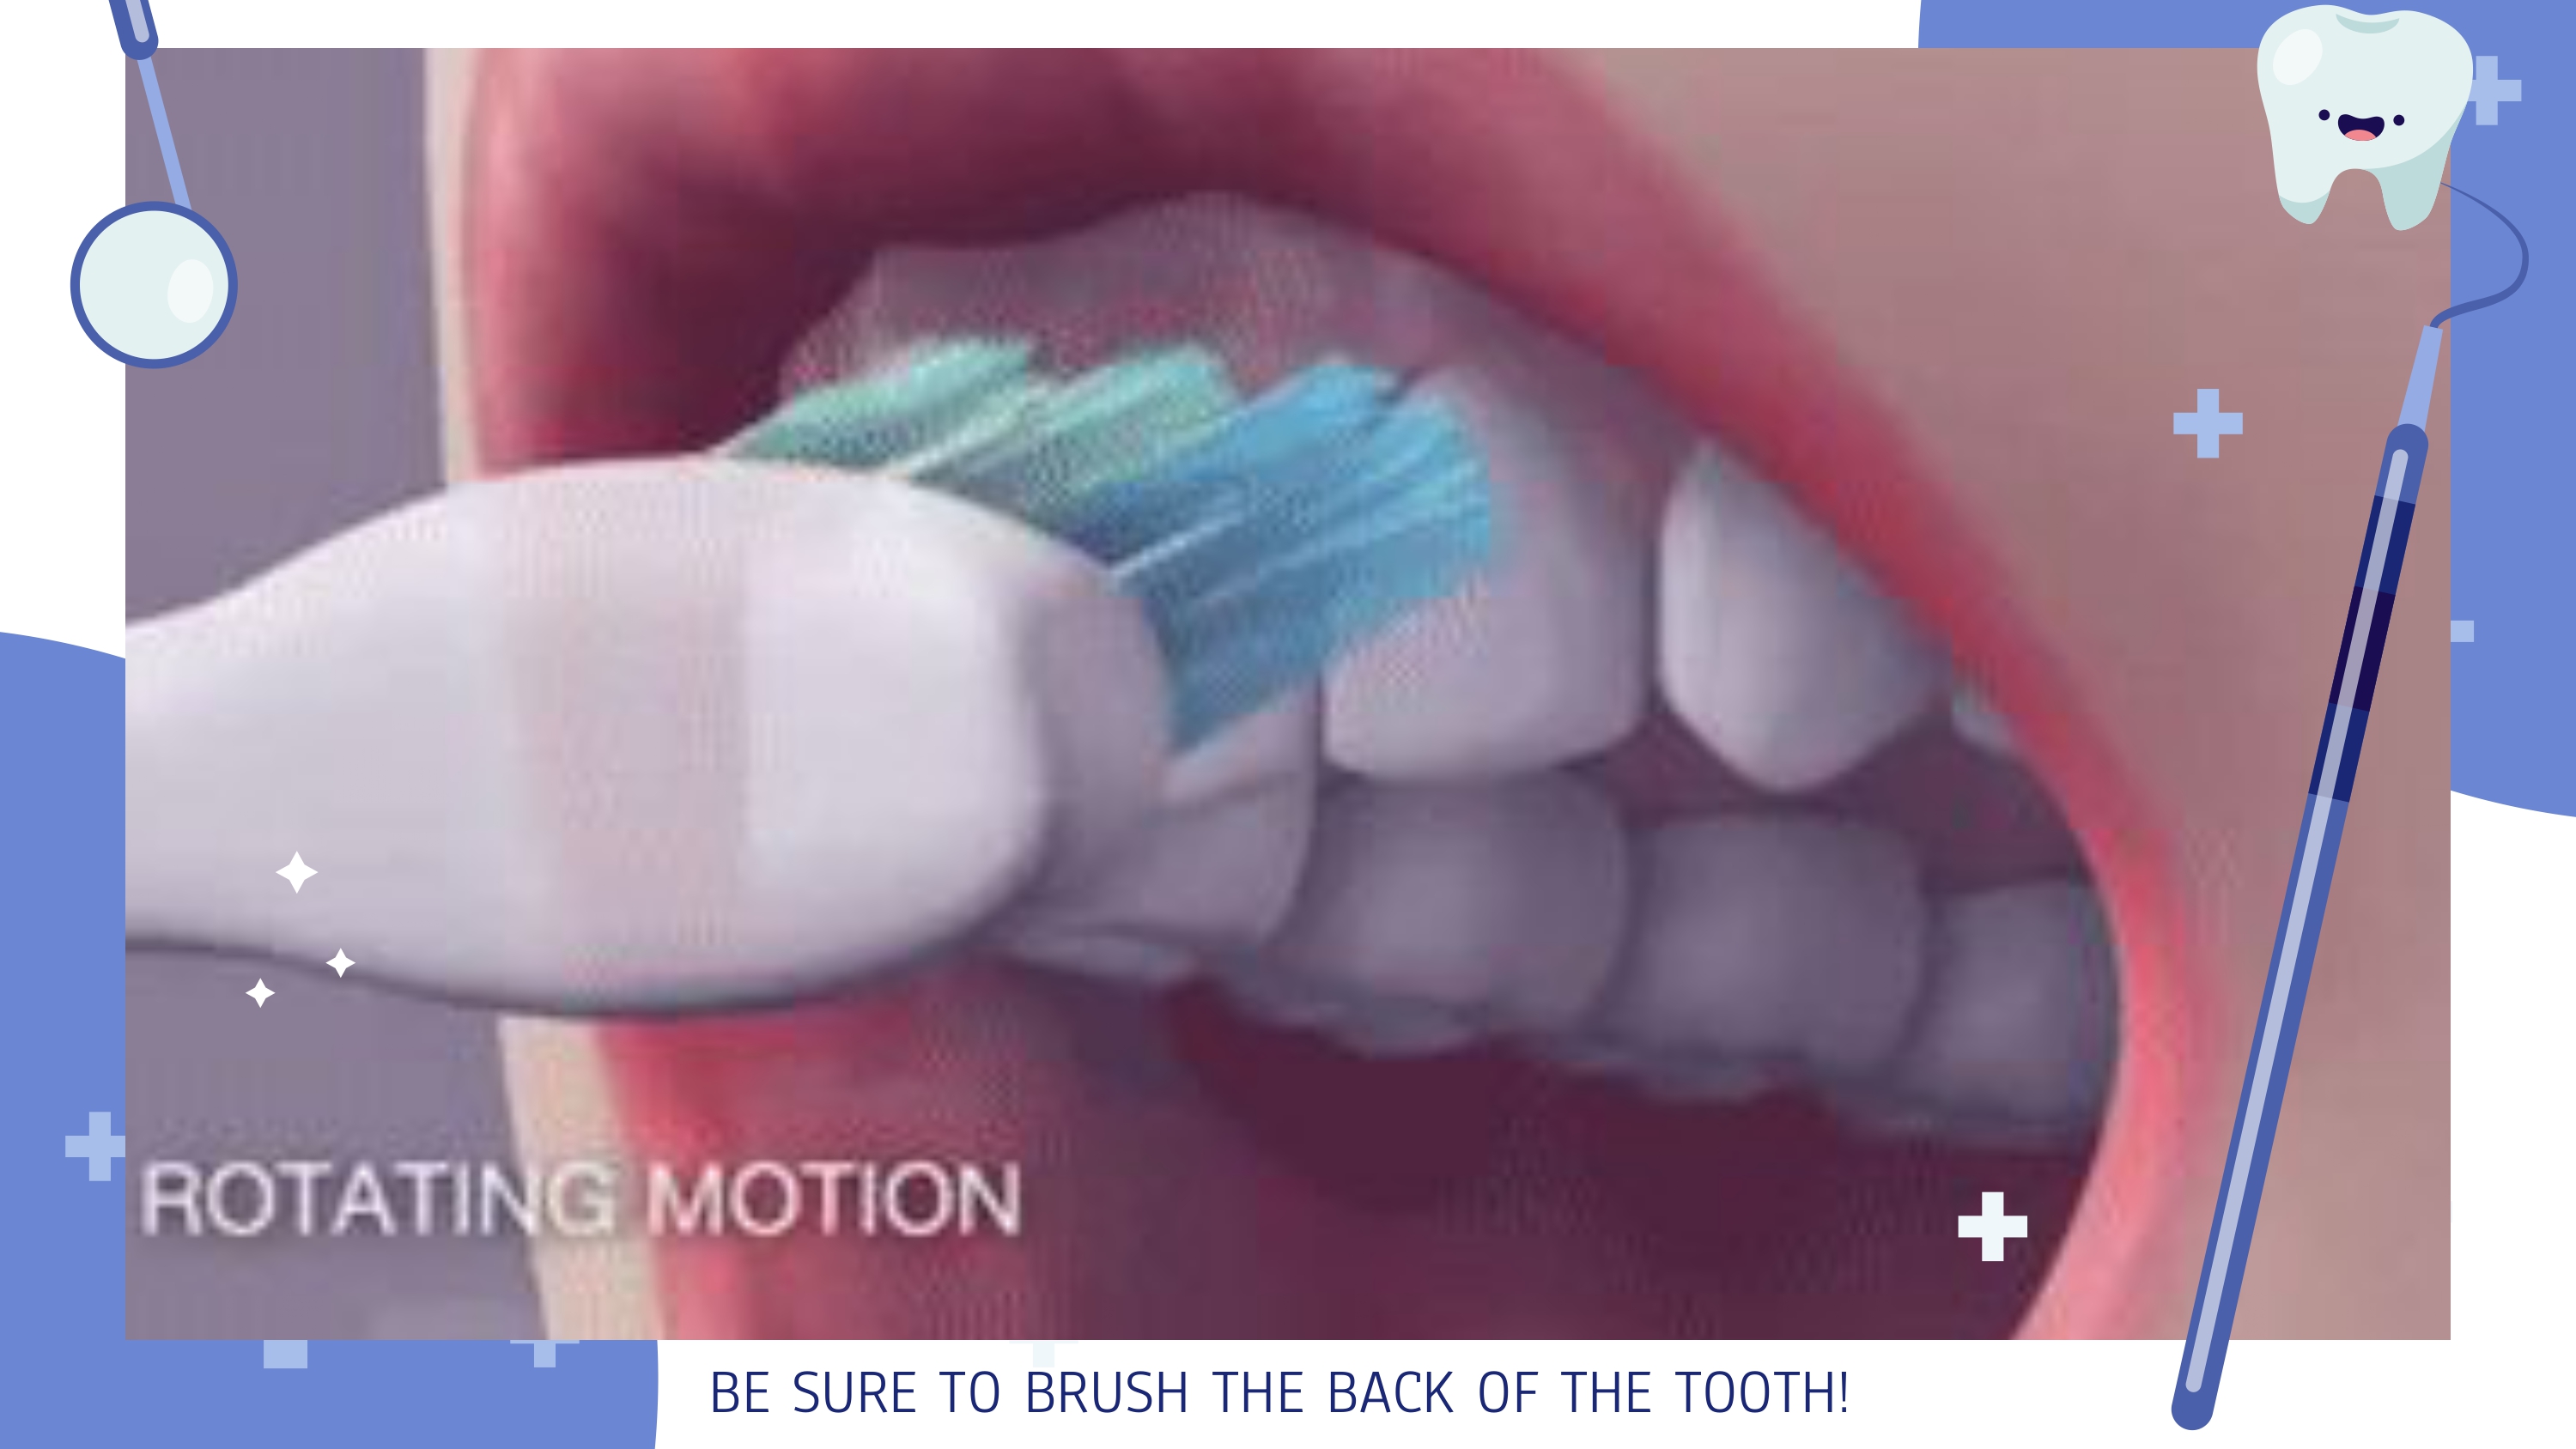
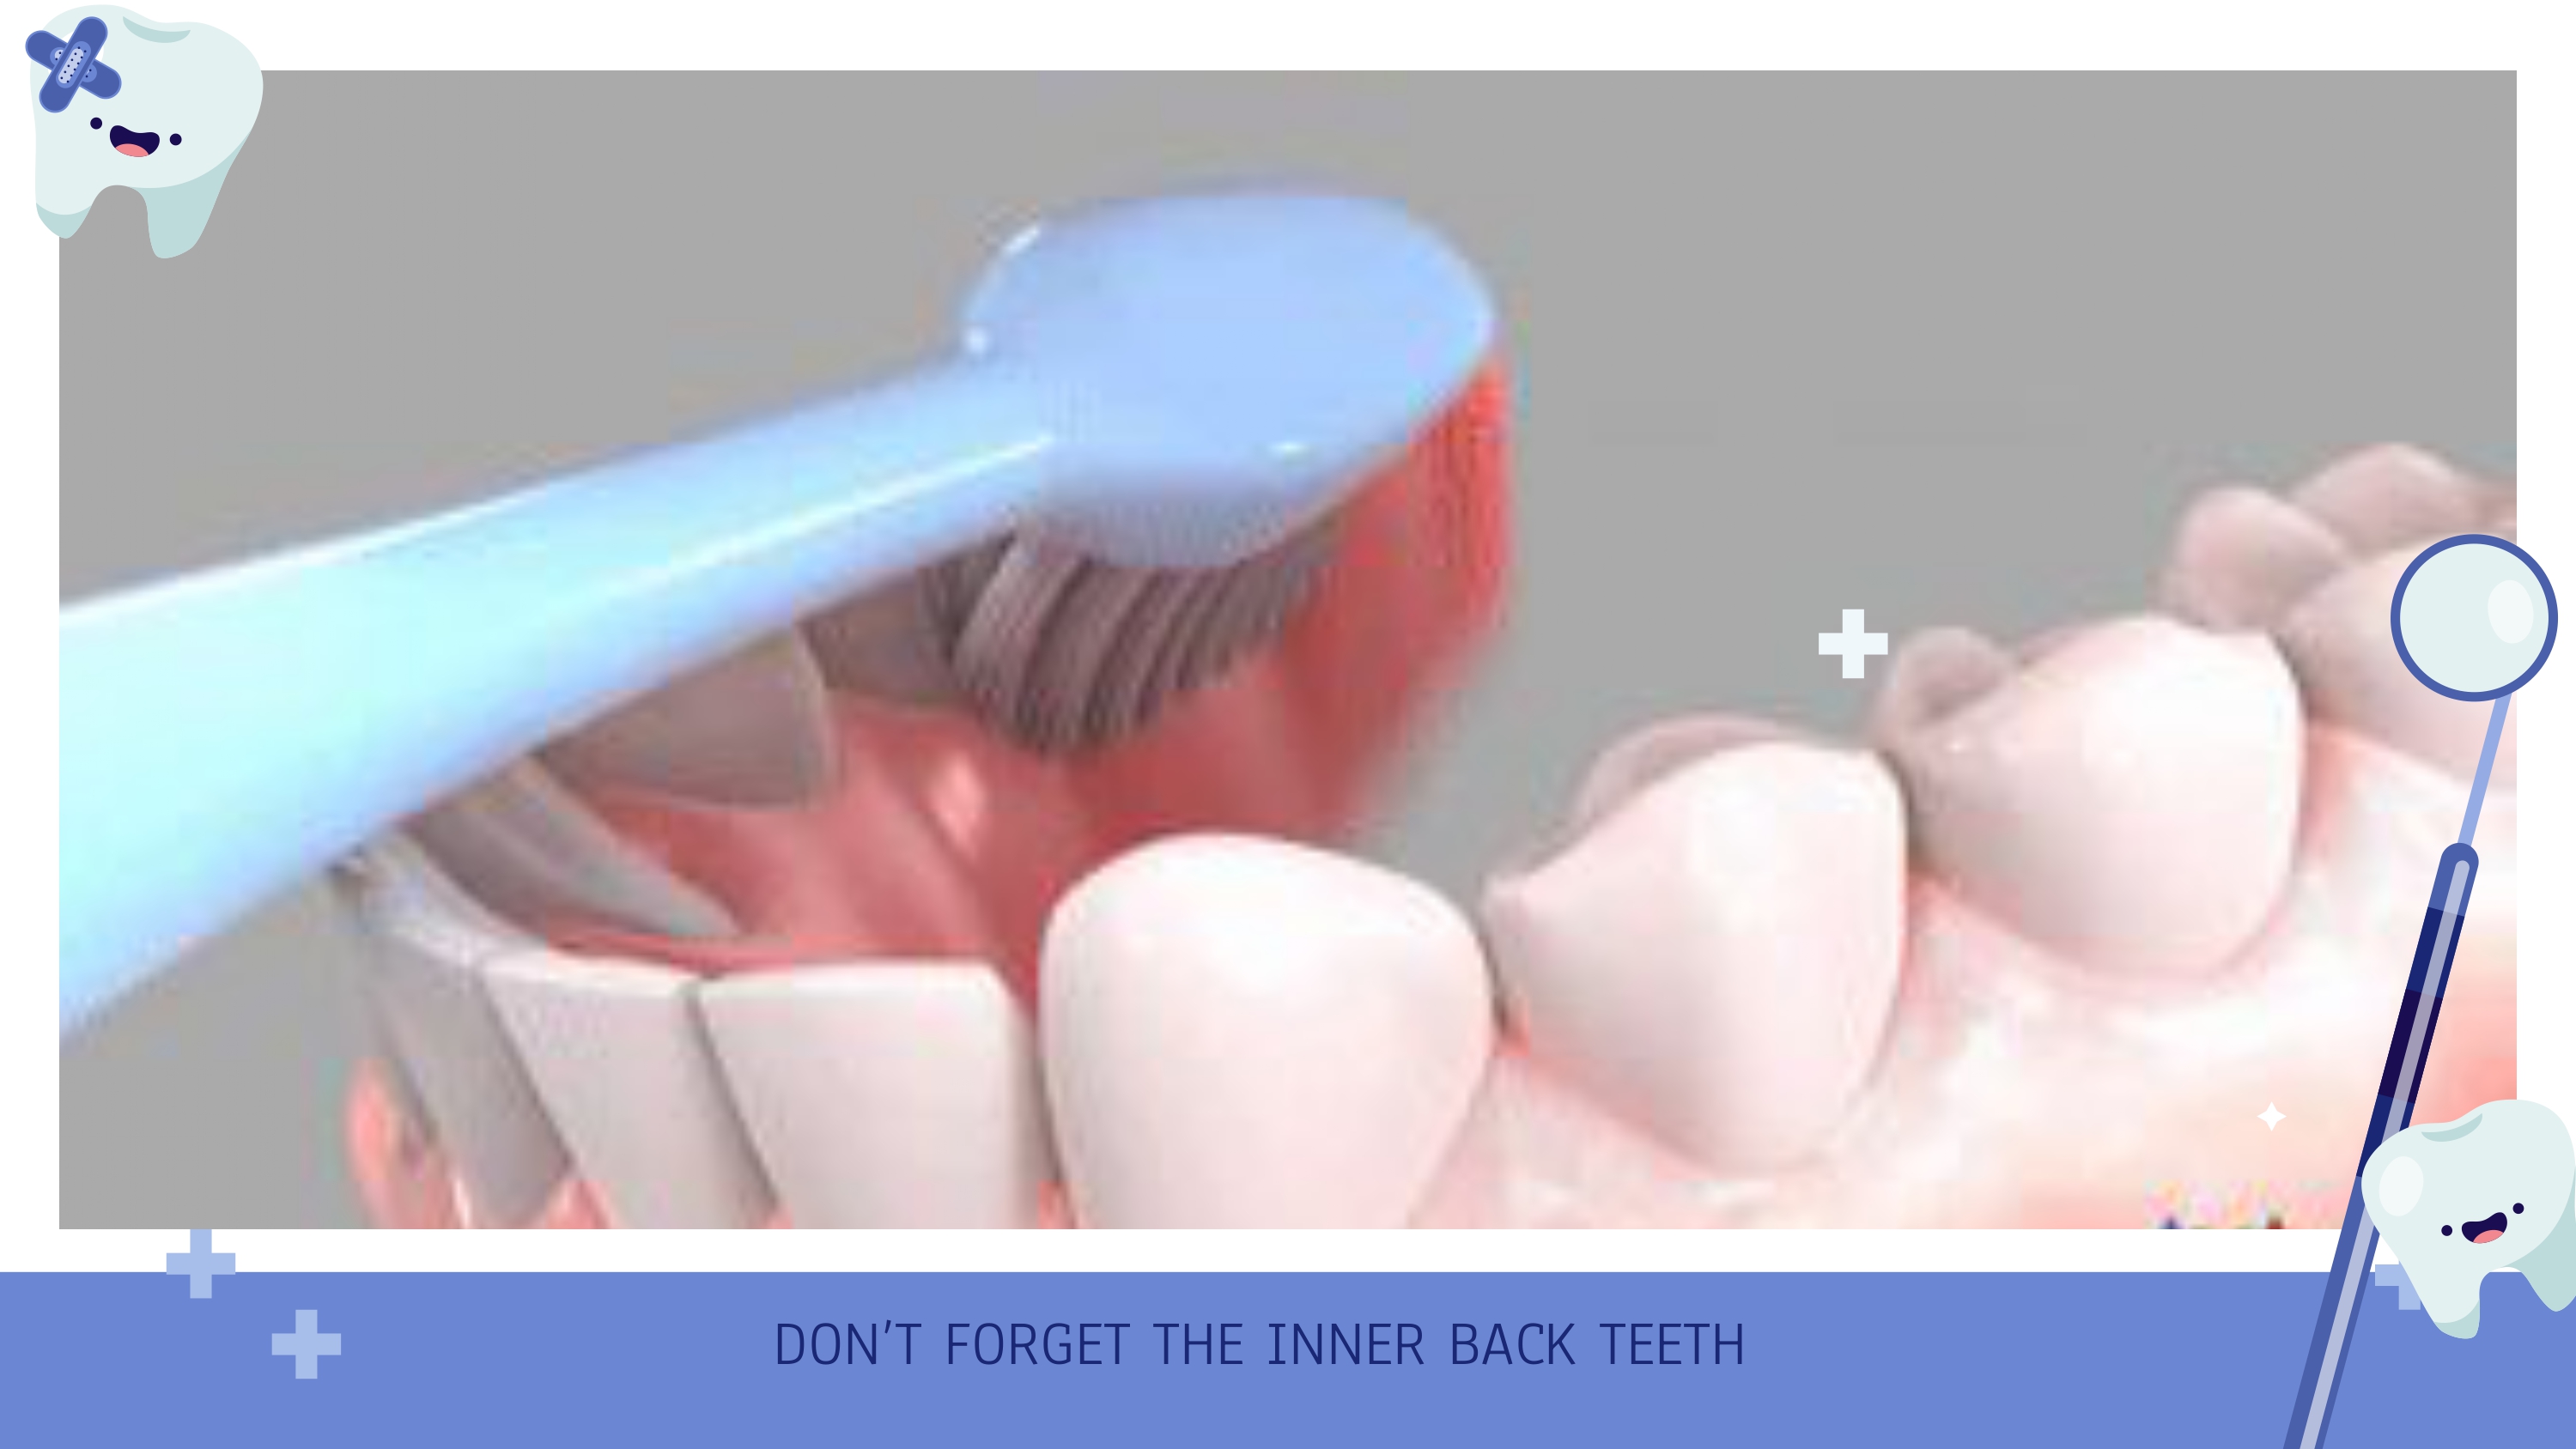
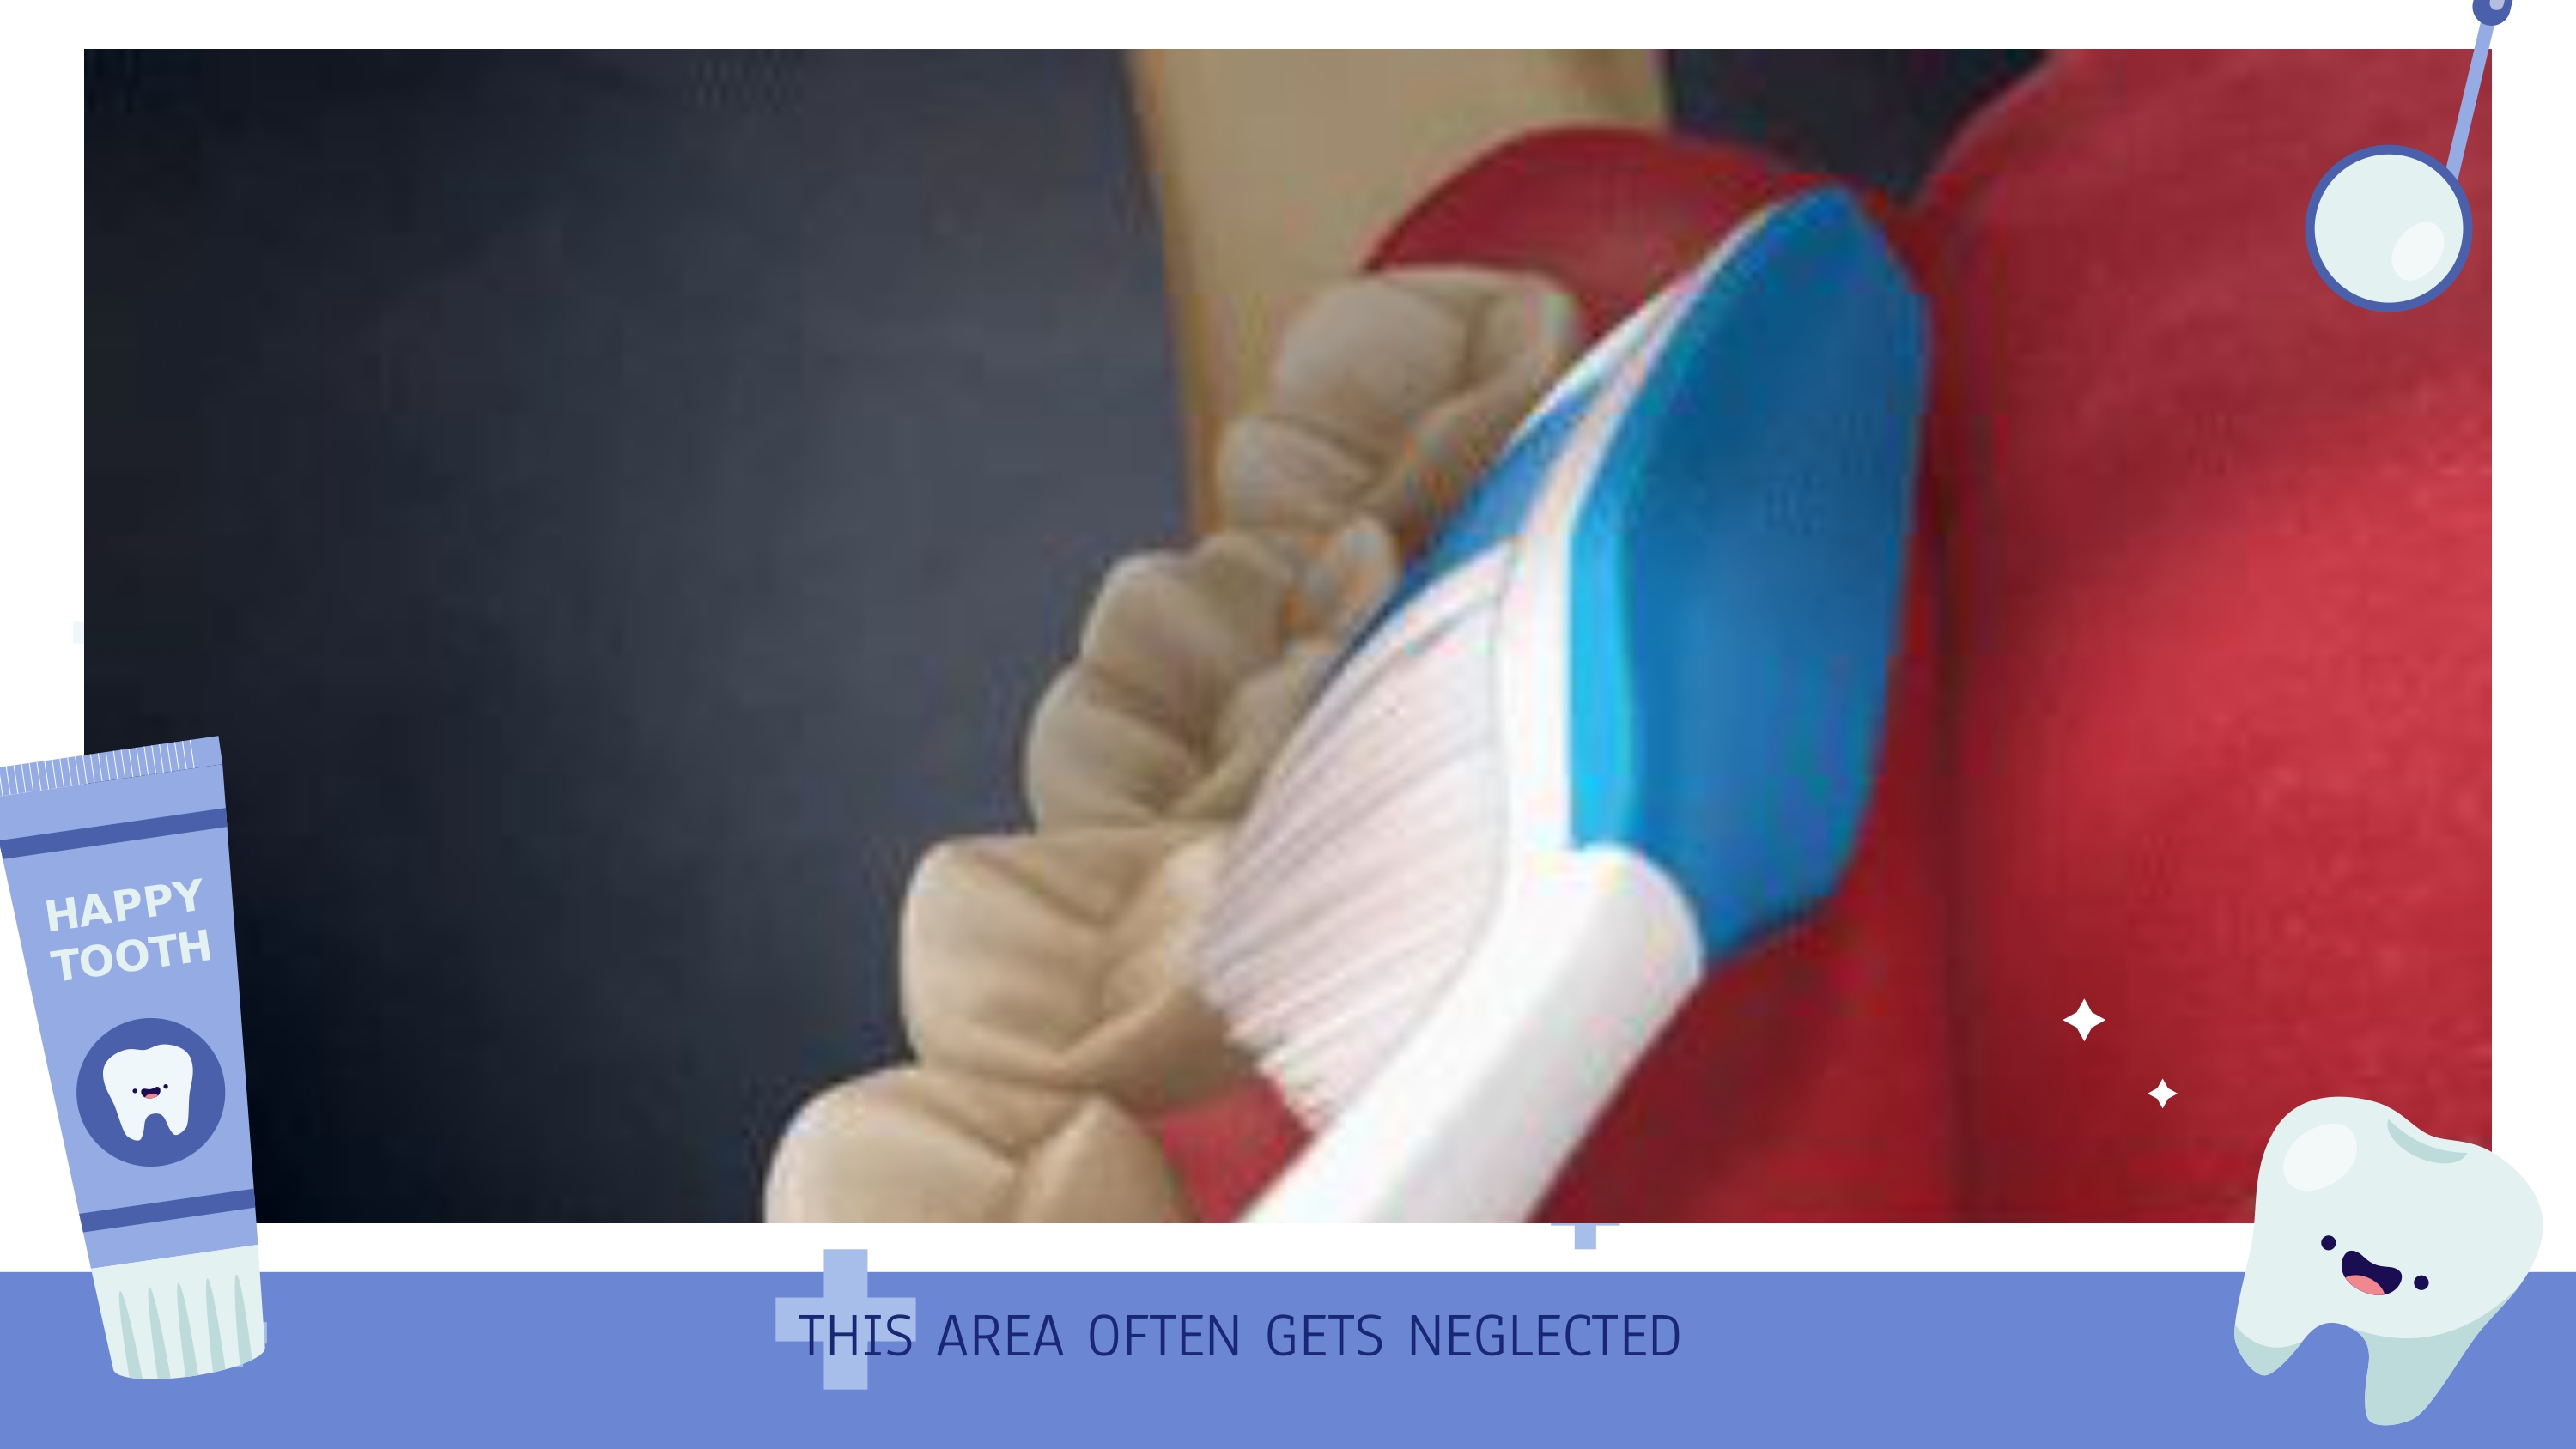
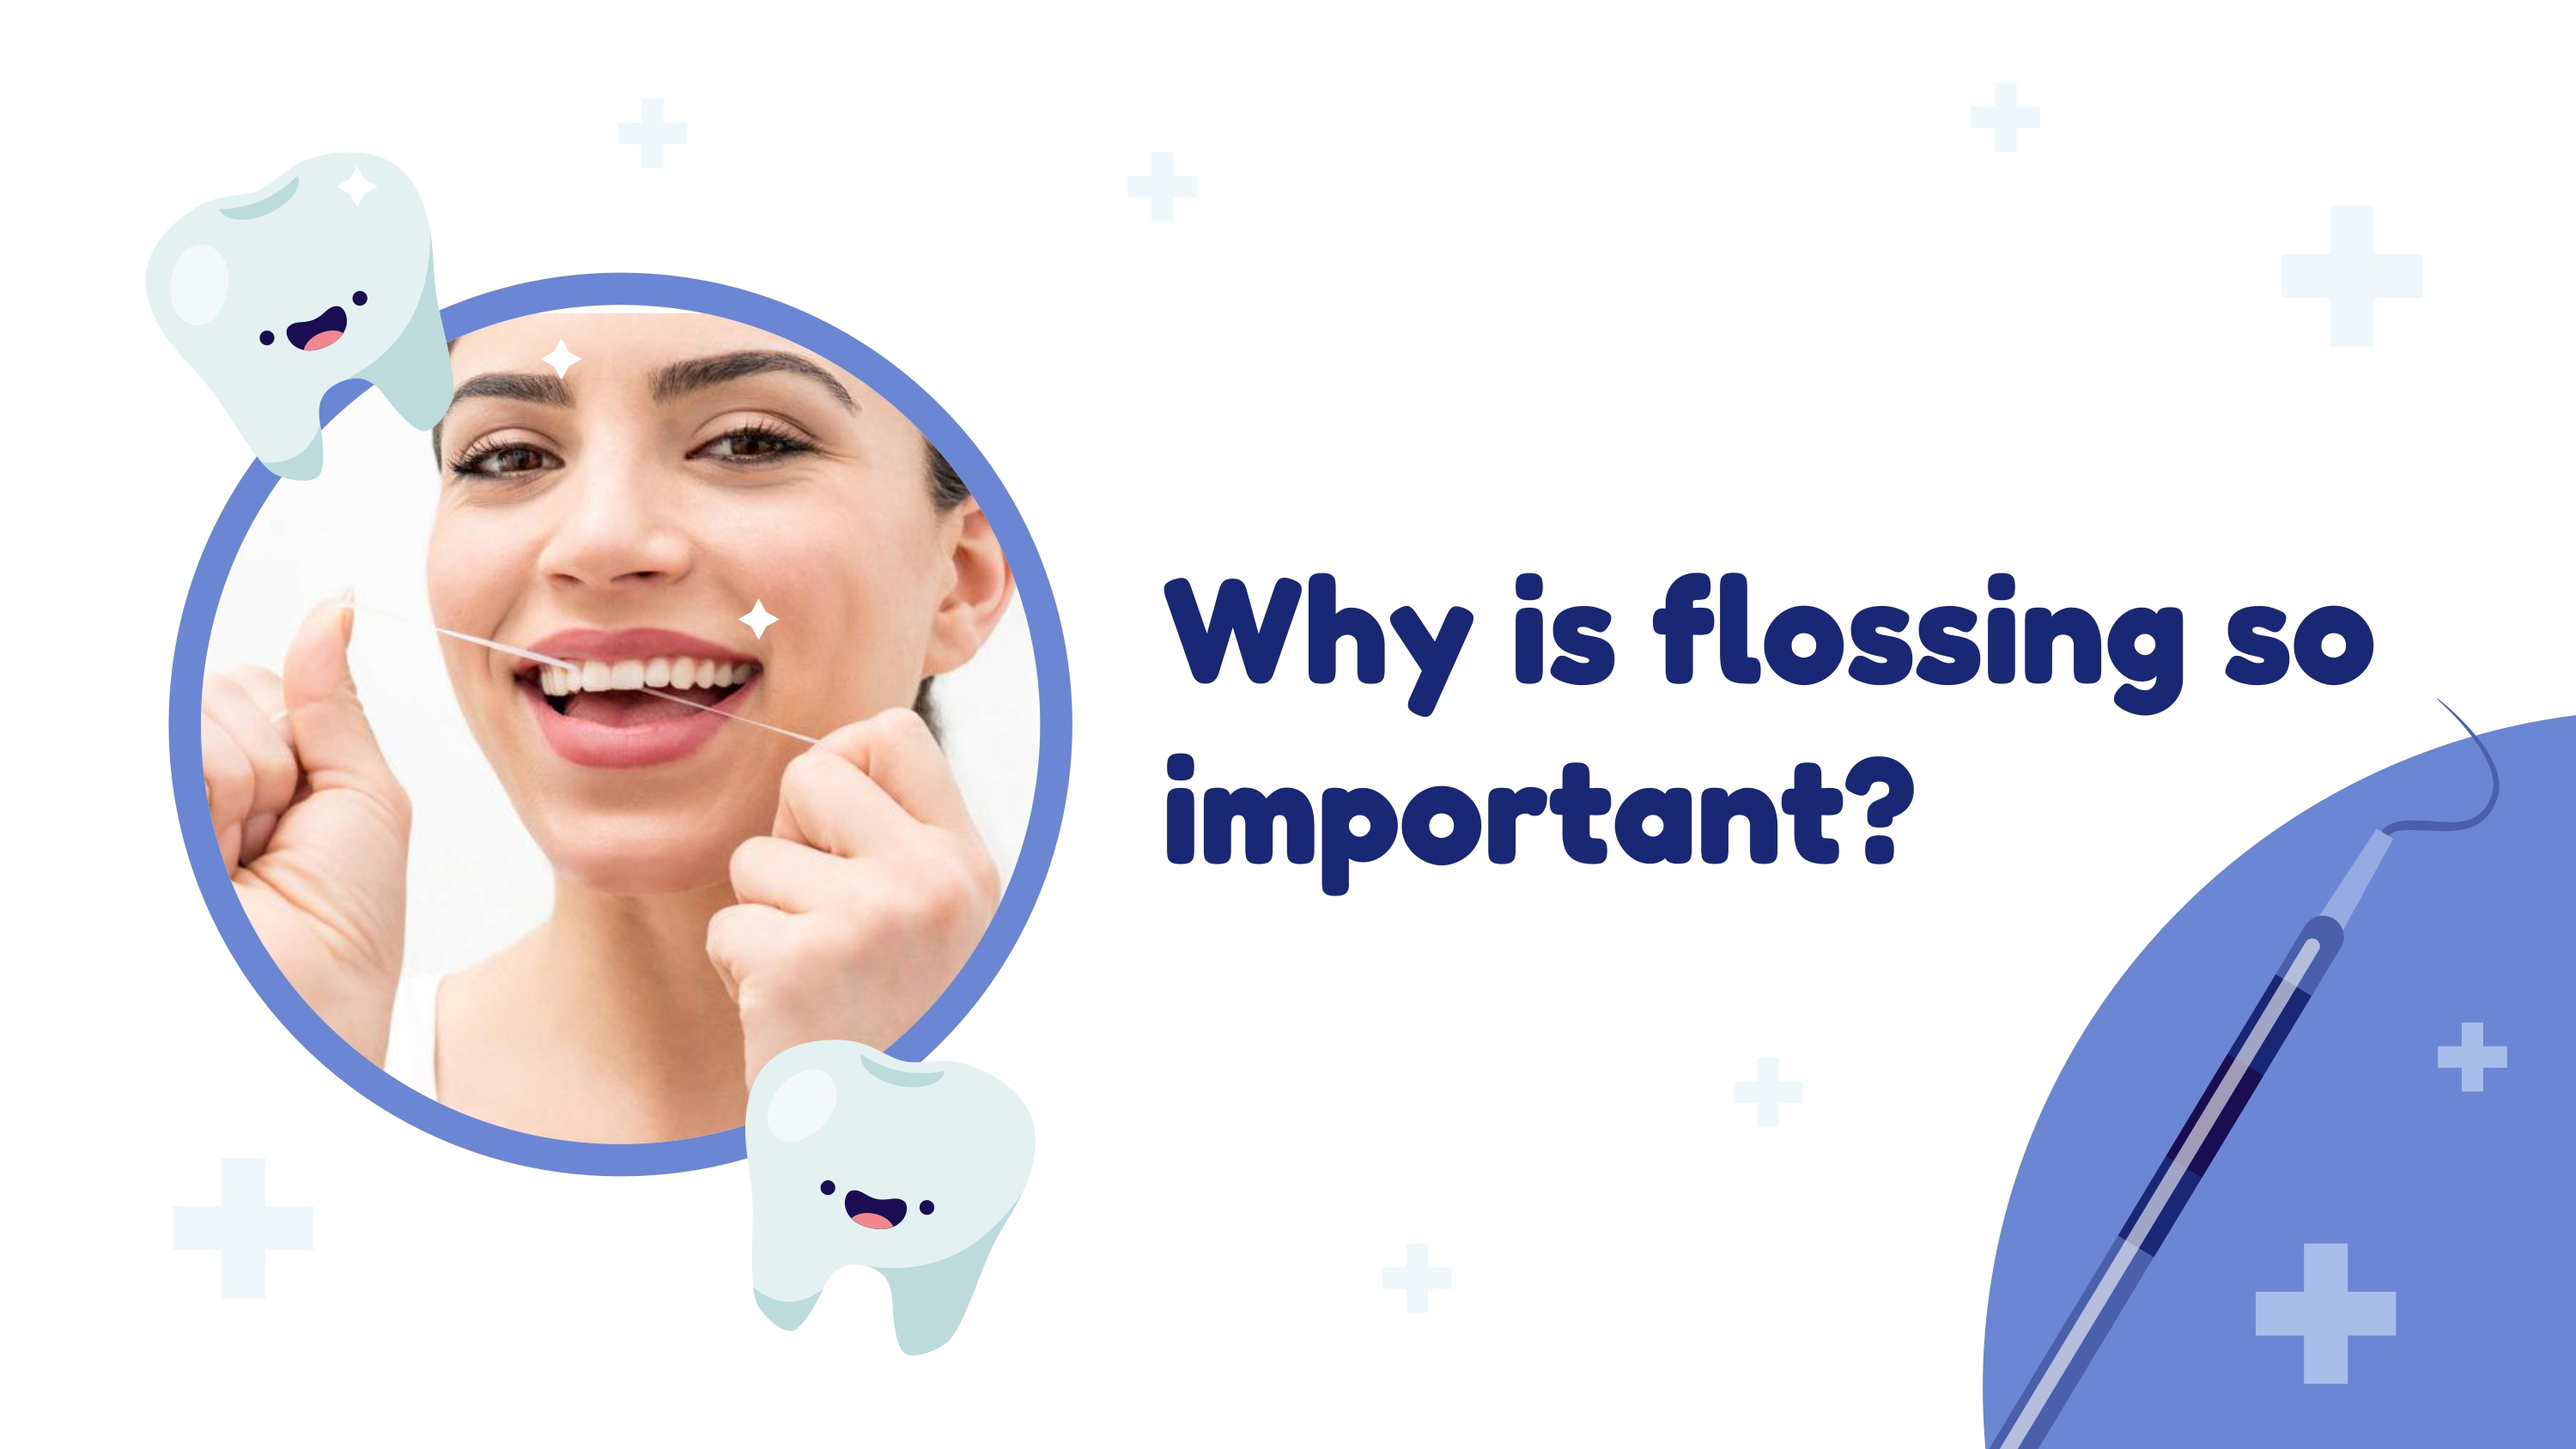
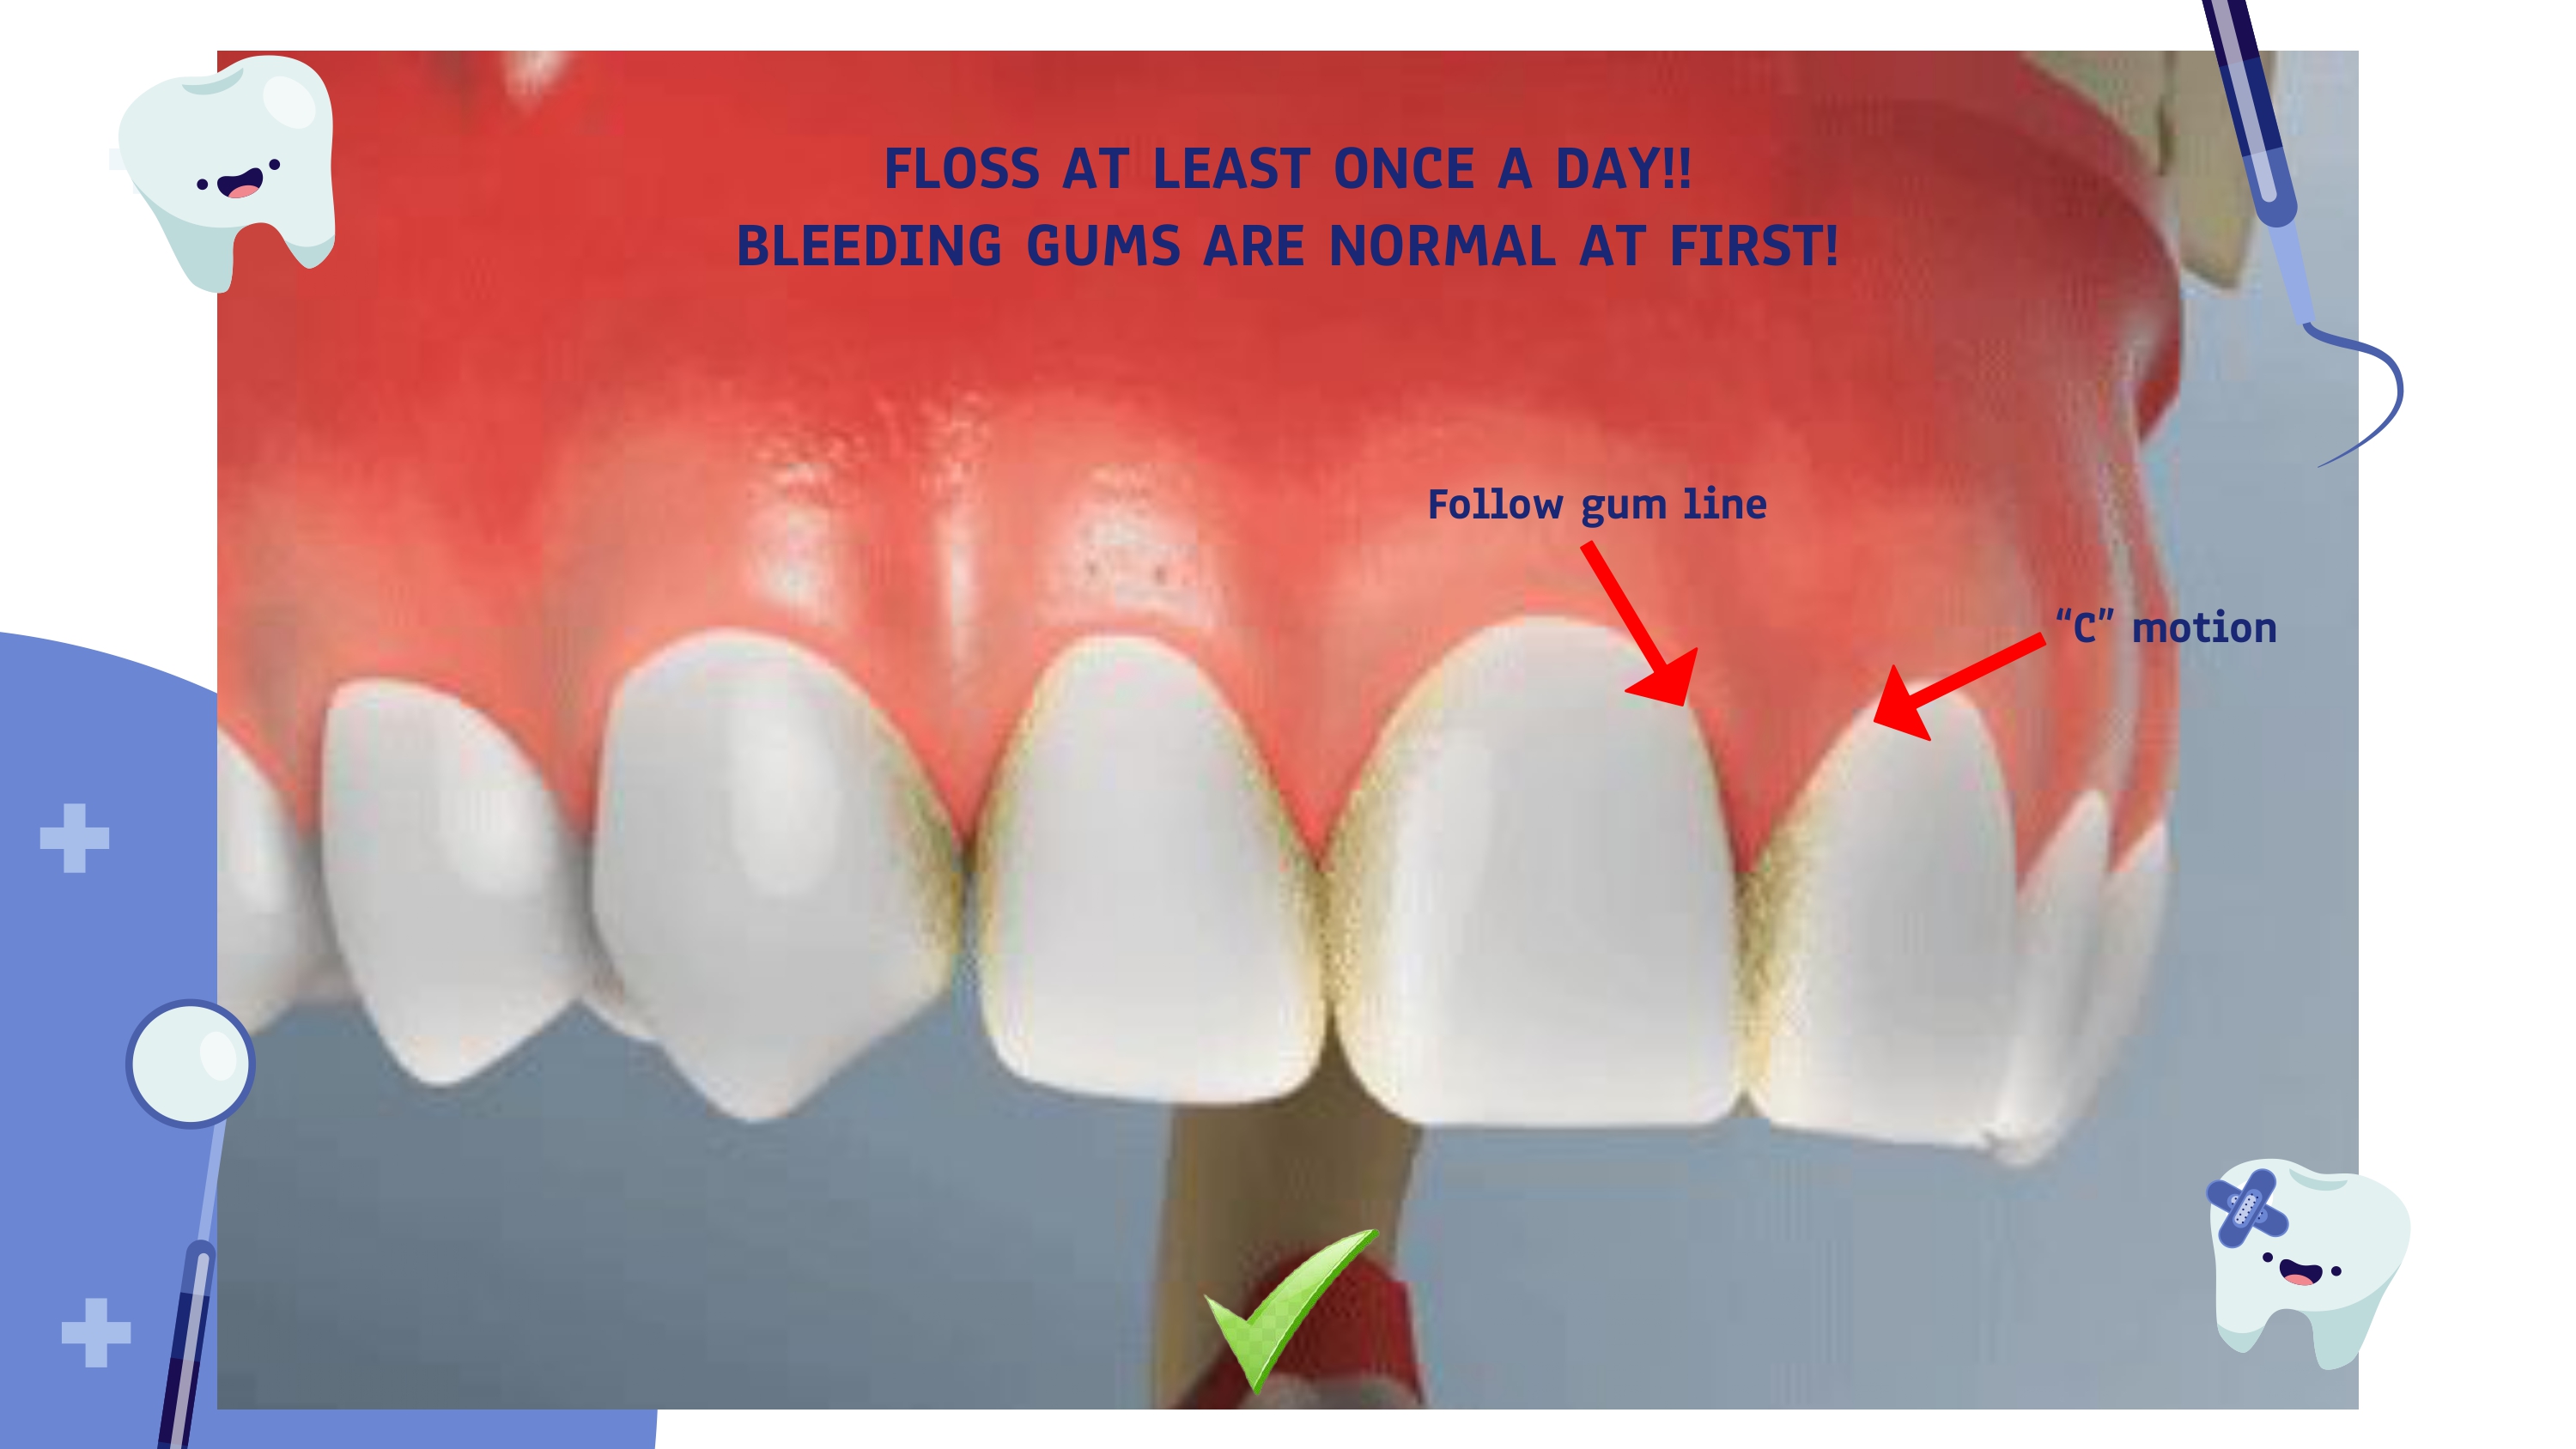
Flossing & Brushing Guide
Step-by-step patient education guide for proper flossing and brushing technique.
Patient Guide
17 pages
Page 1
Click to zoom
Page 2
Click to zoom
Page 3
Click to zoom
Page 4
Click to zoom
Page 5
Click to zoom
Page 6
Click to zoom
Page 7
Click to zoom

Page 8
Click to zoom
Page 9
Click to zoom
Page 10
Click to zoom
Page 11
Click to zoom
Page 12
Click to zoom
Page 13
Click to zoom
Page 14
Click to zoom
Page 15
Click to zoom
Page 16
Click to zoom

Page 17
Click to zoom
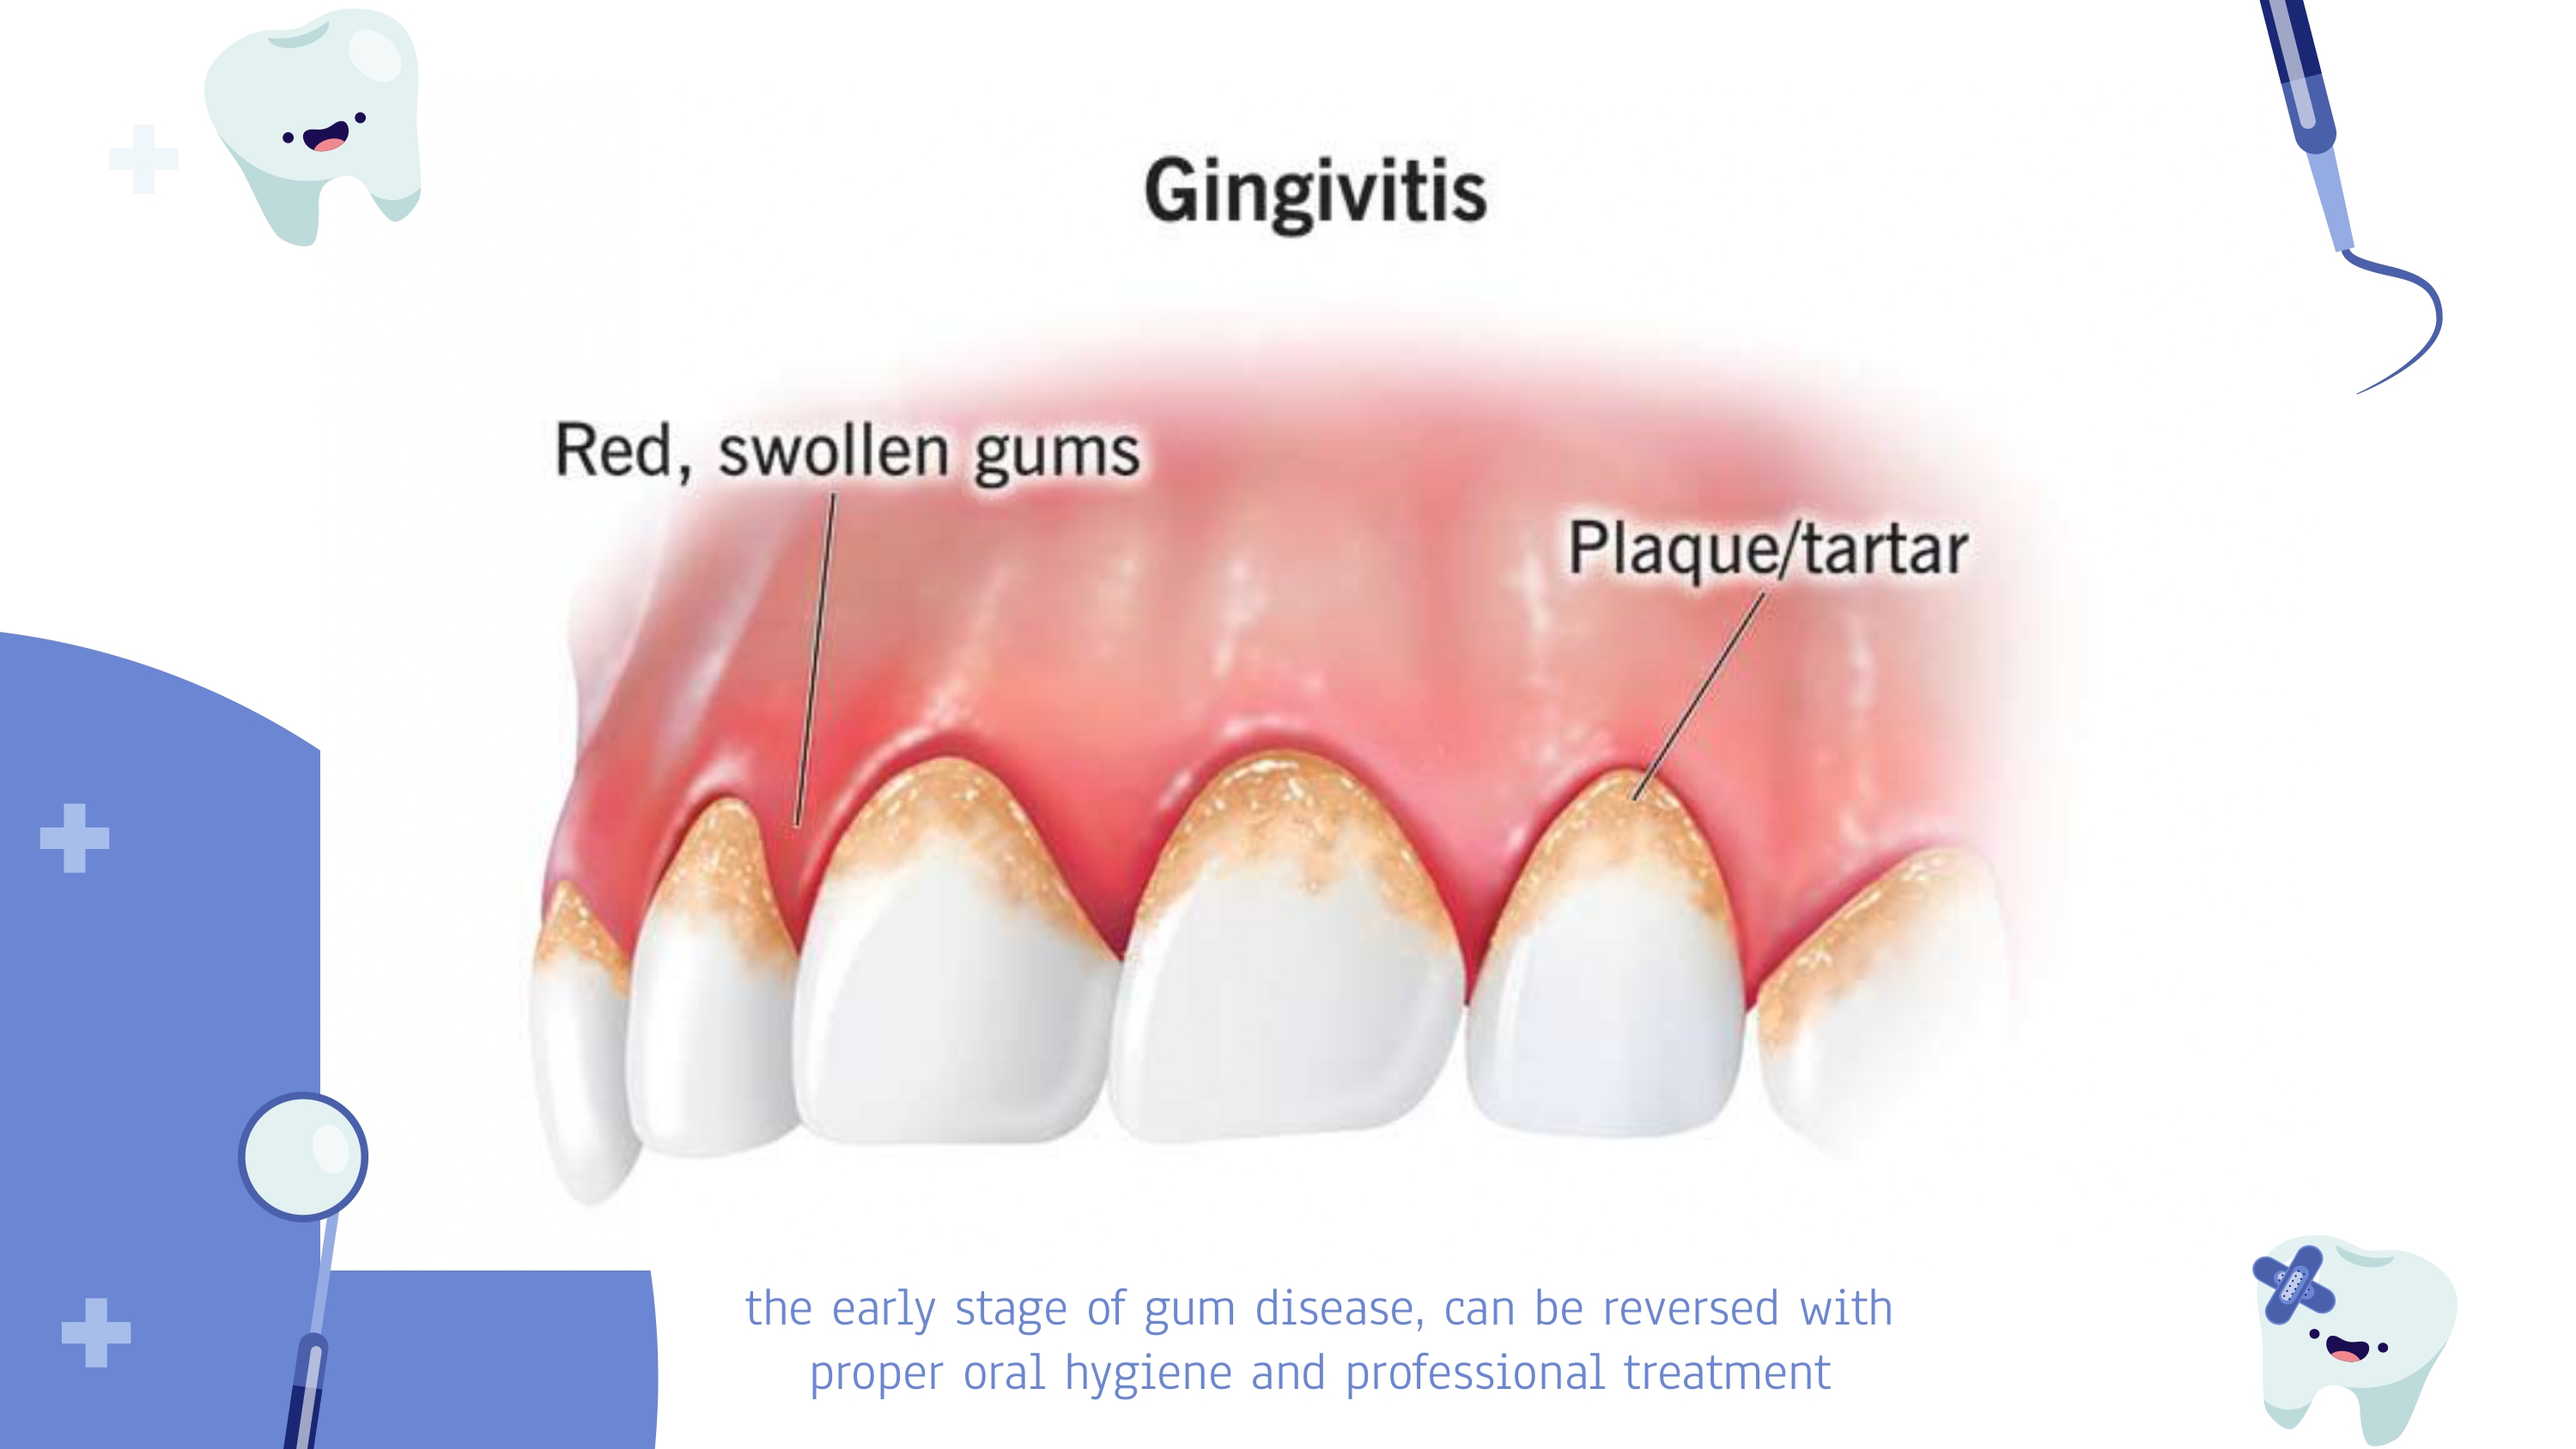
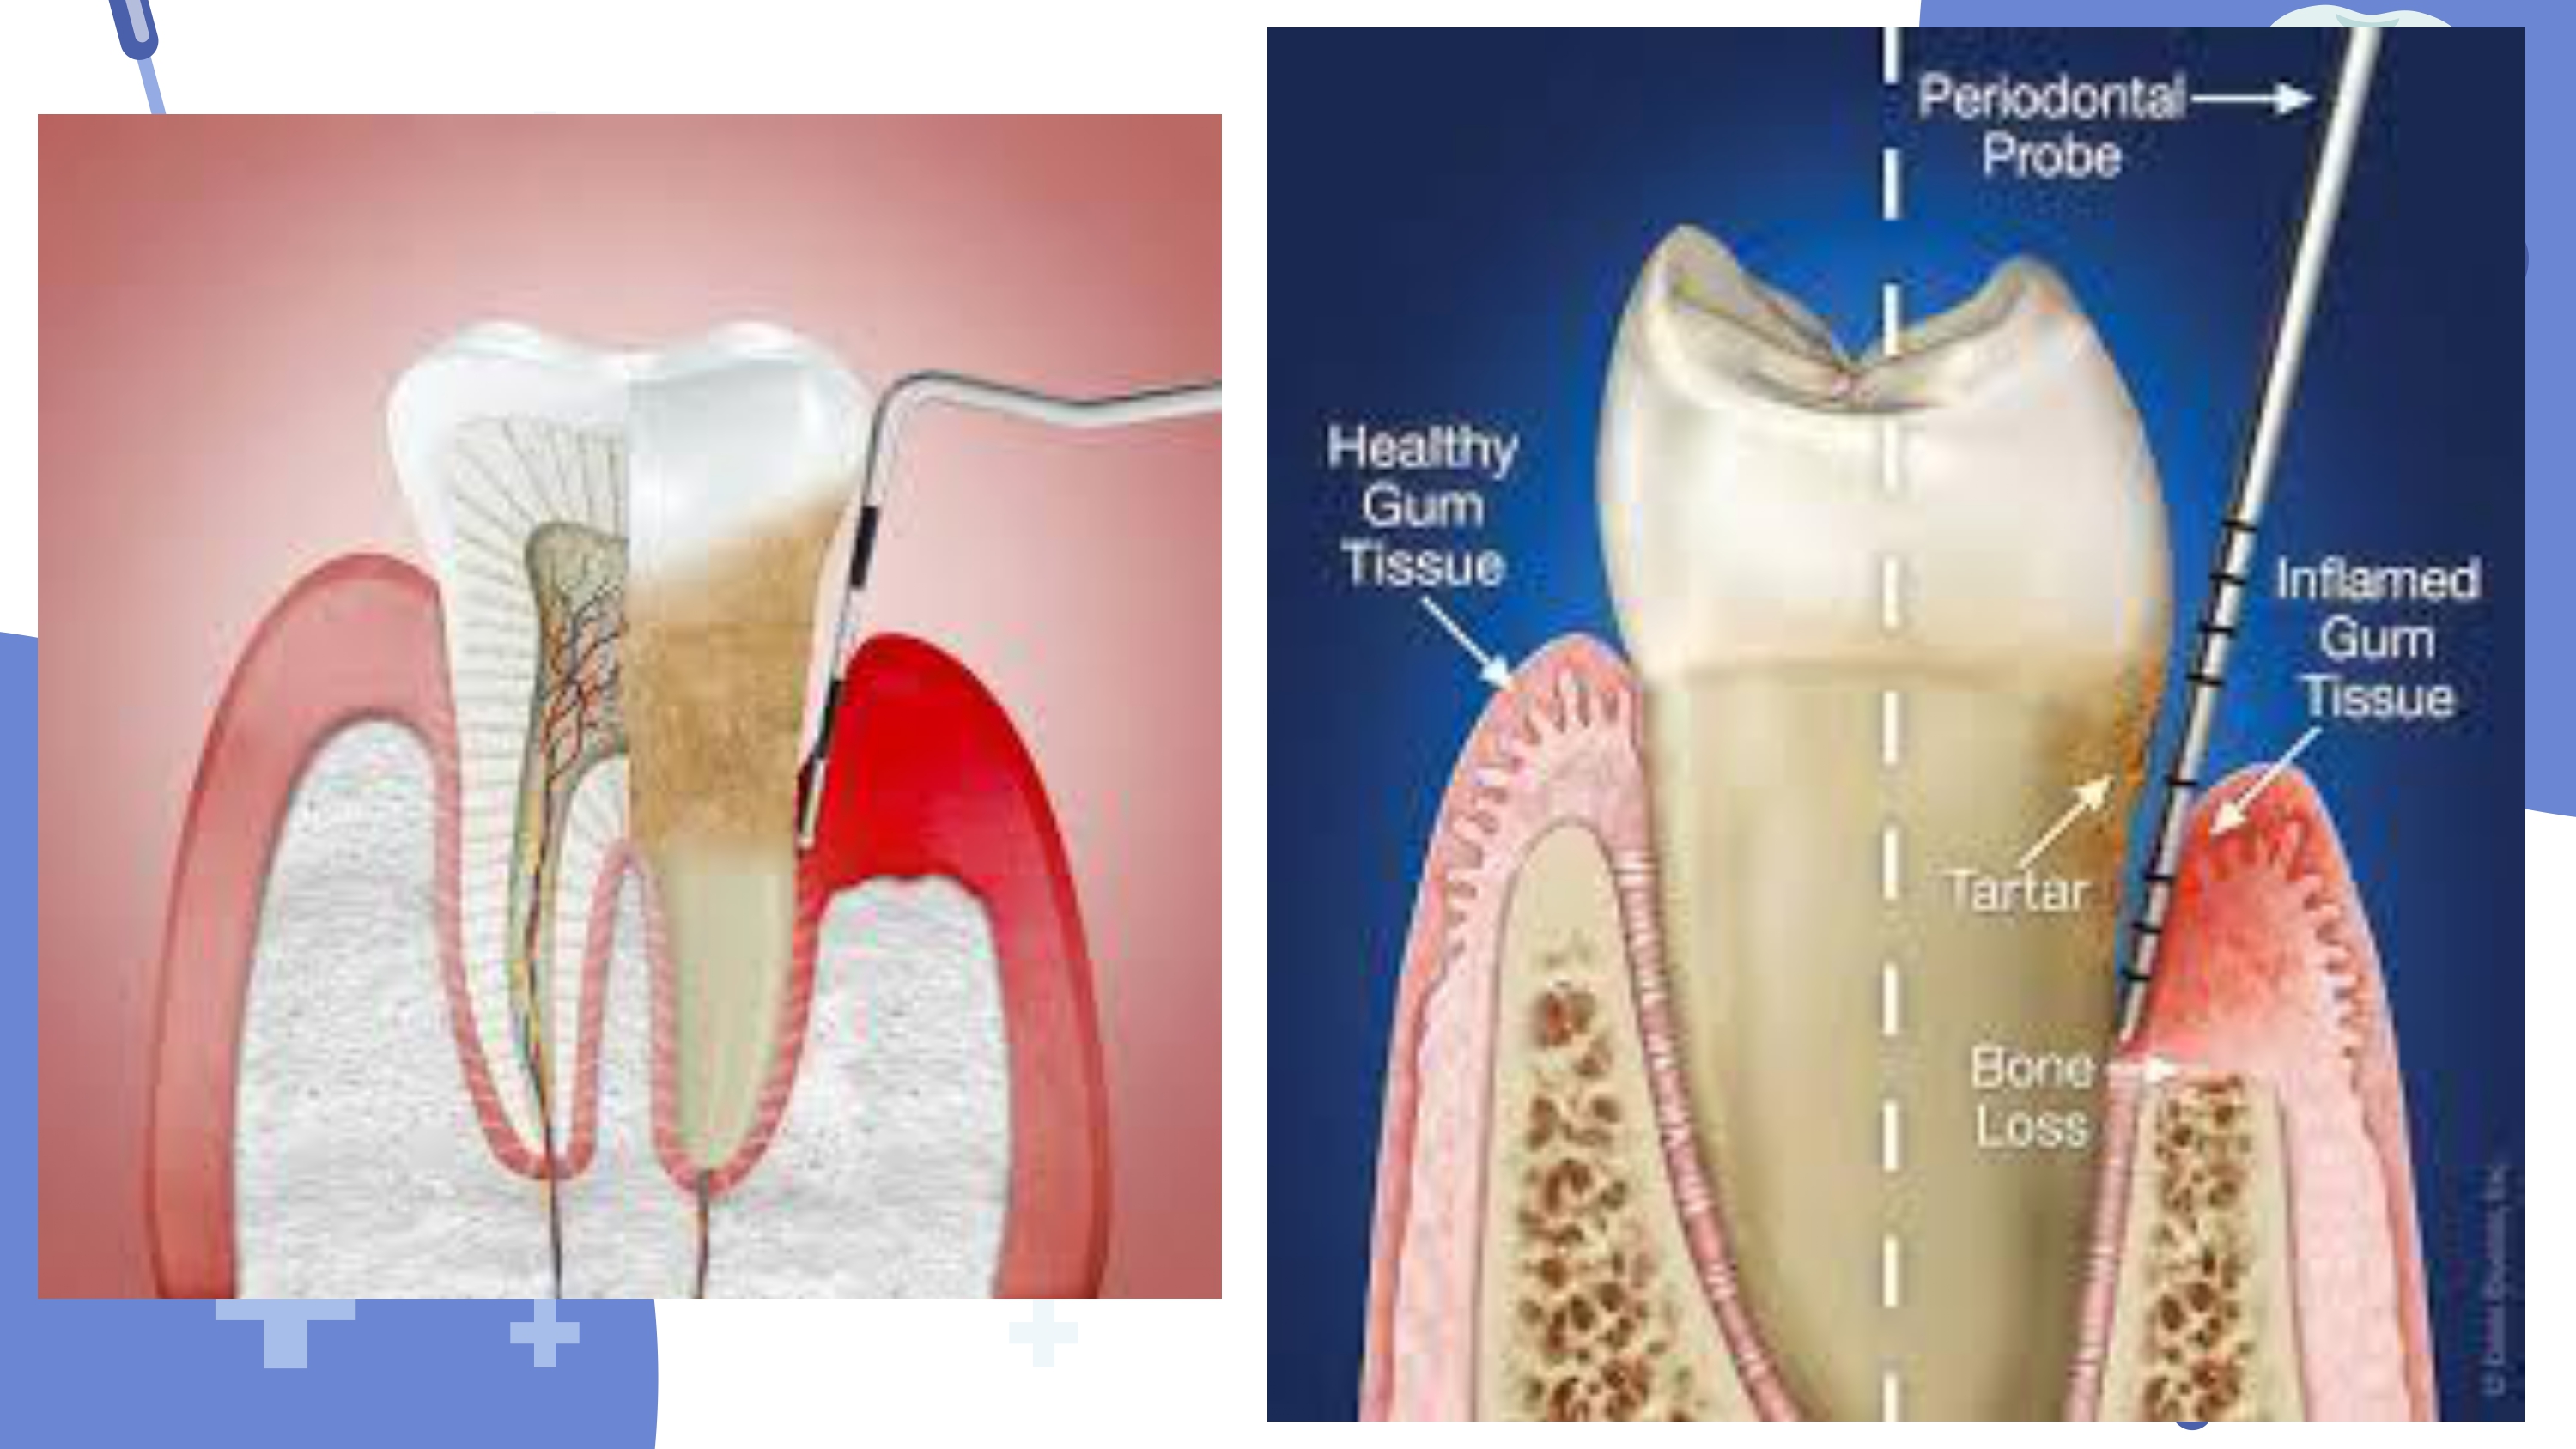
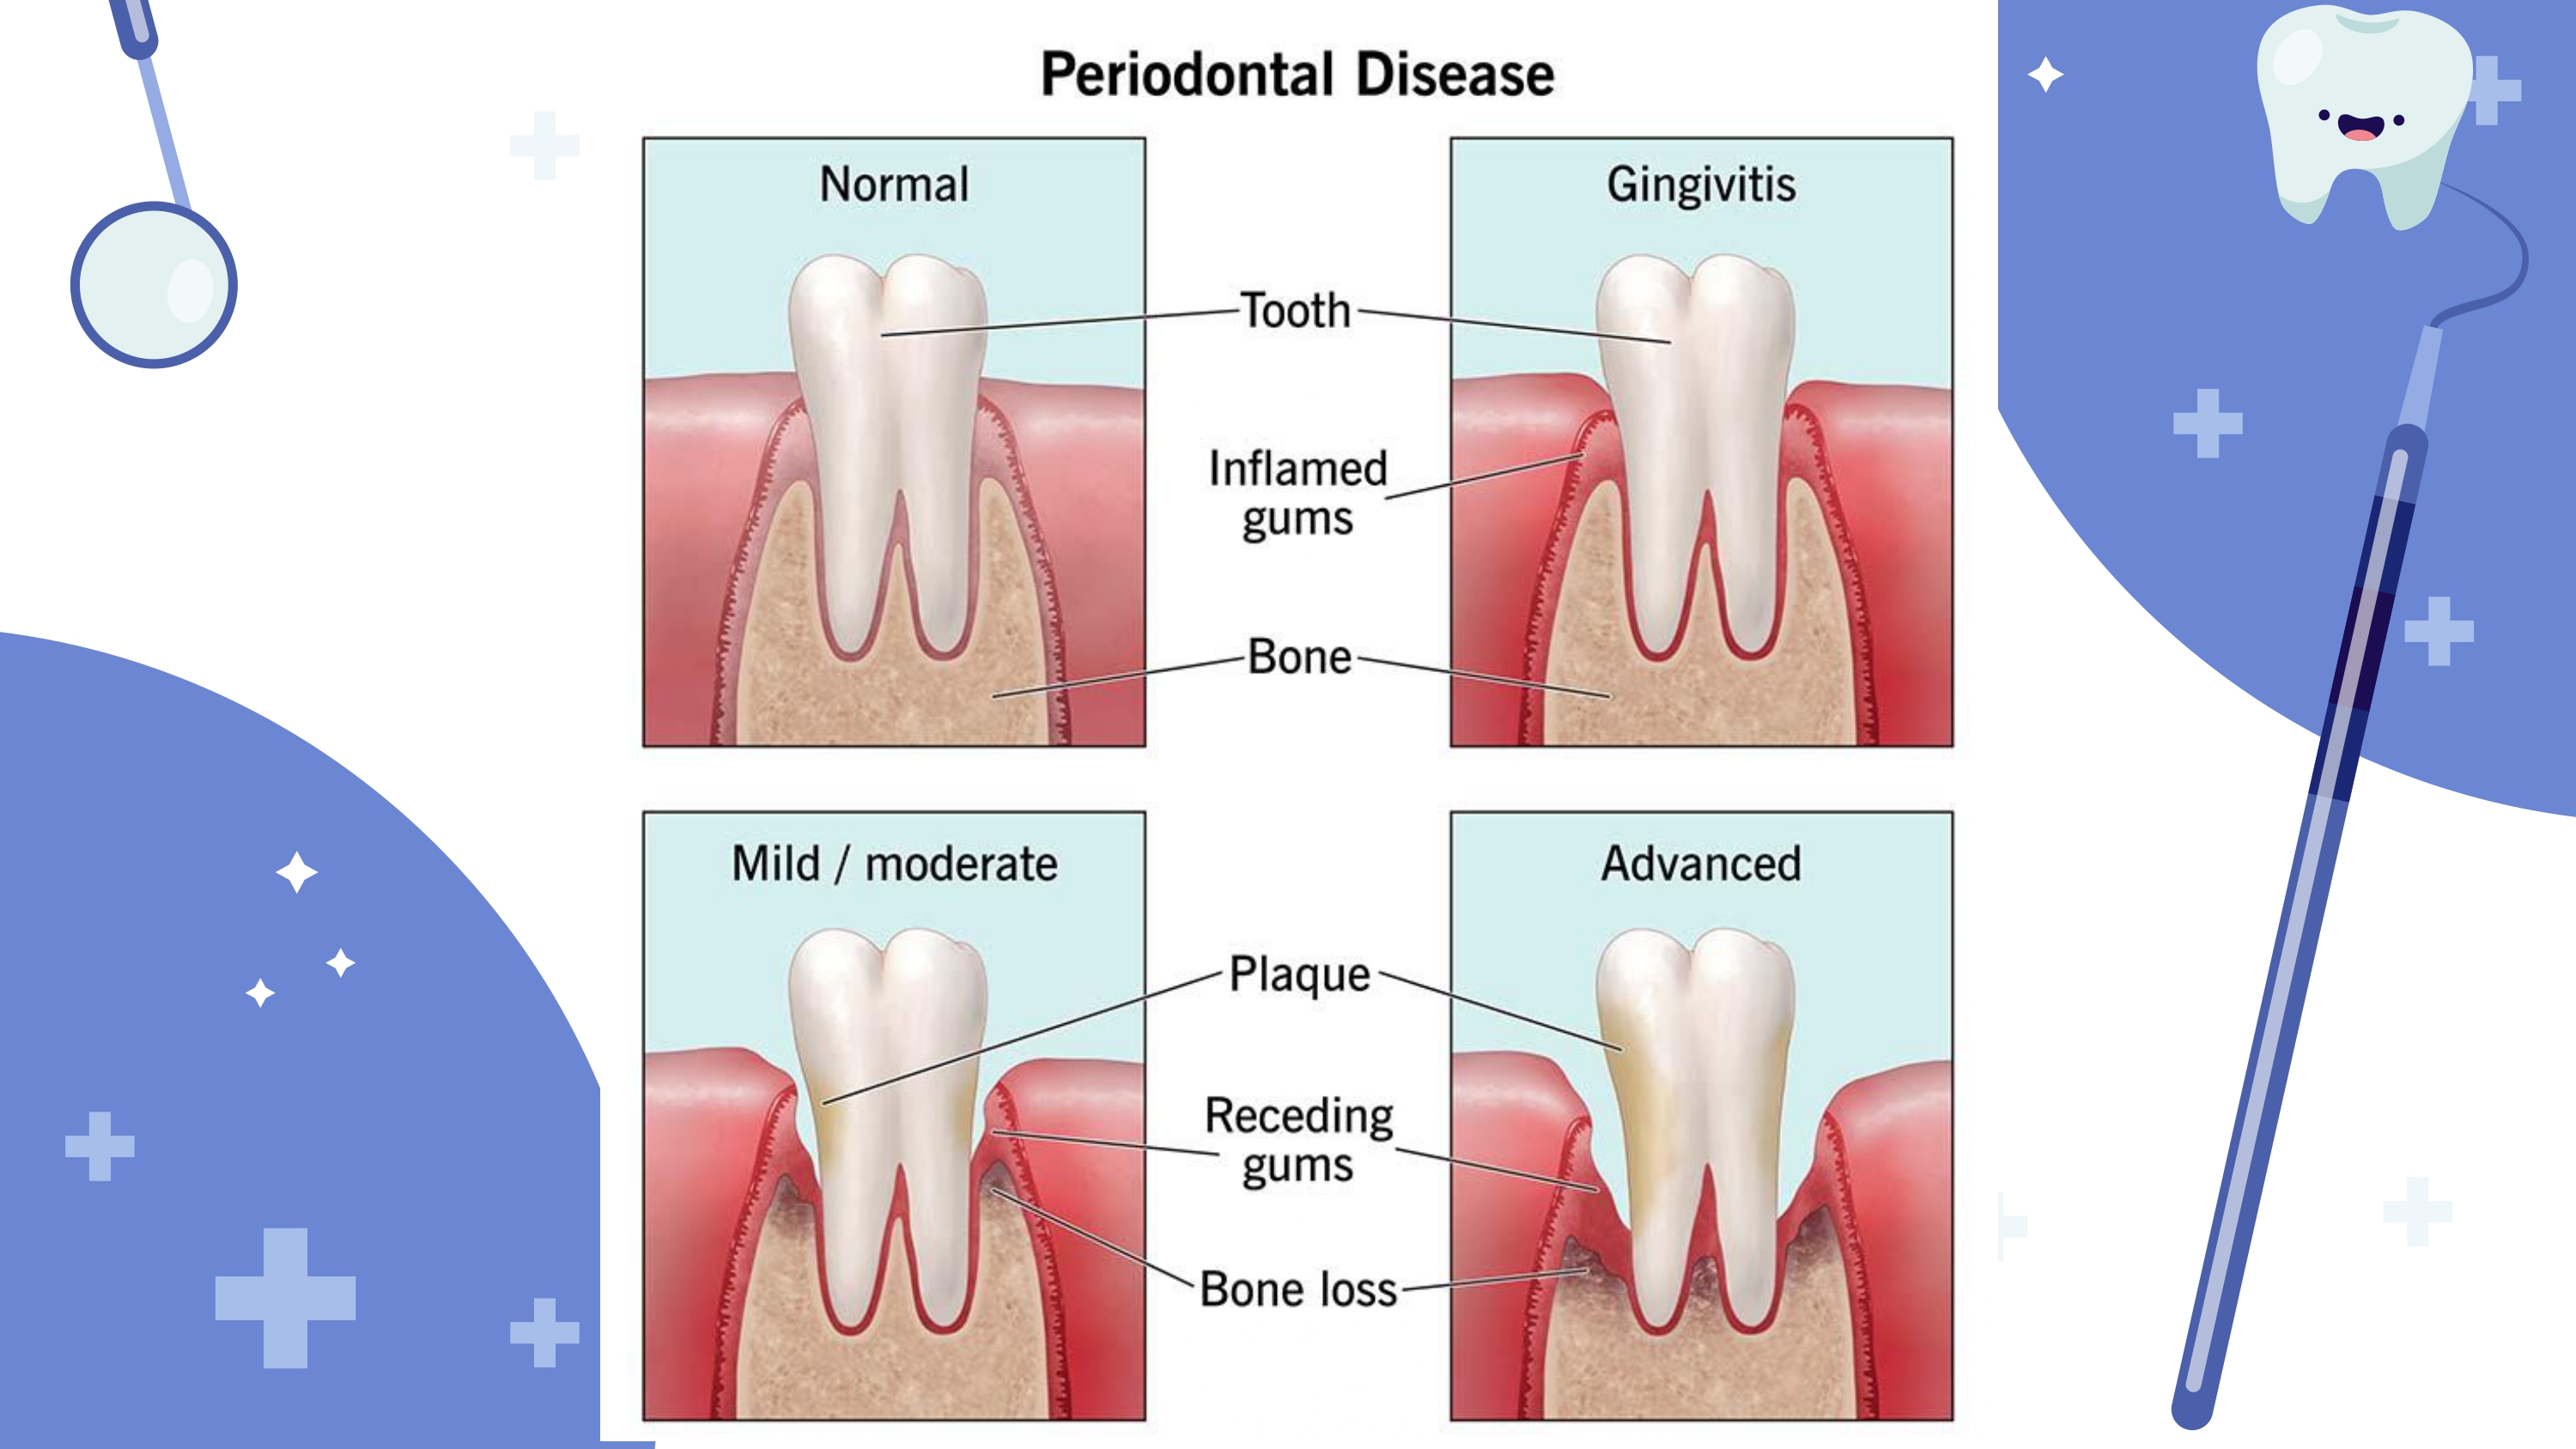
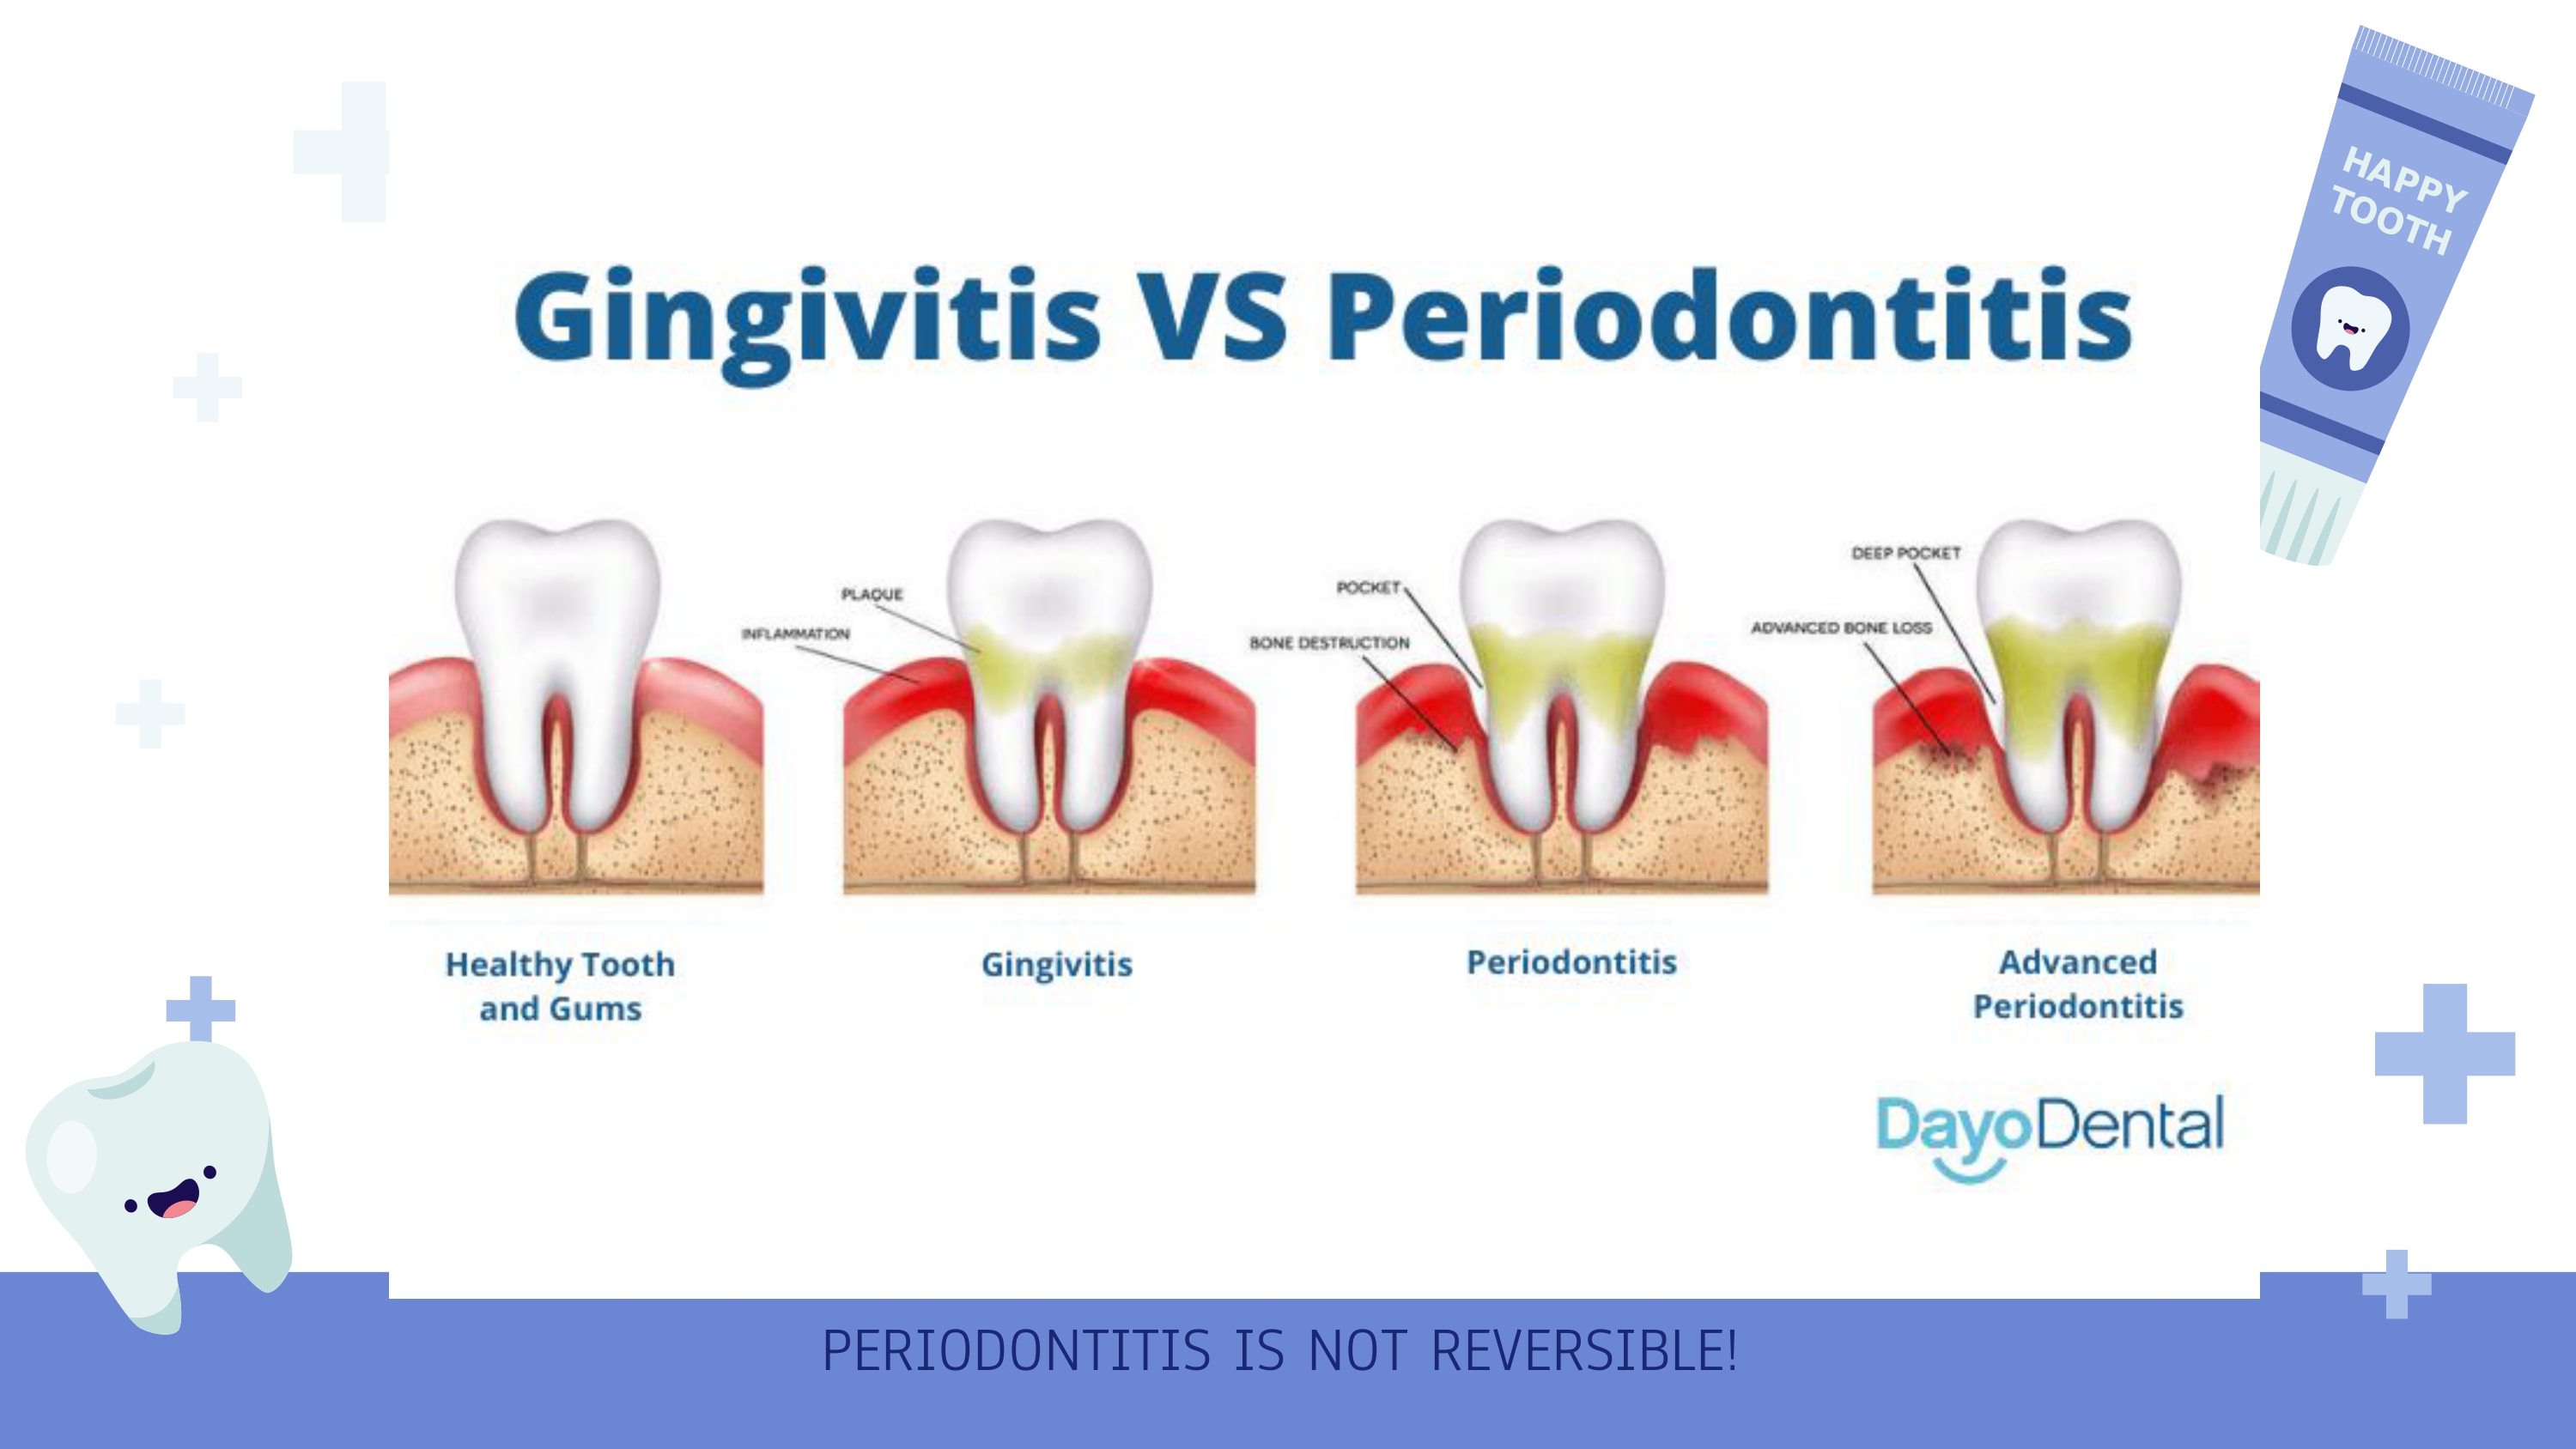
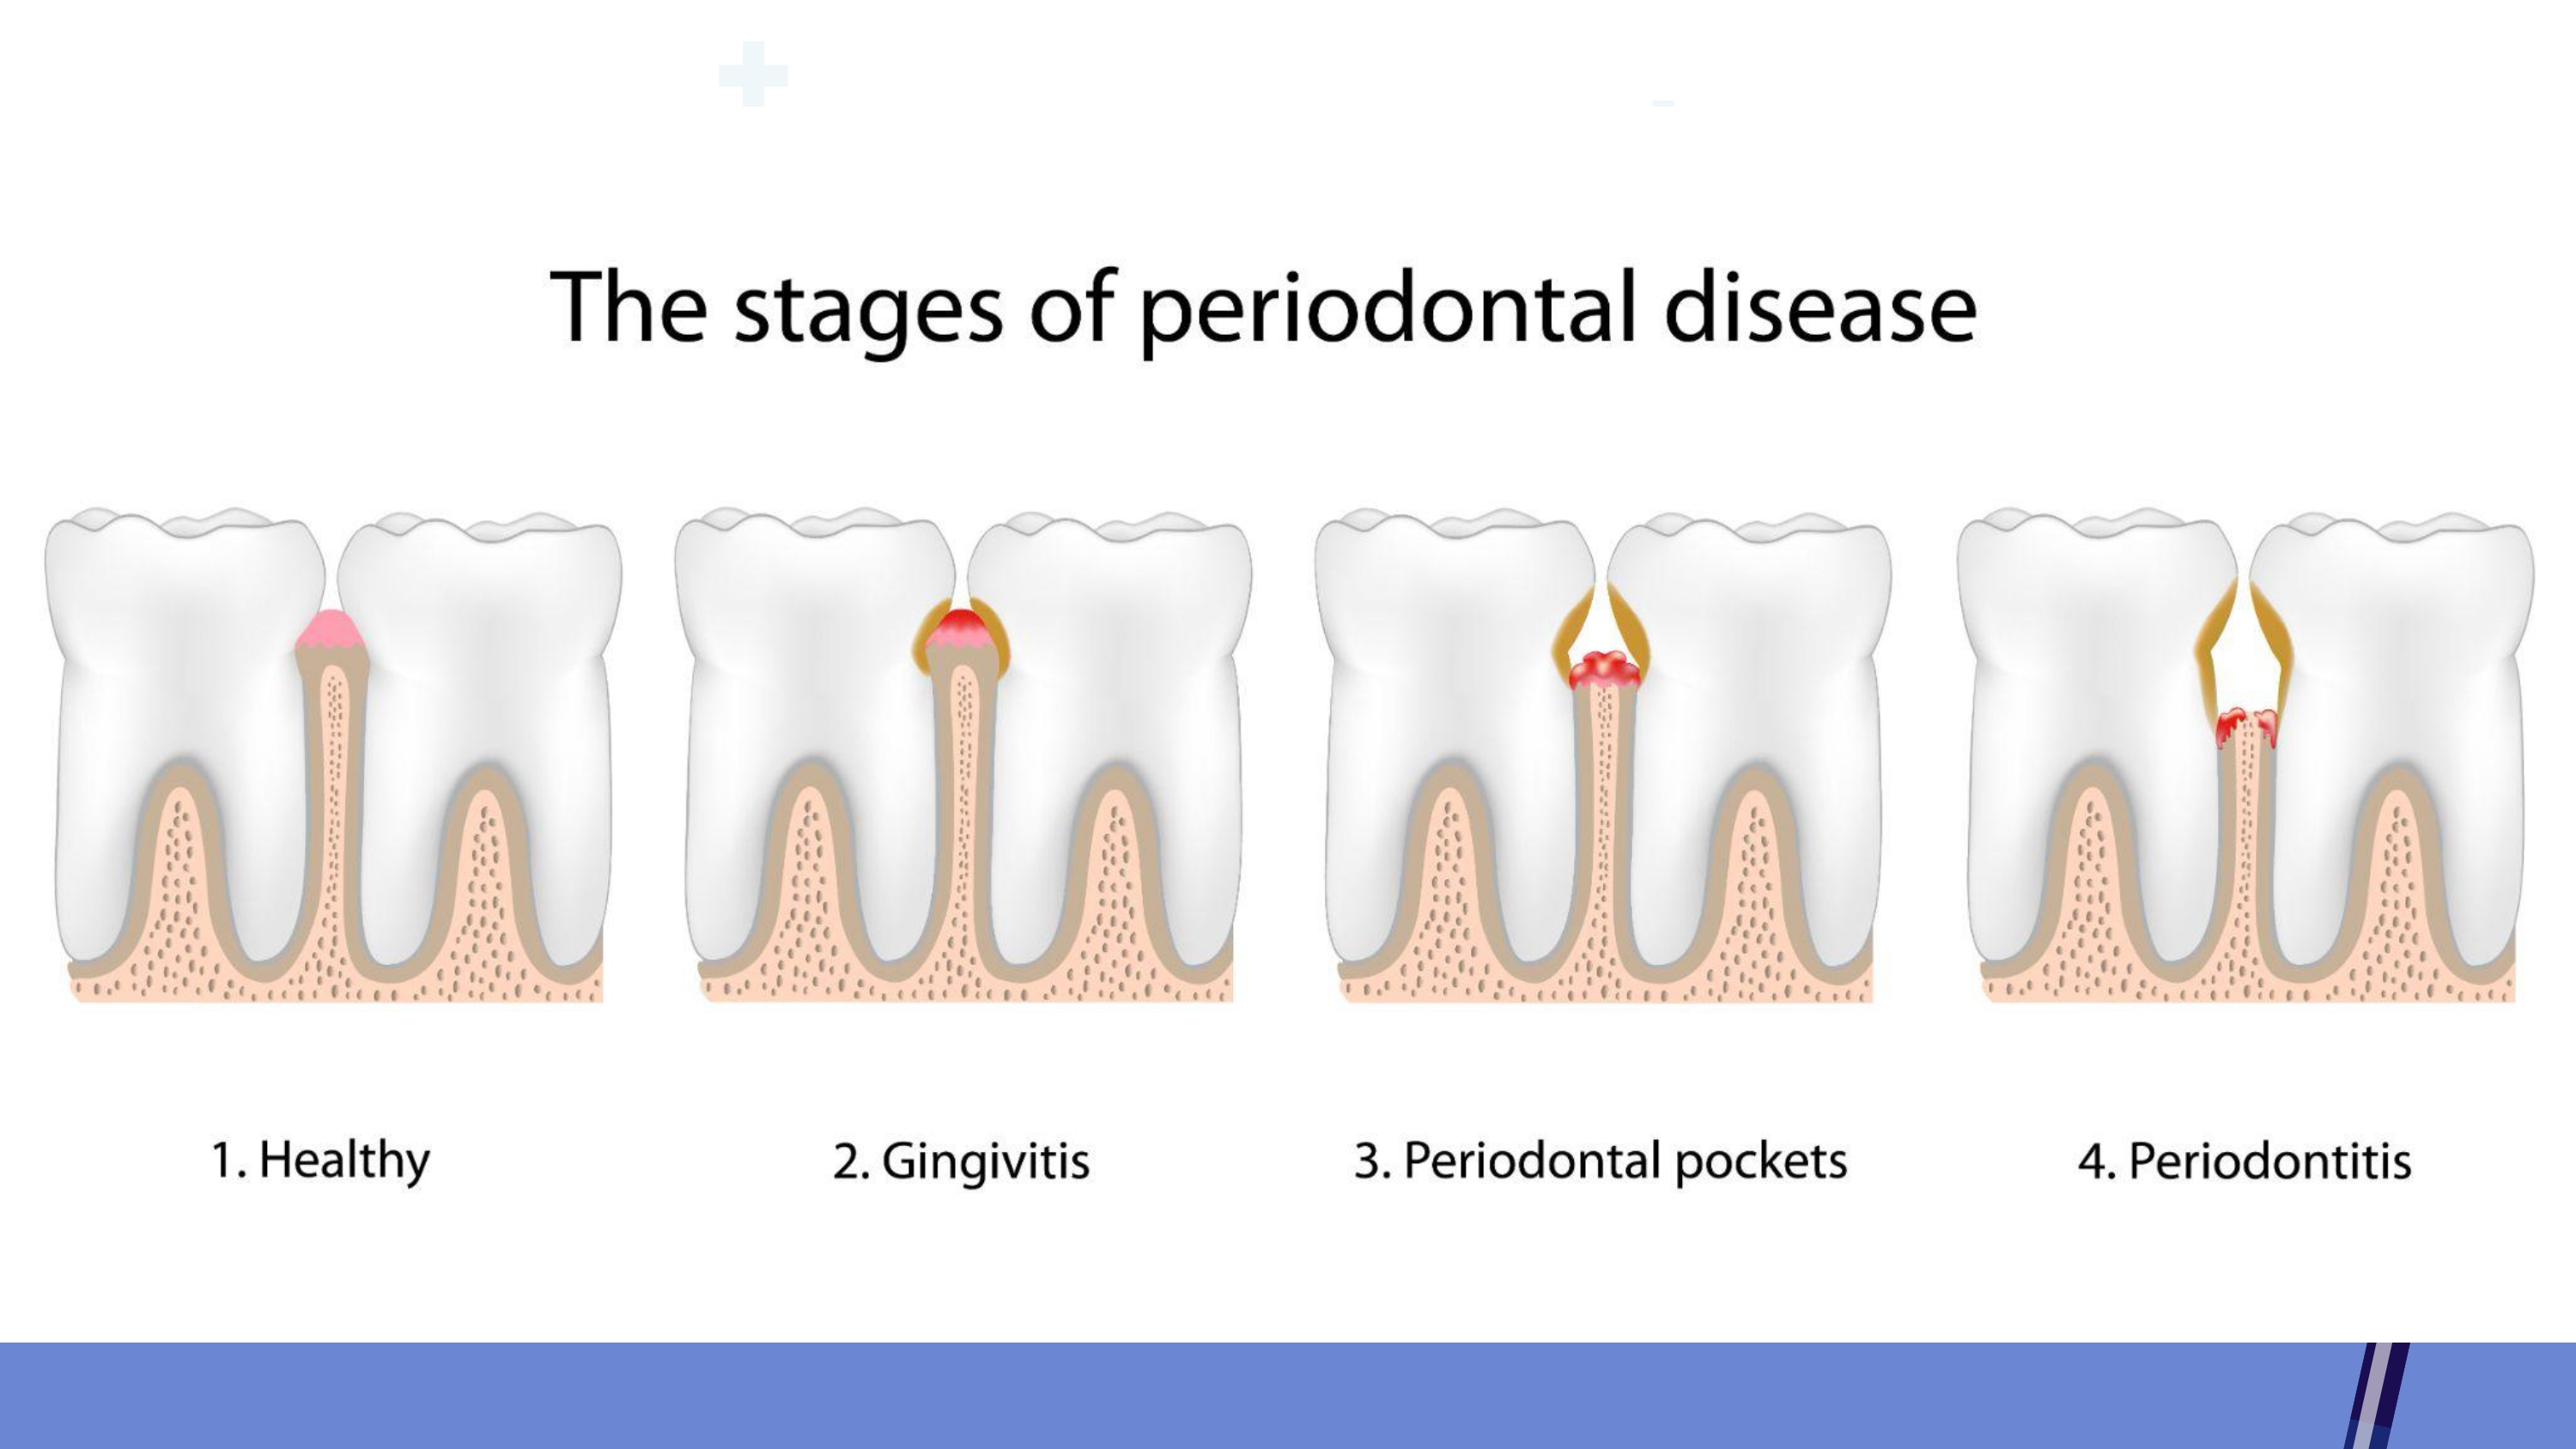
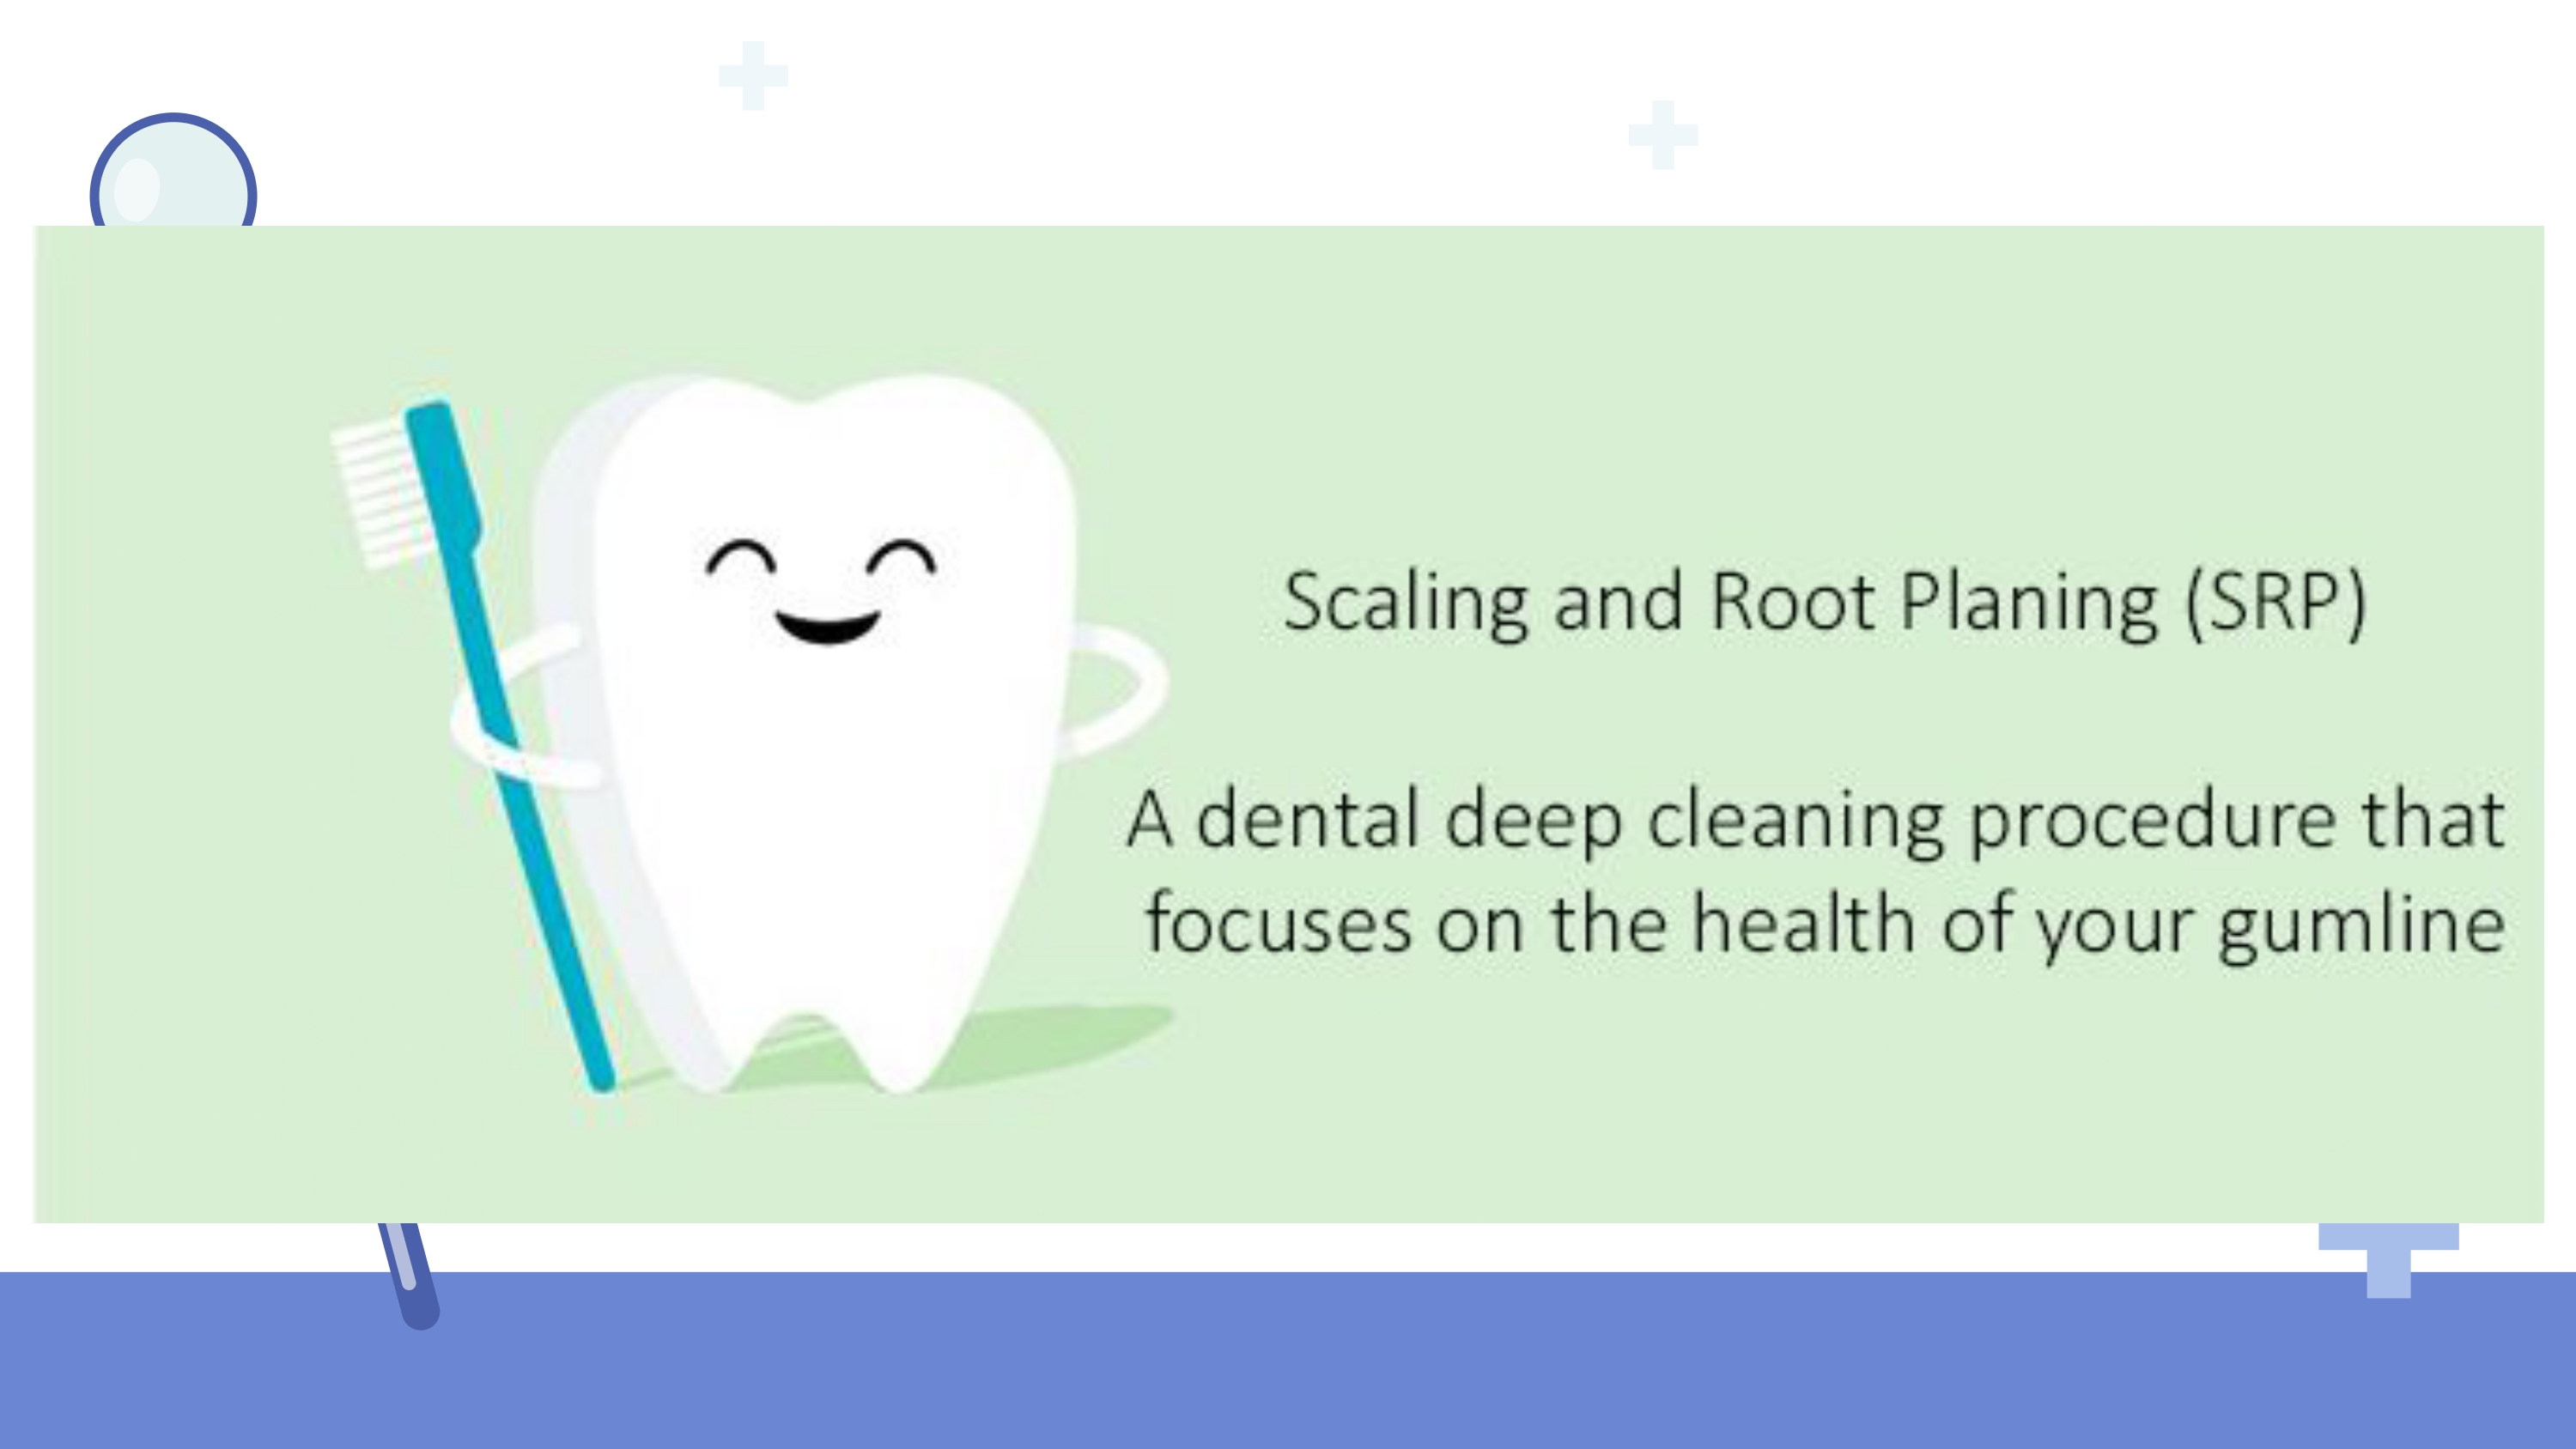
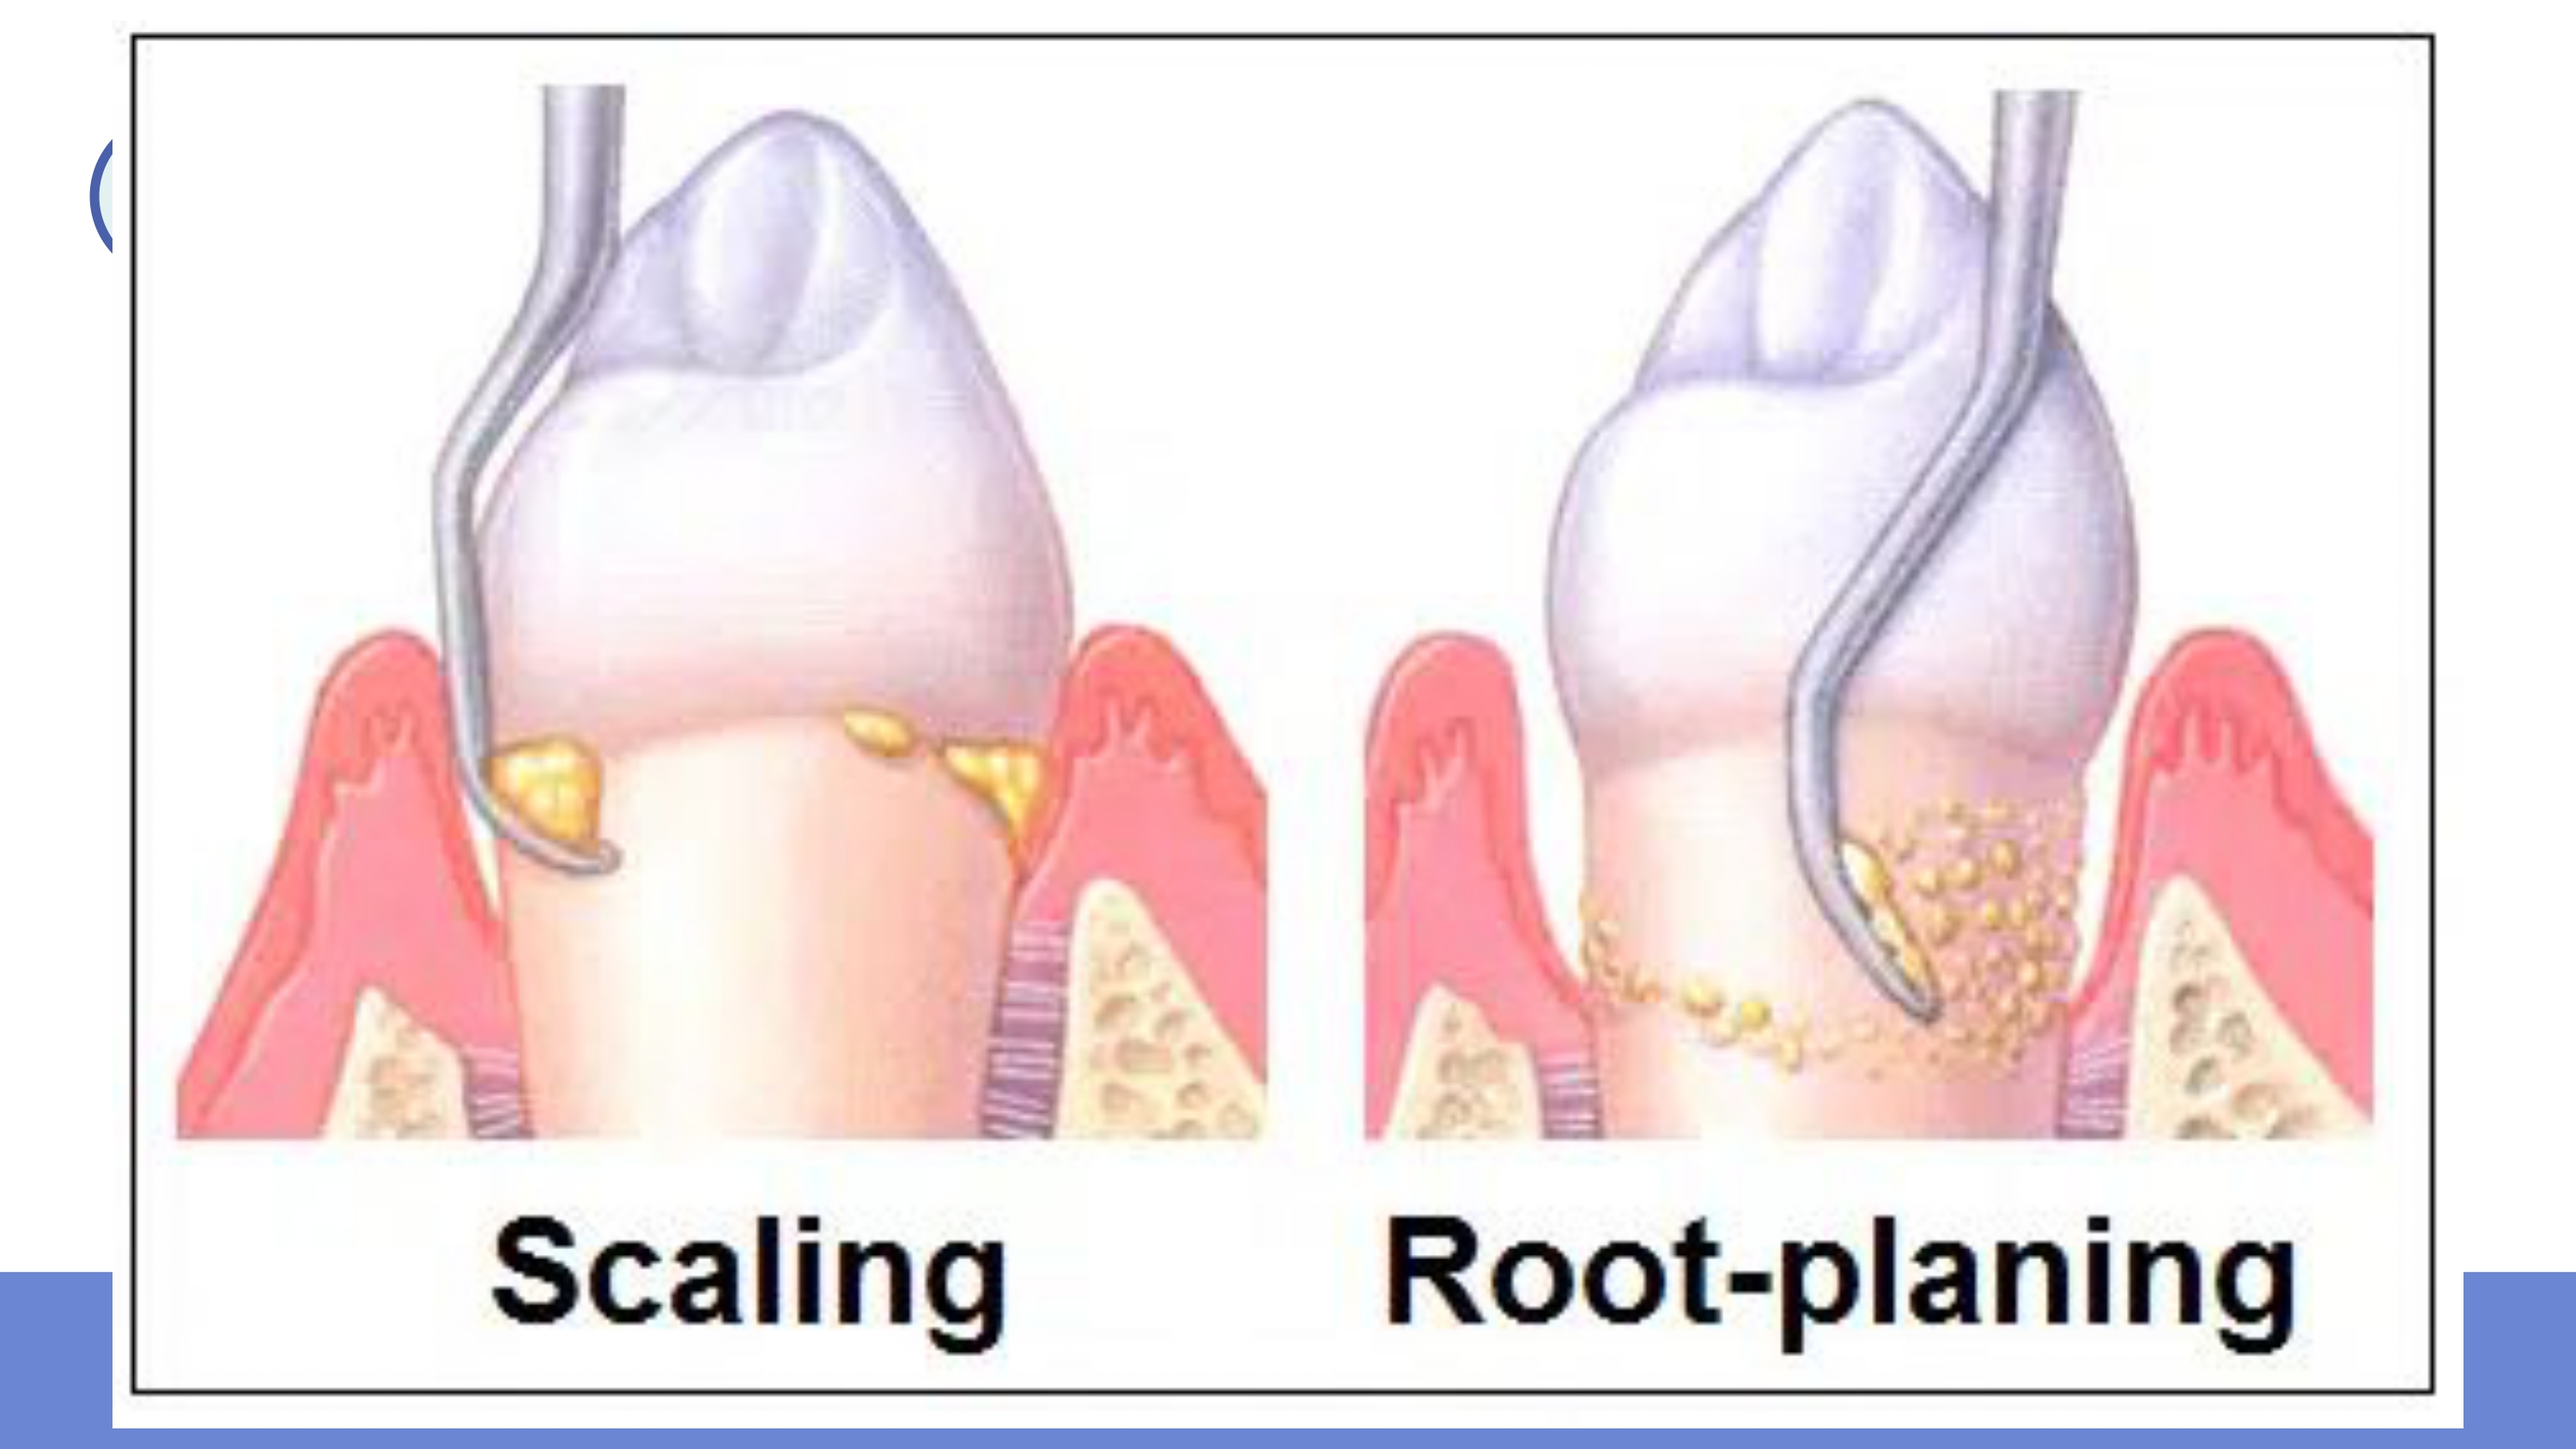
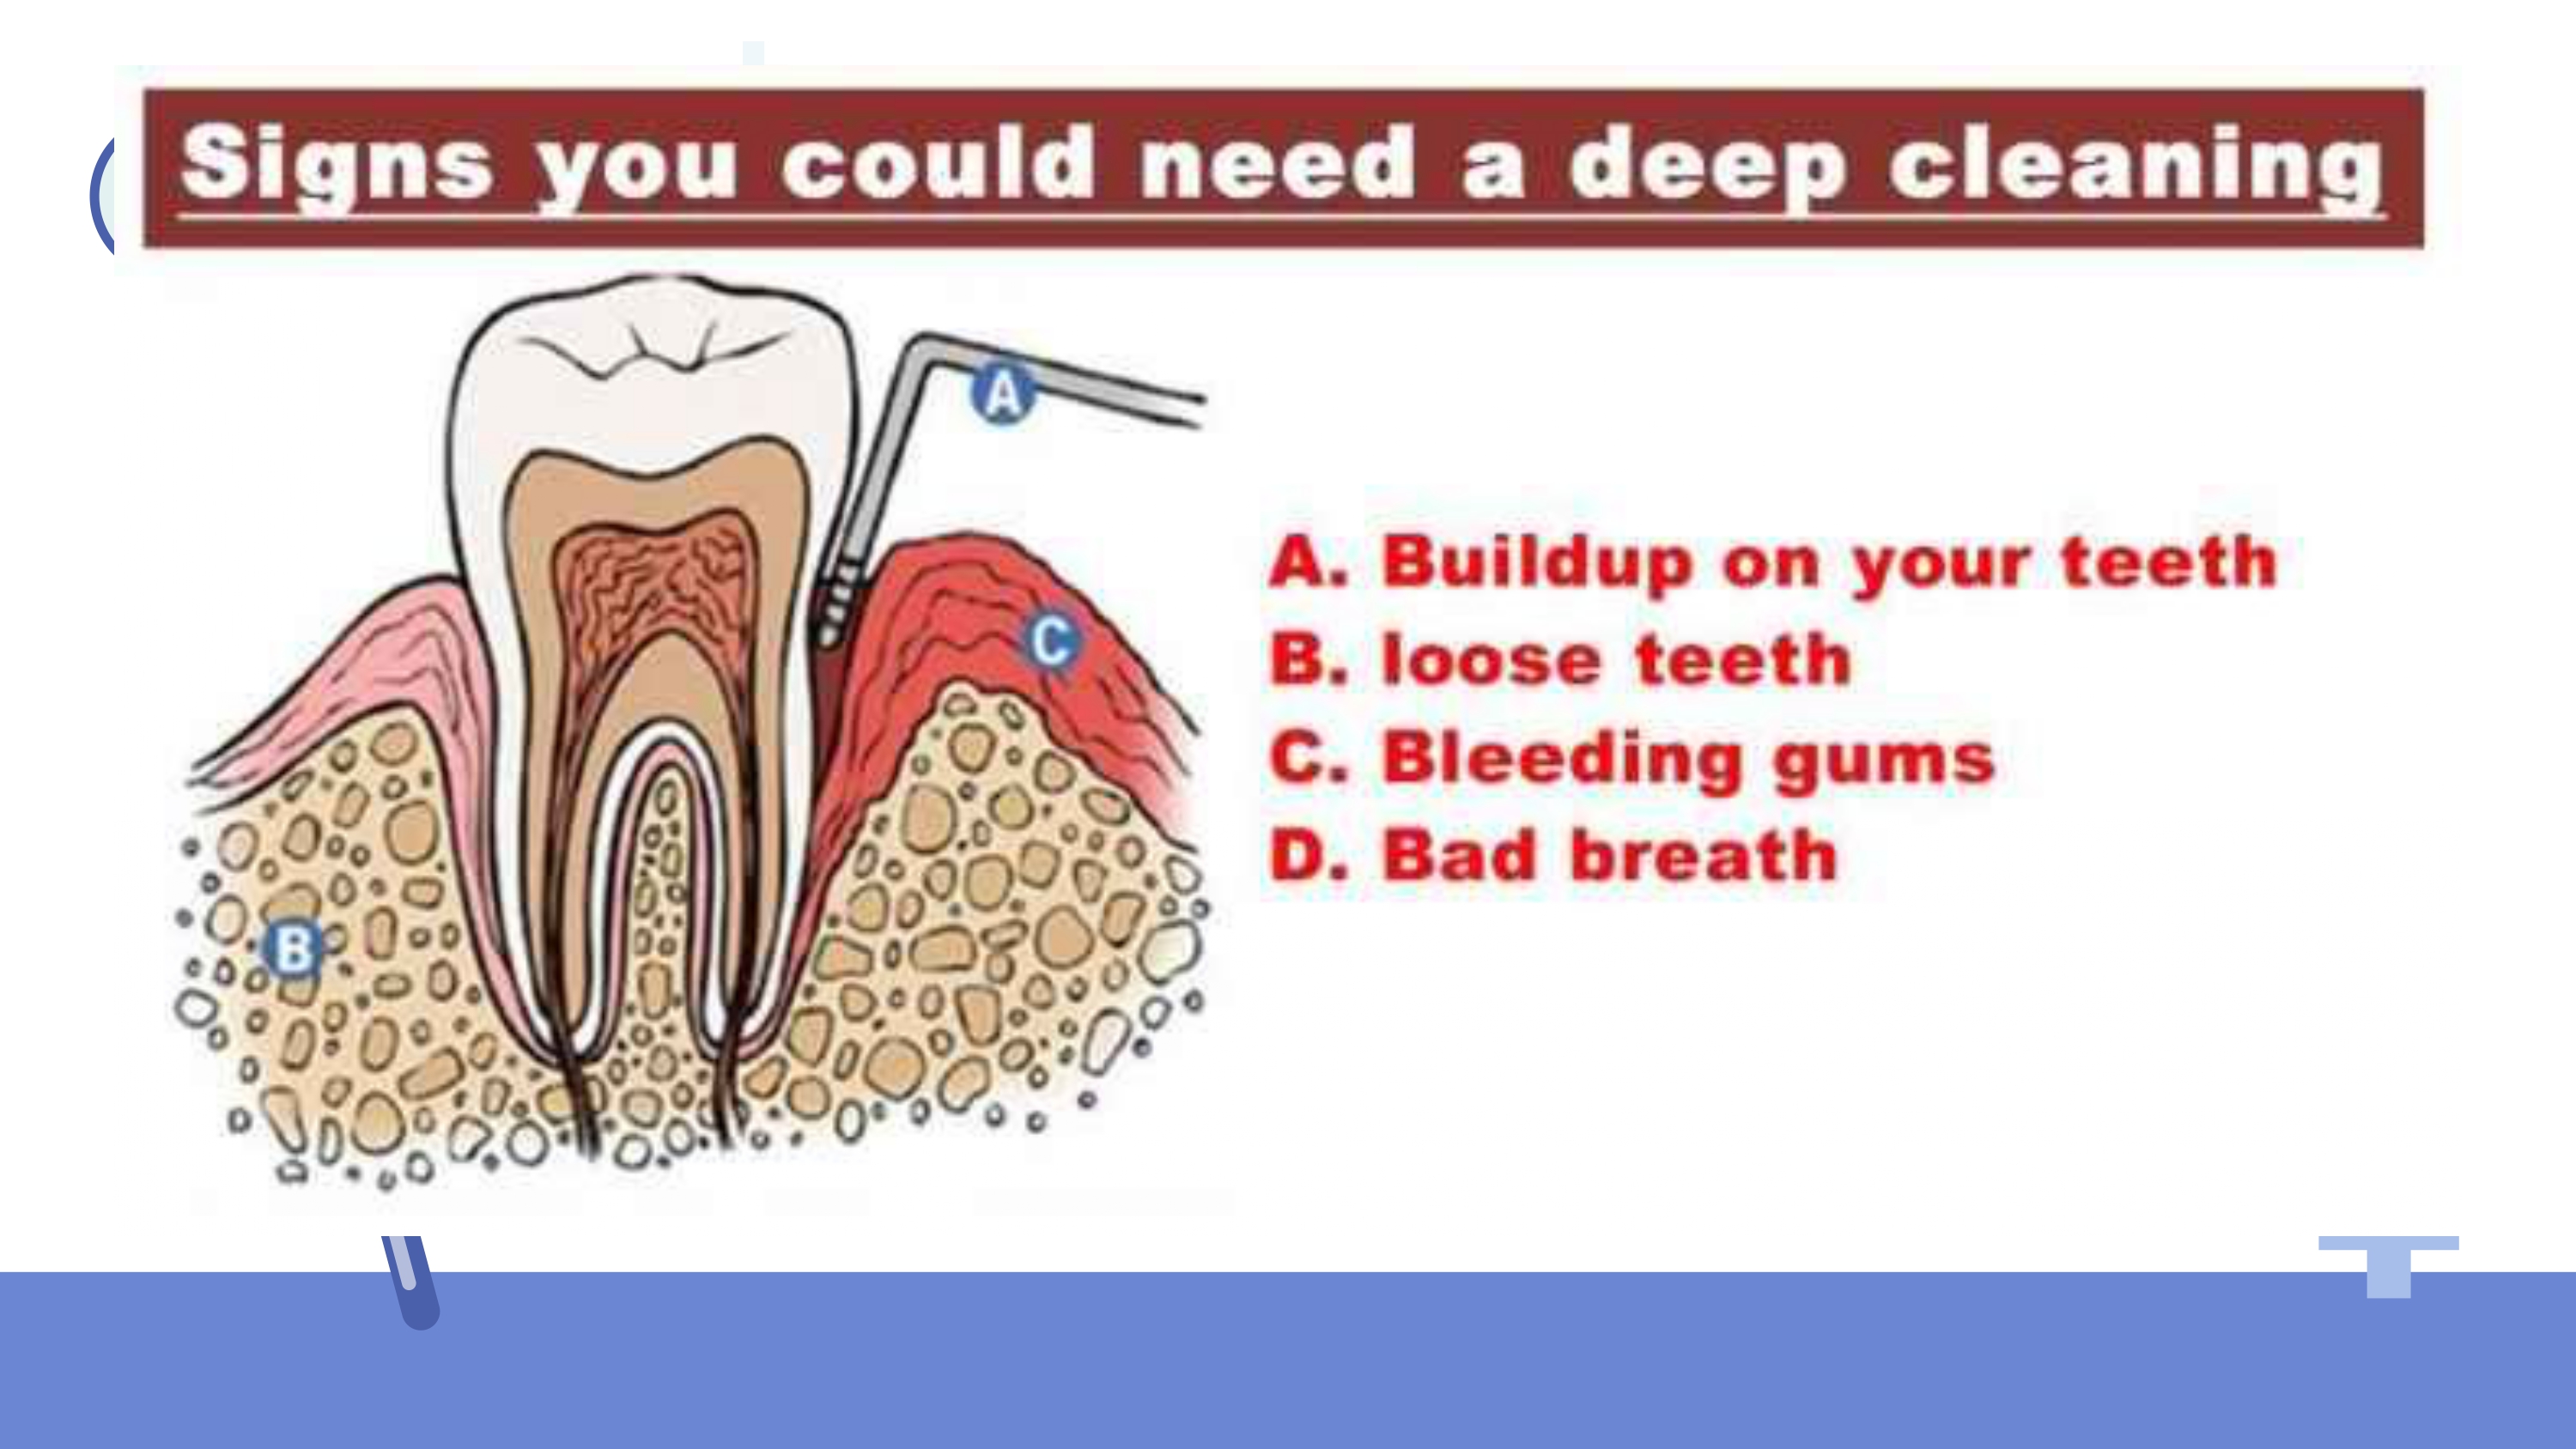
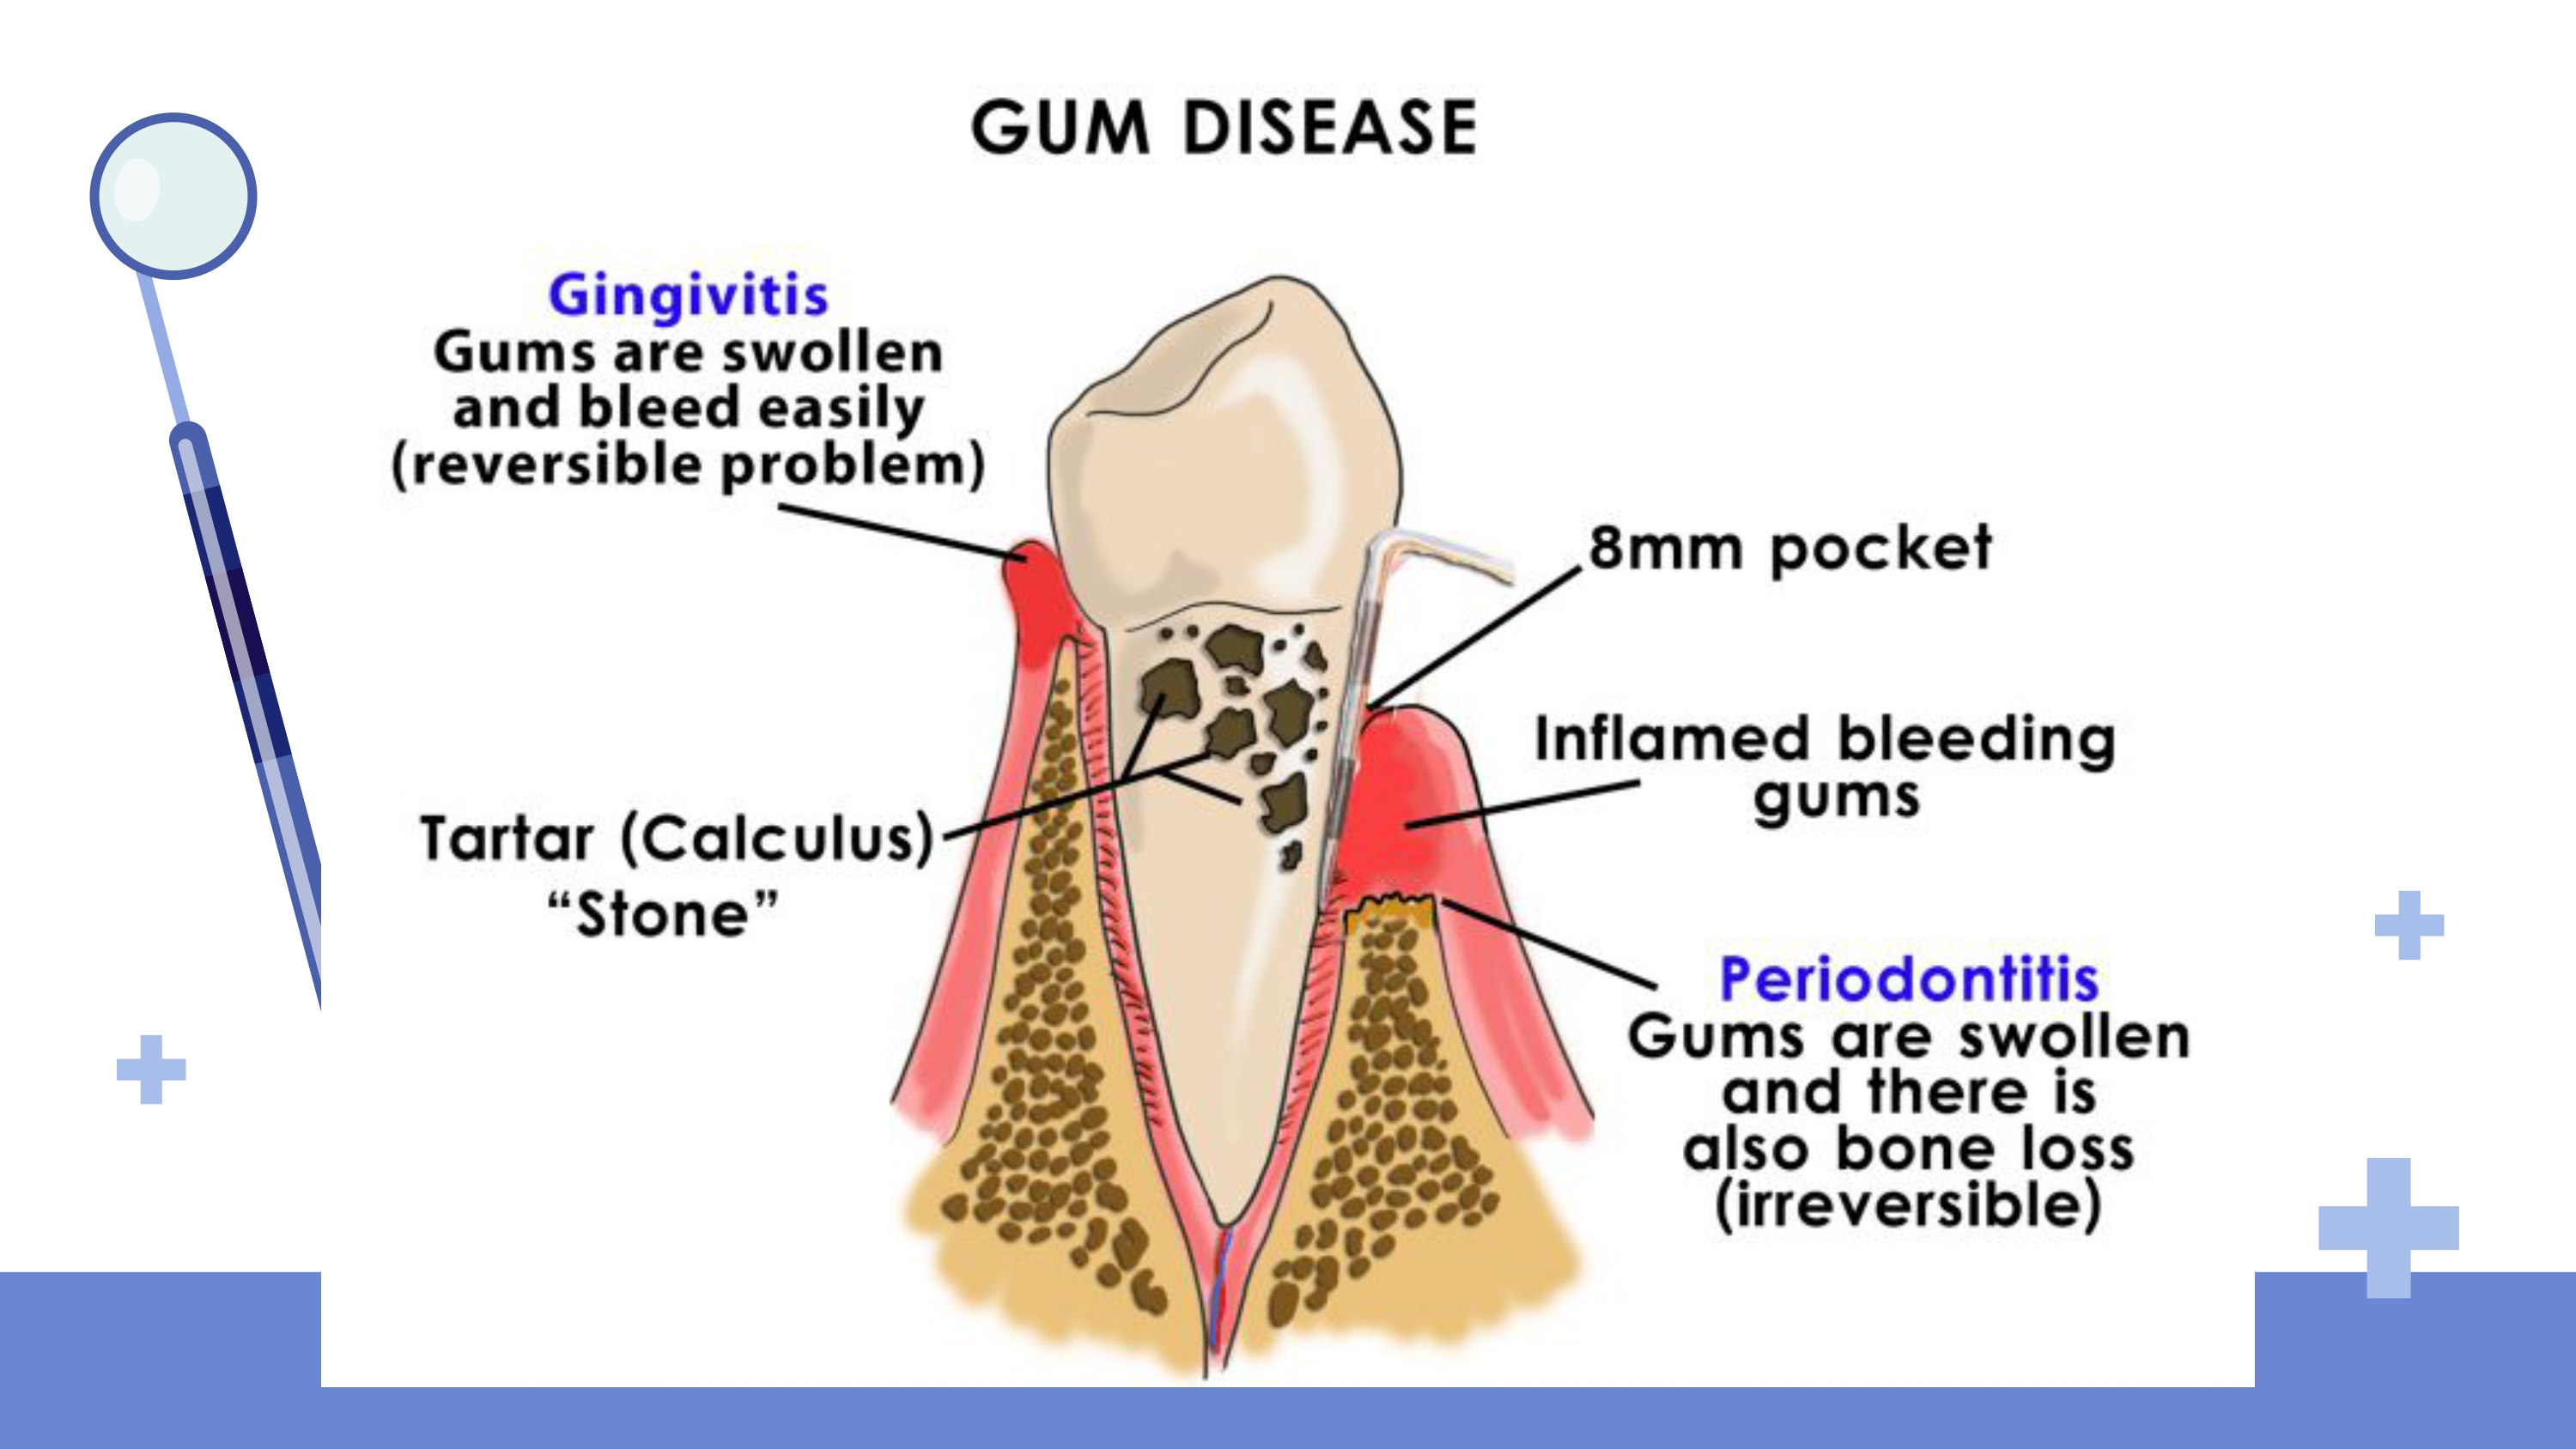
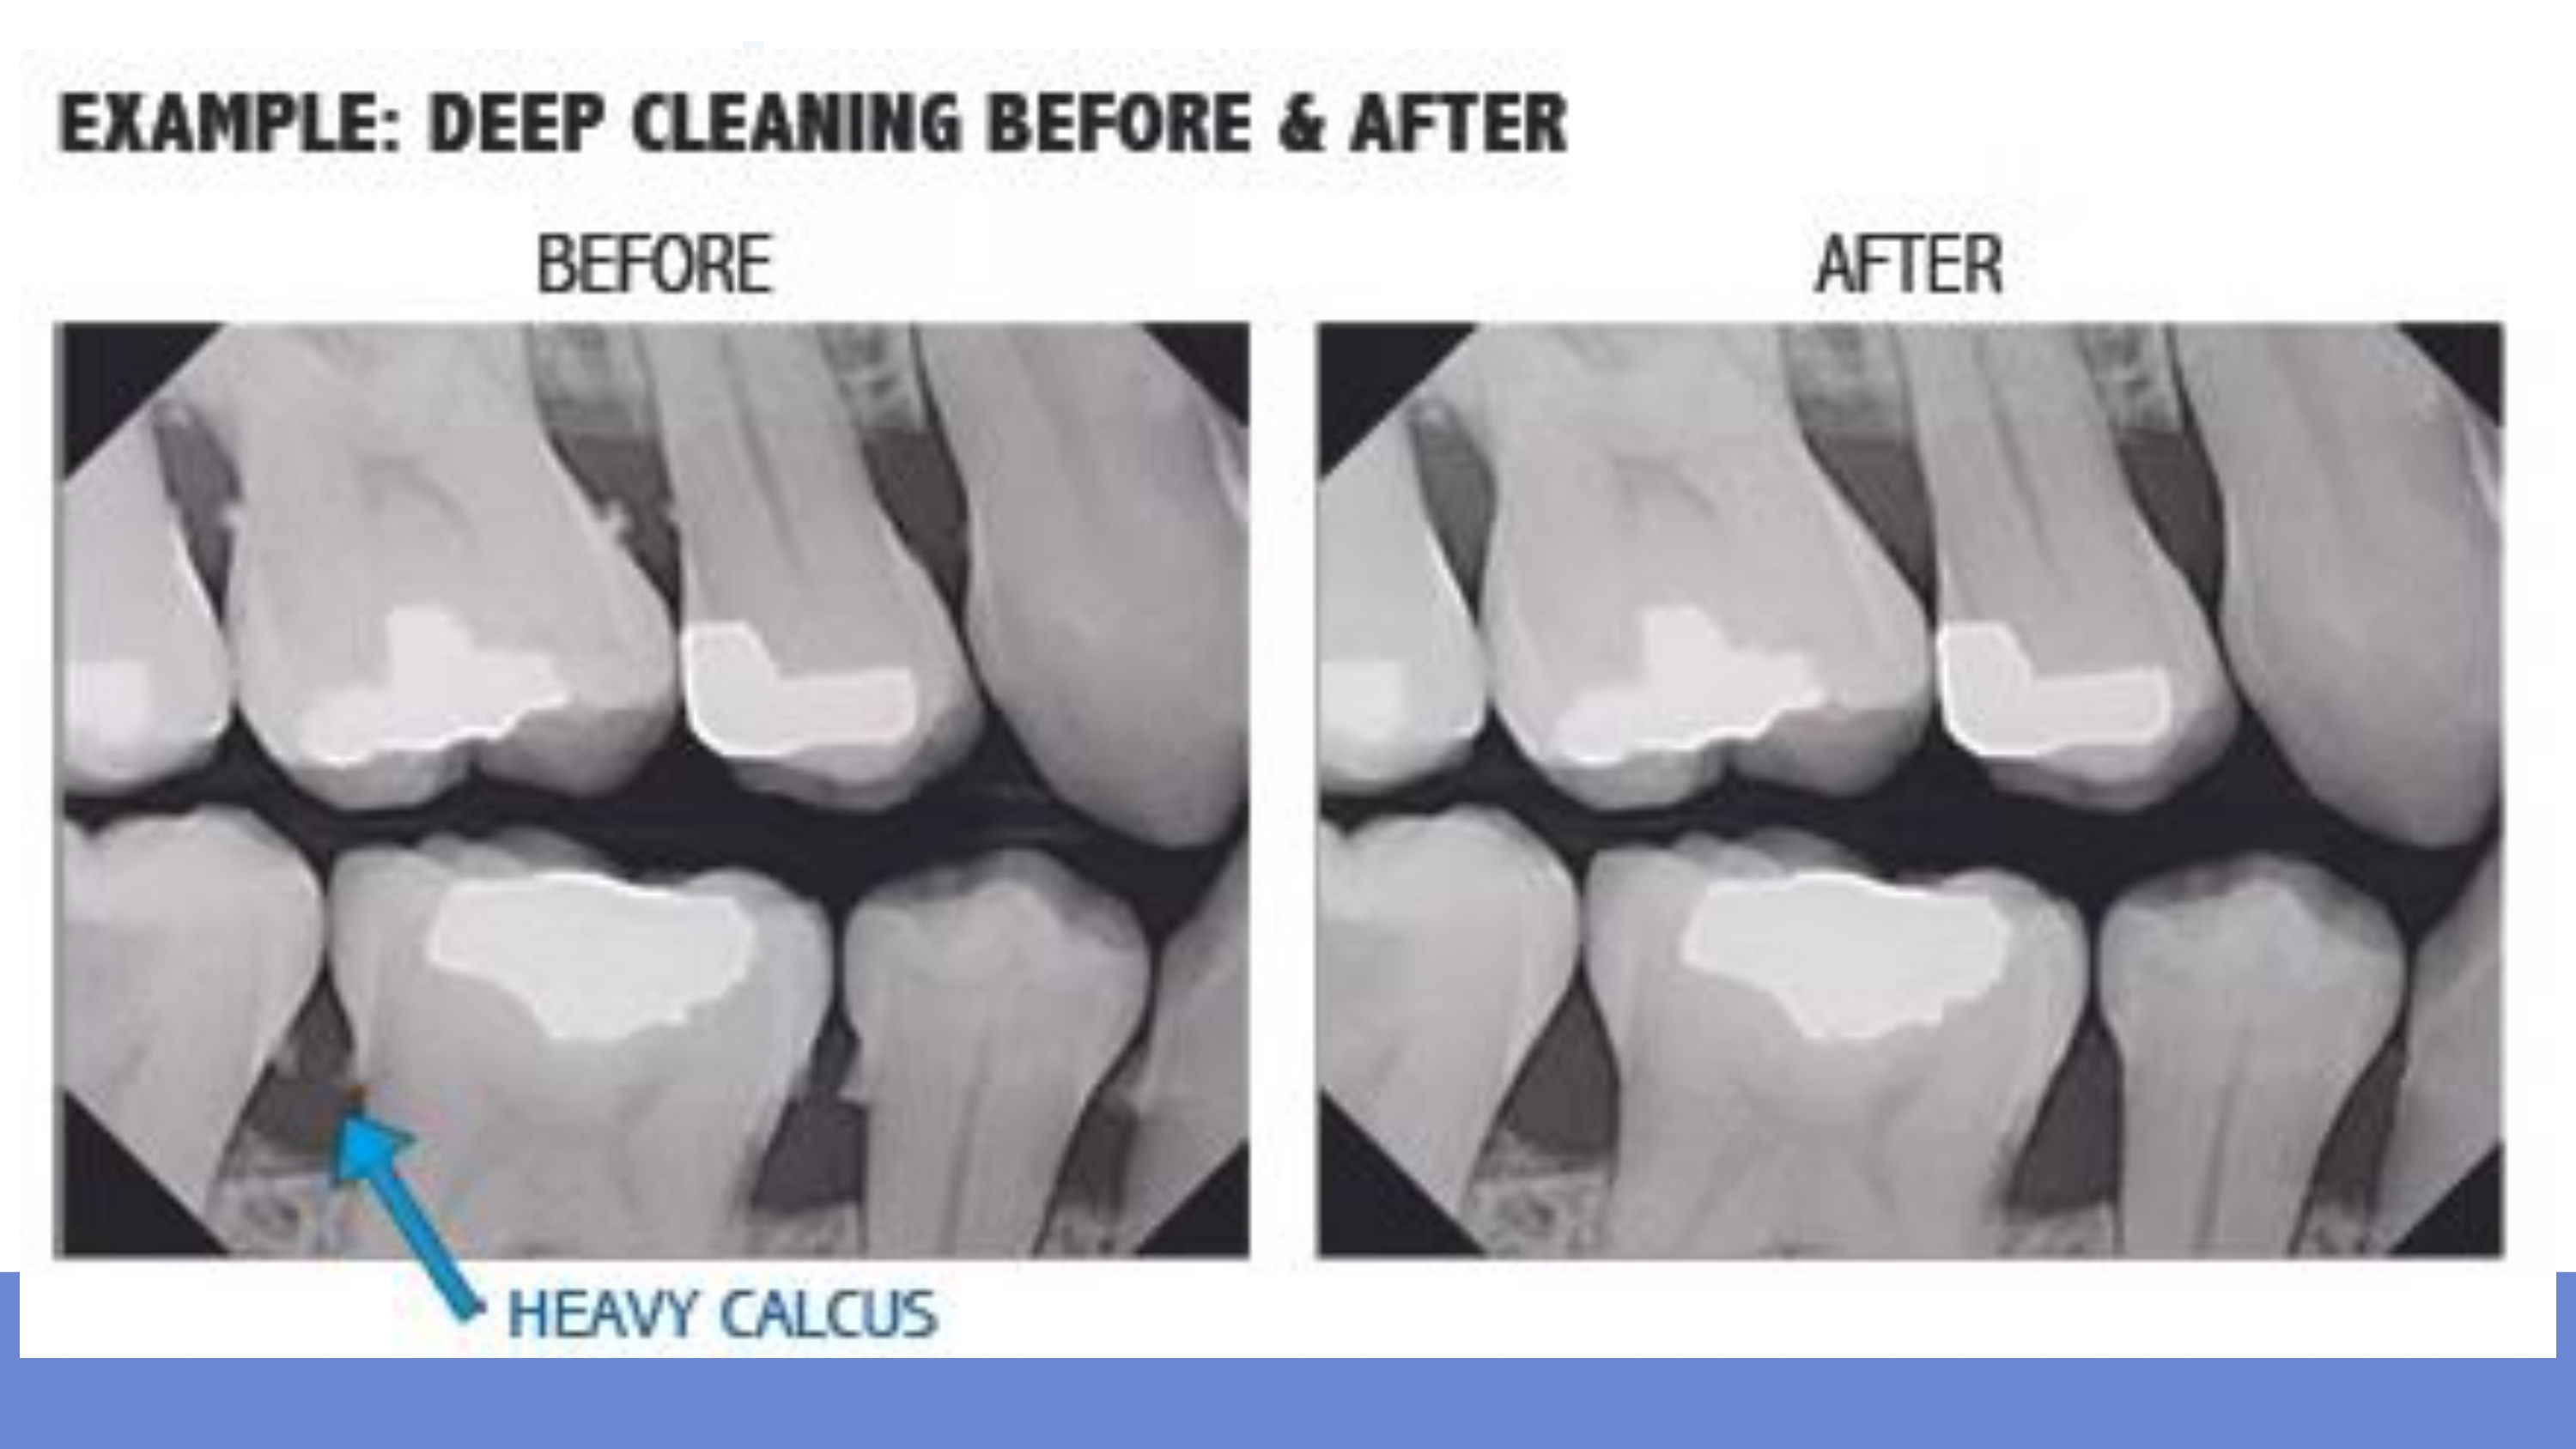
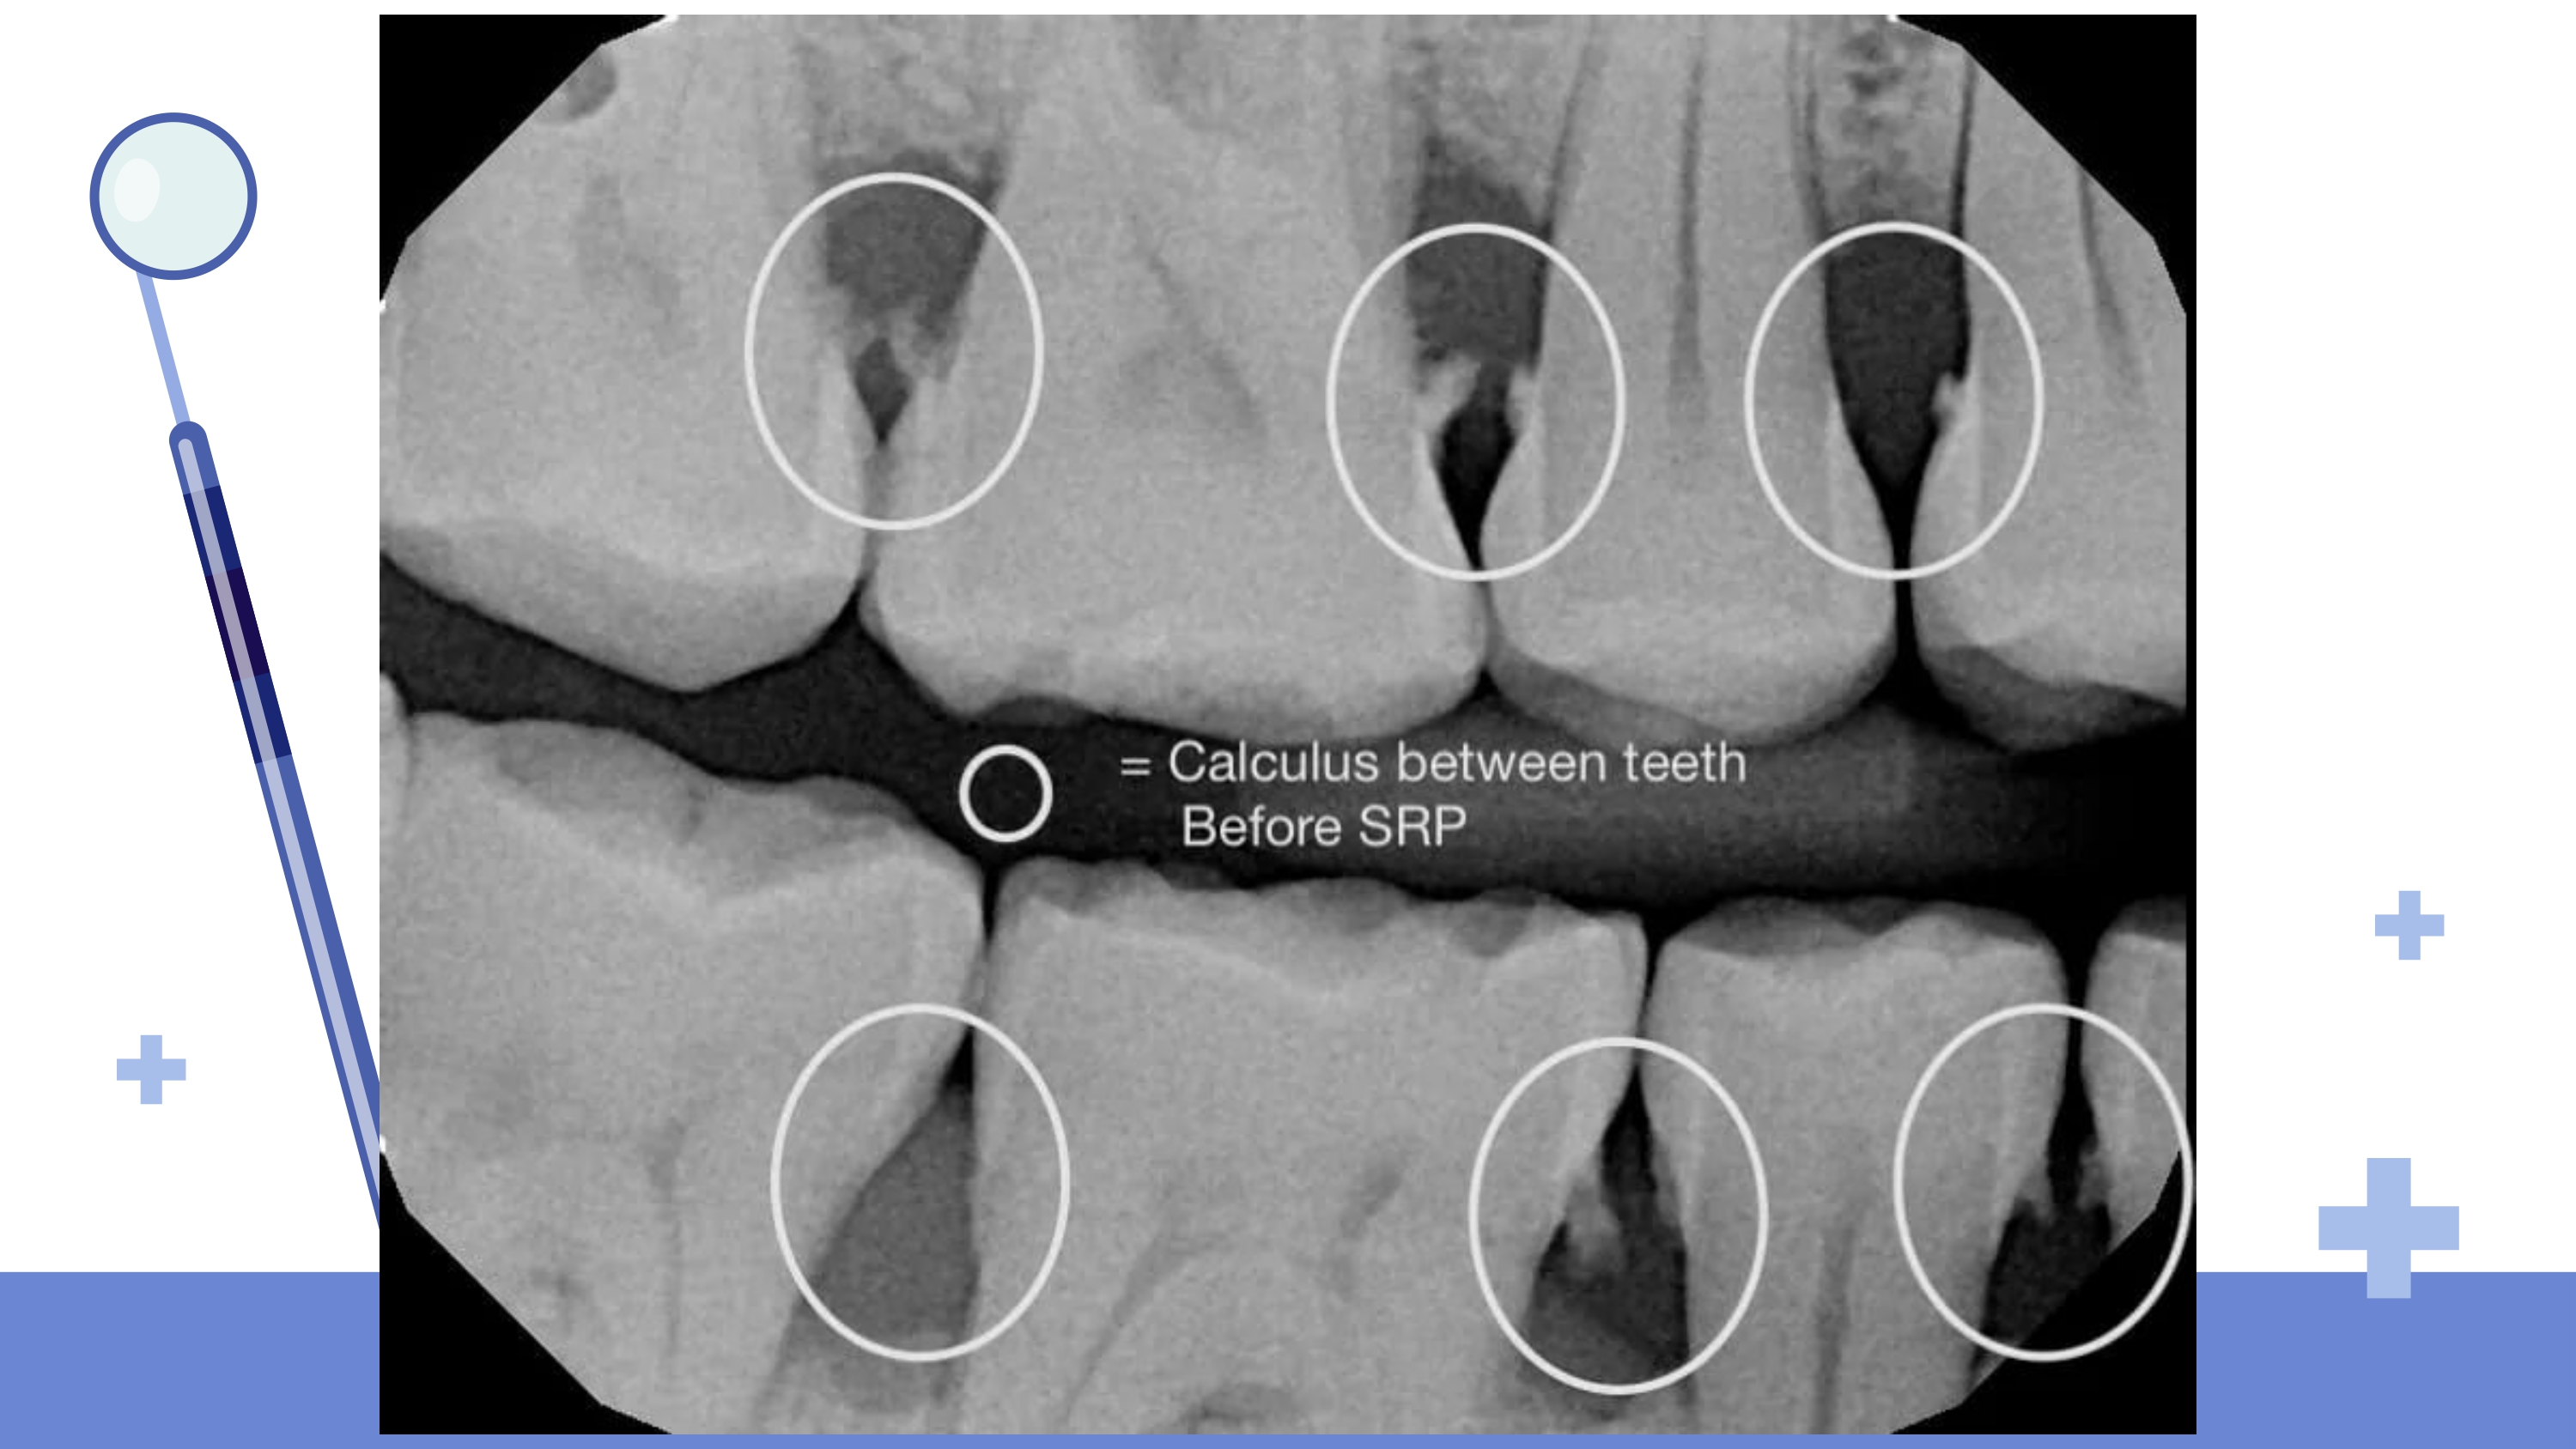
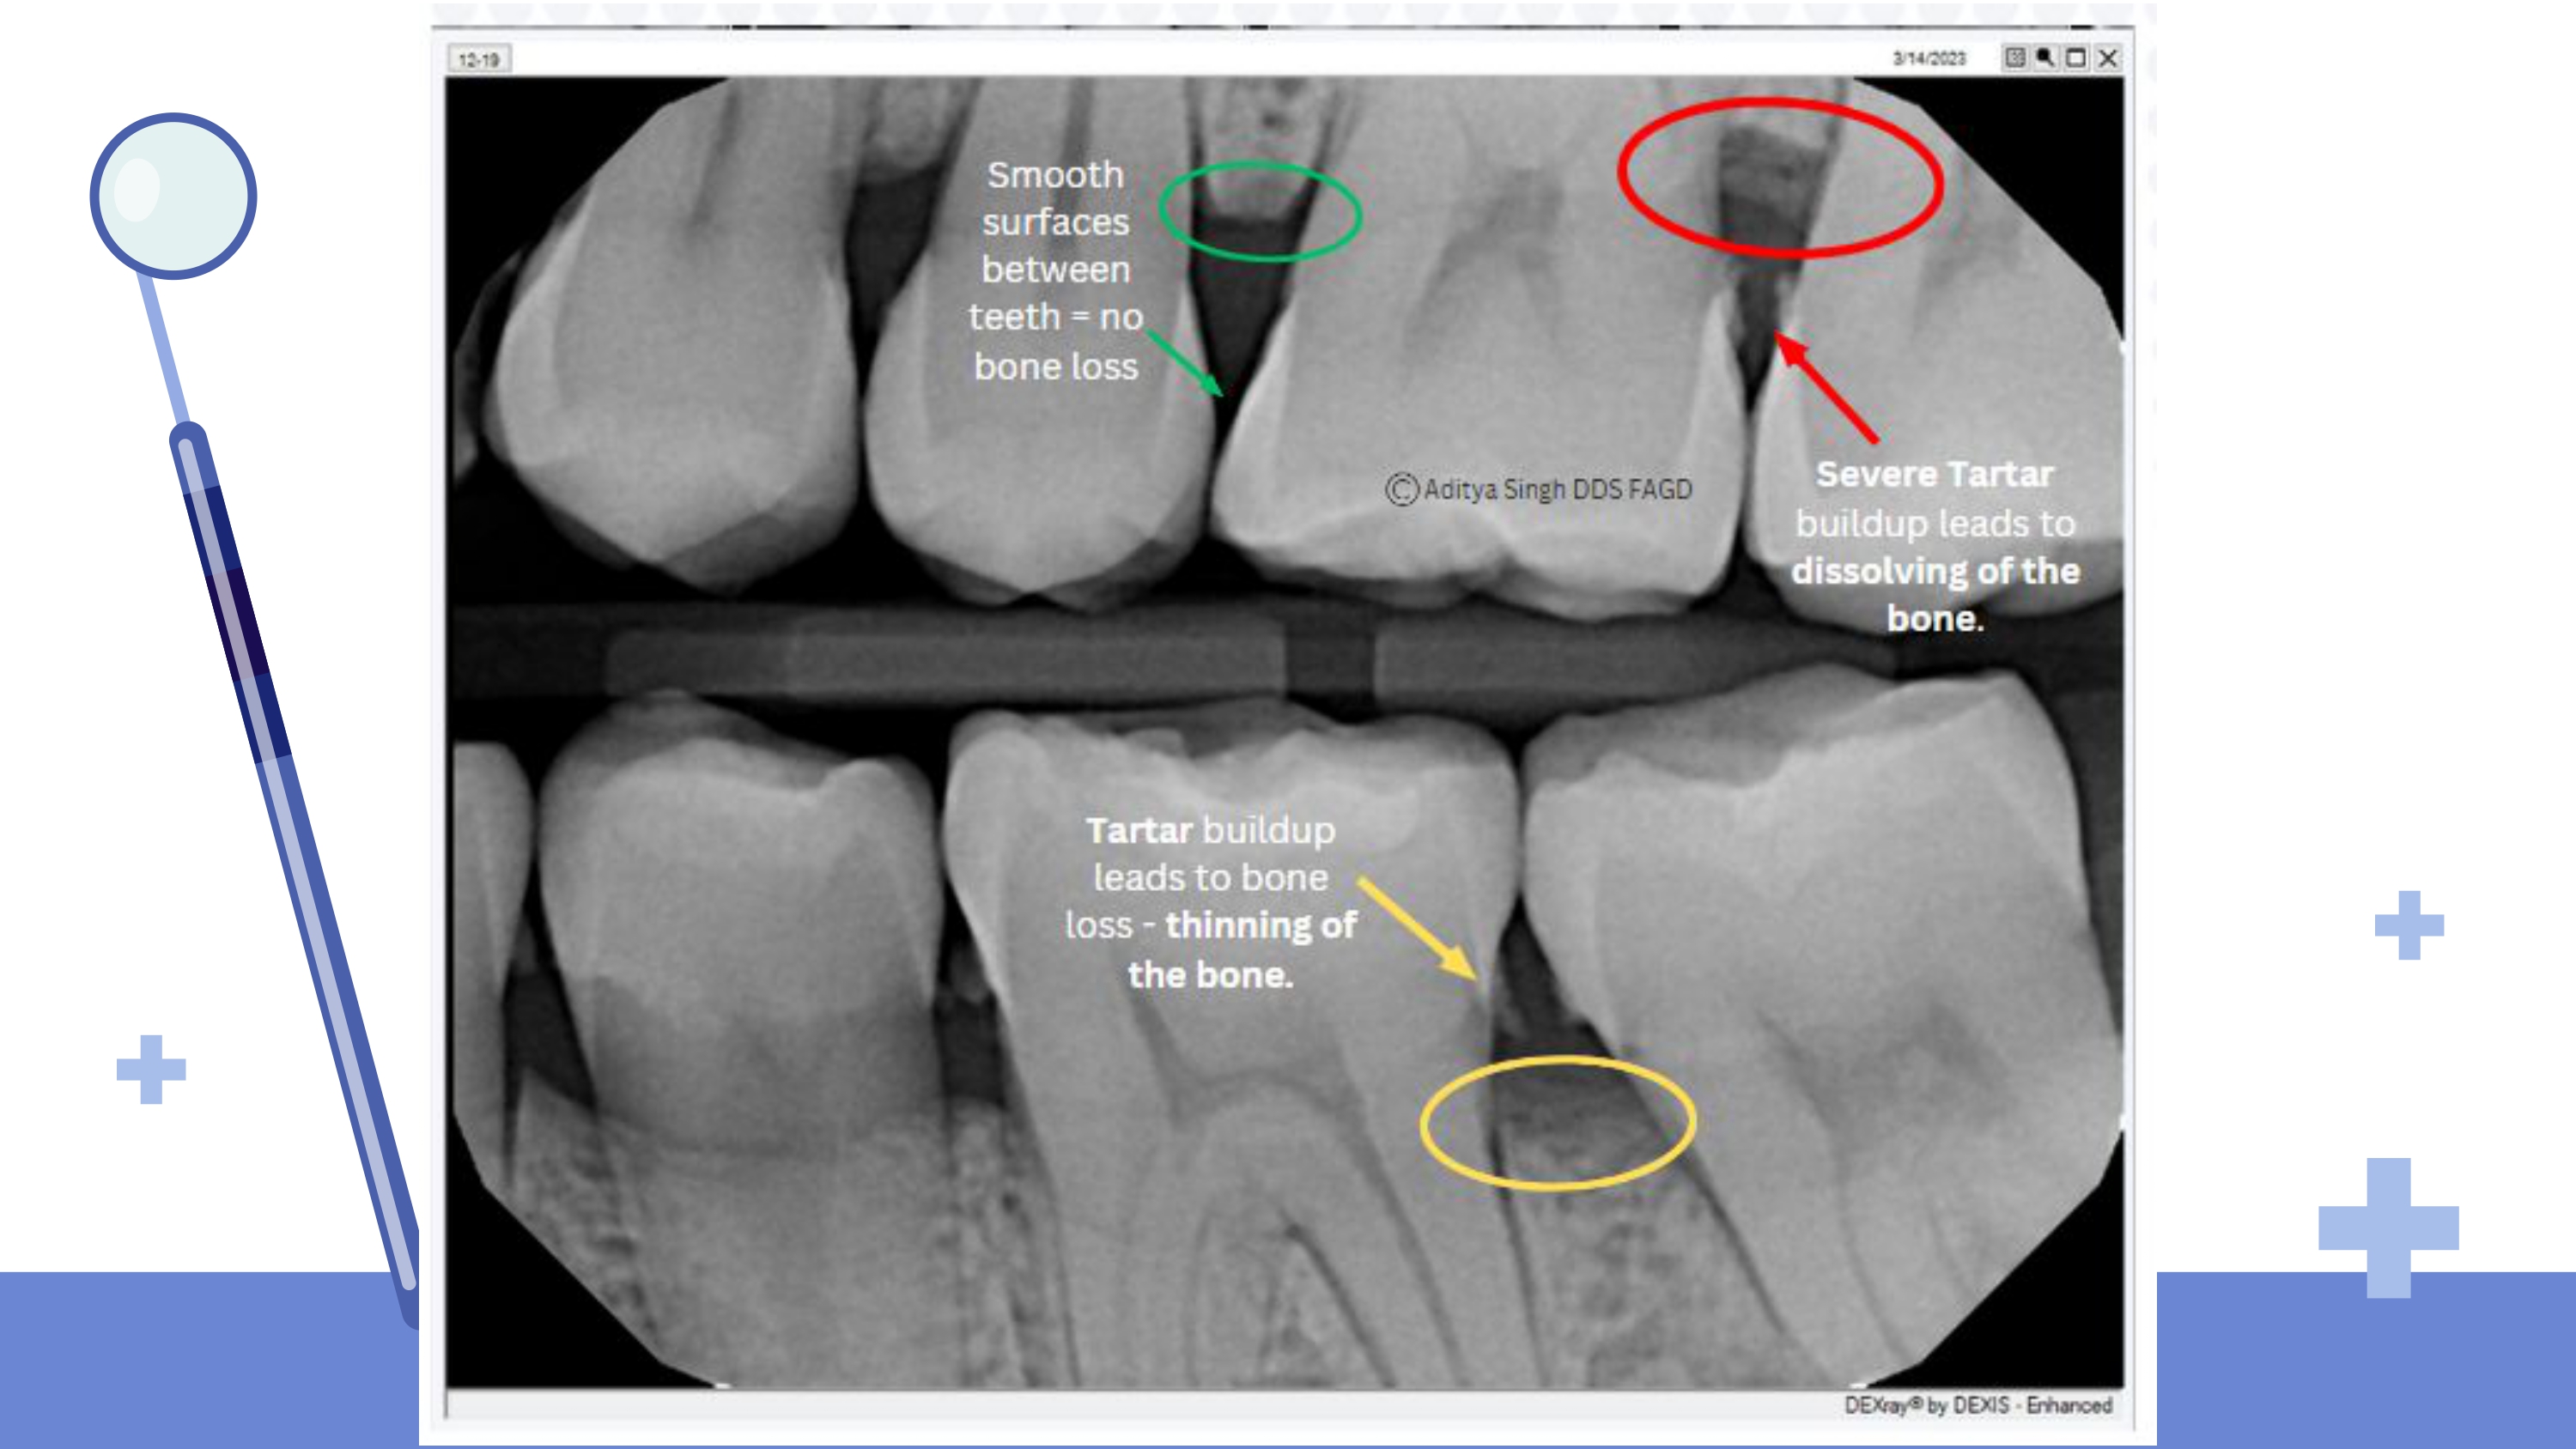
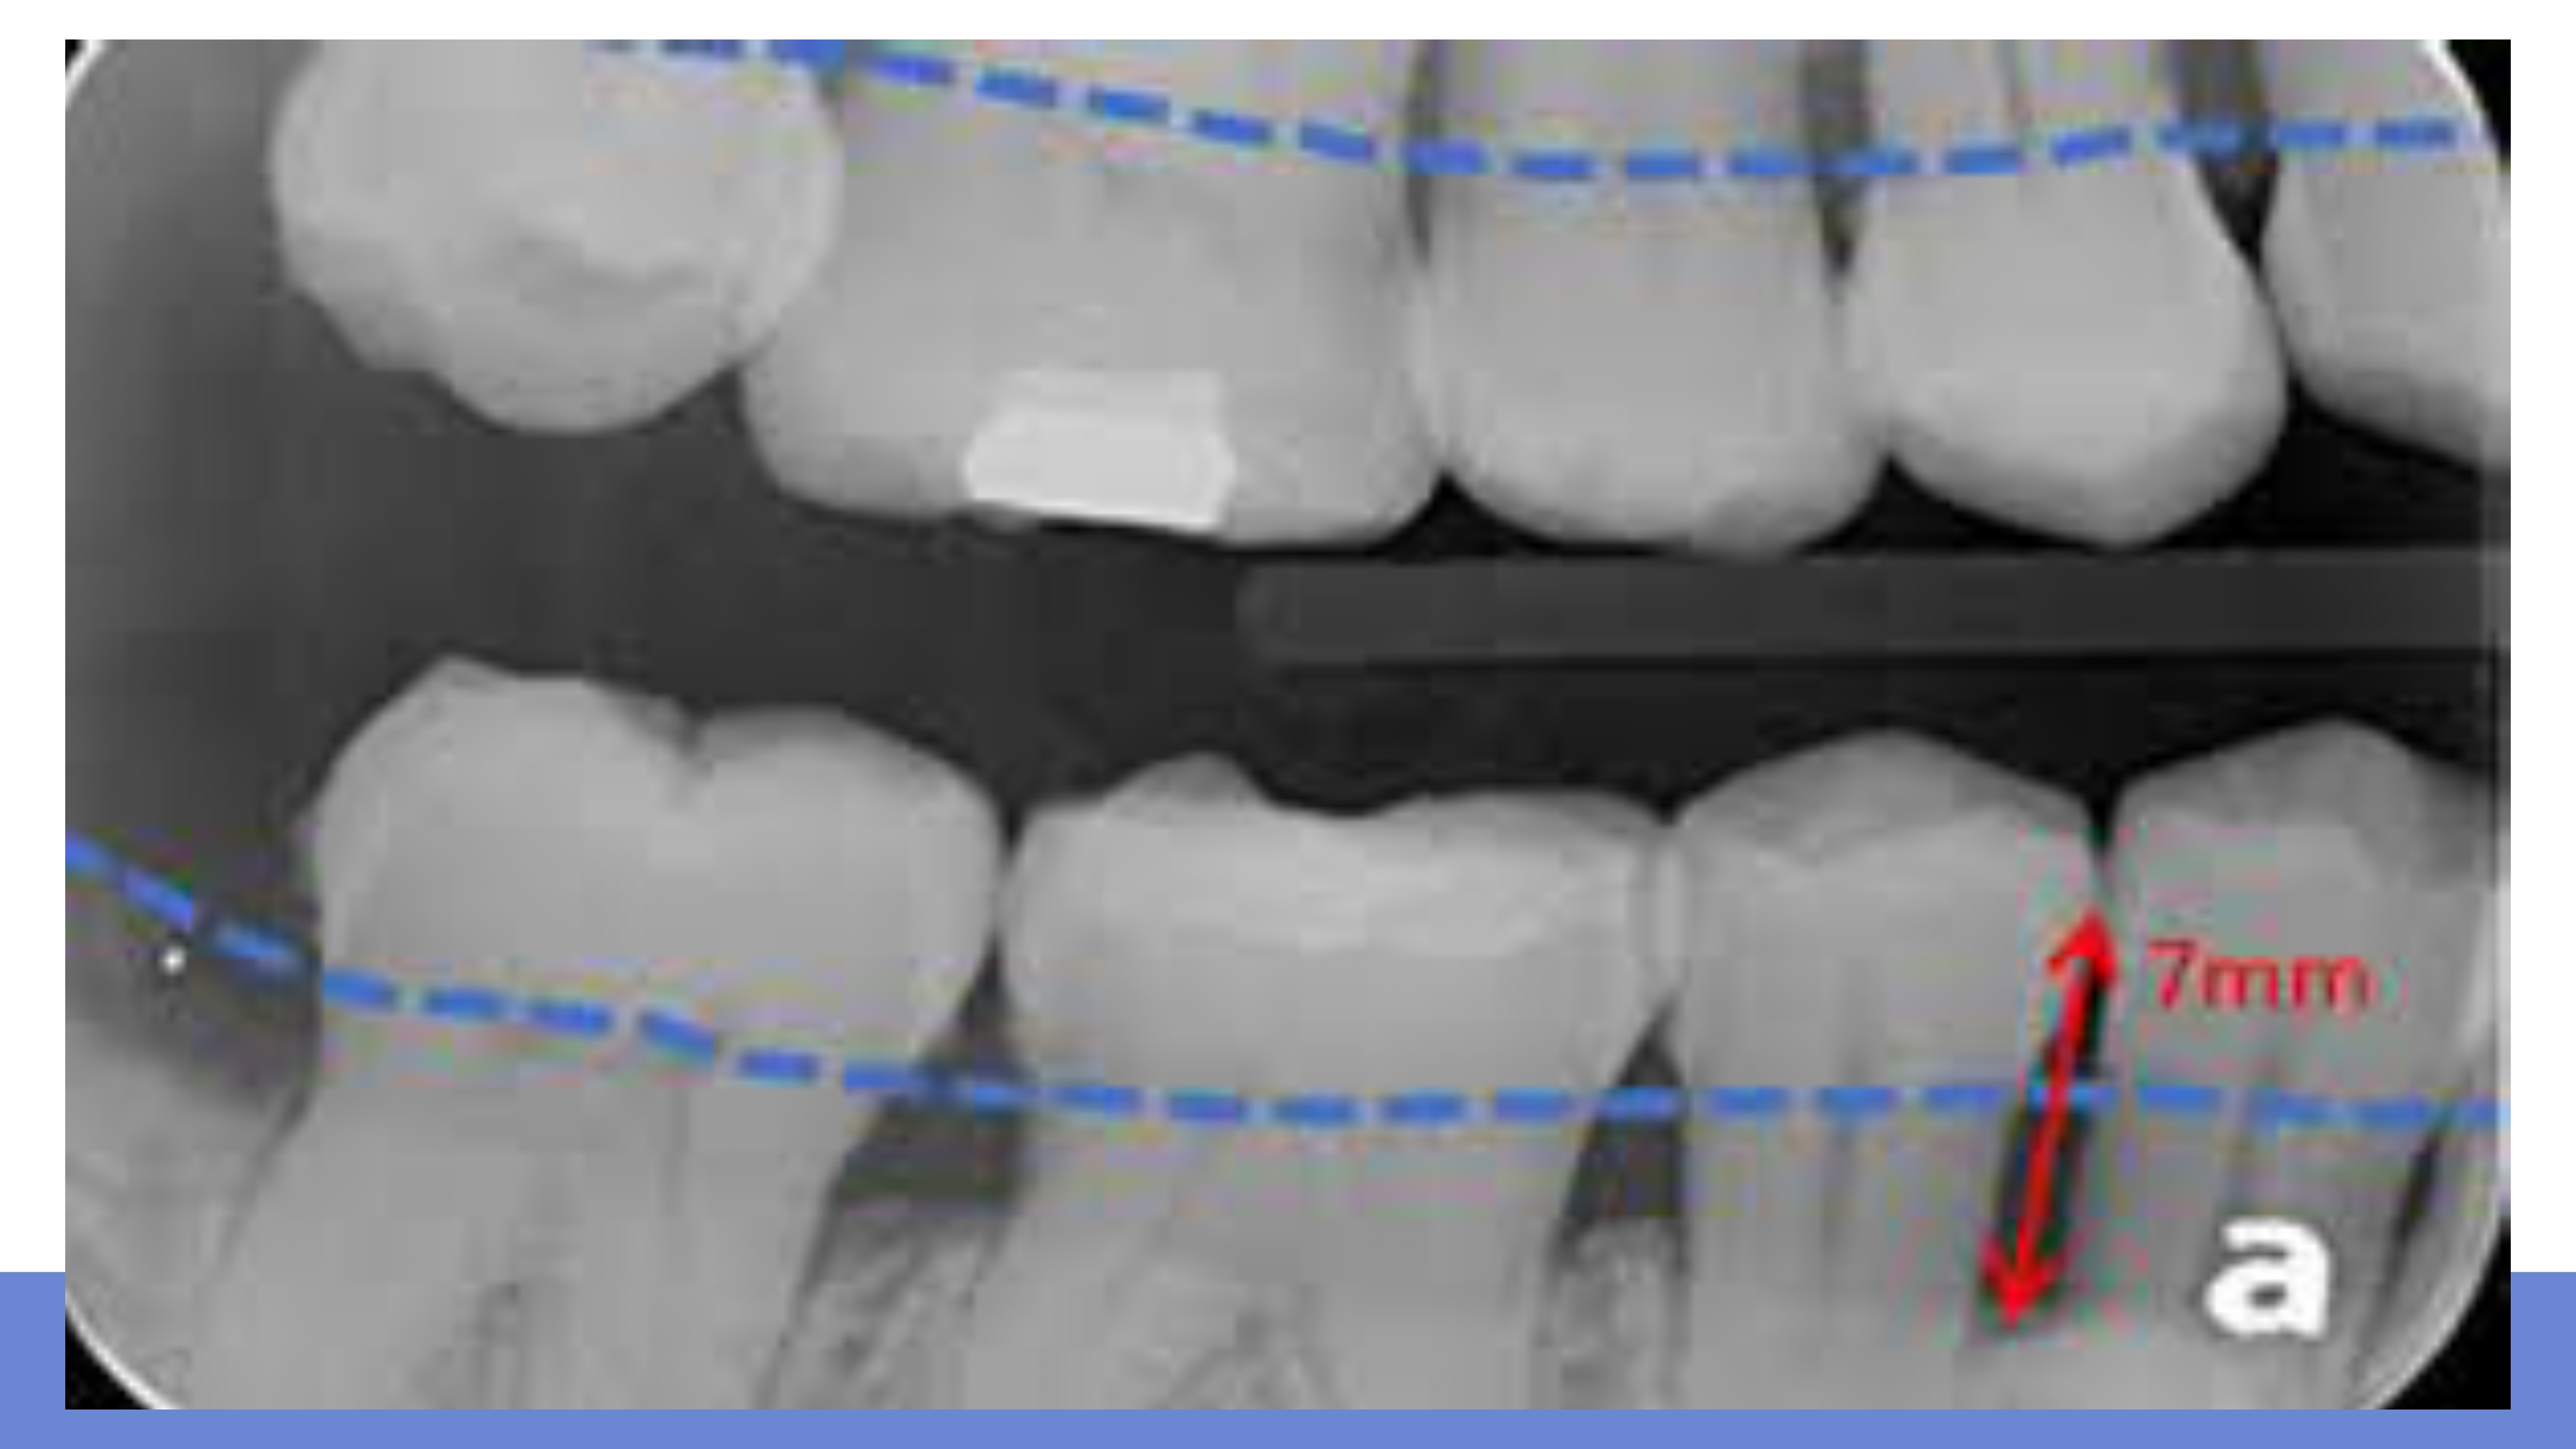
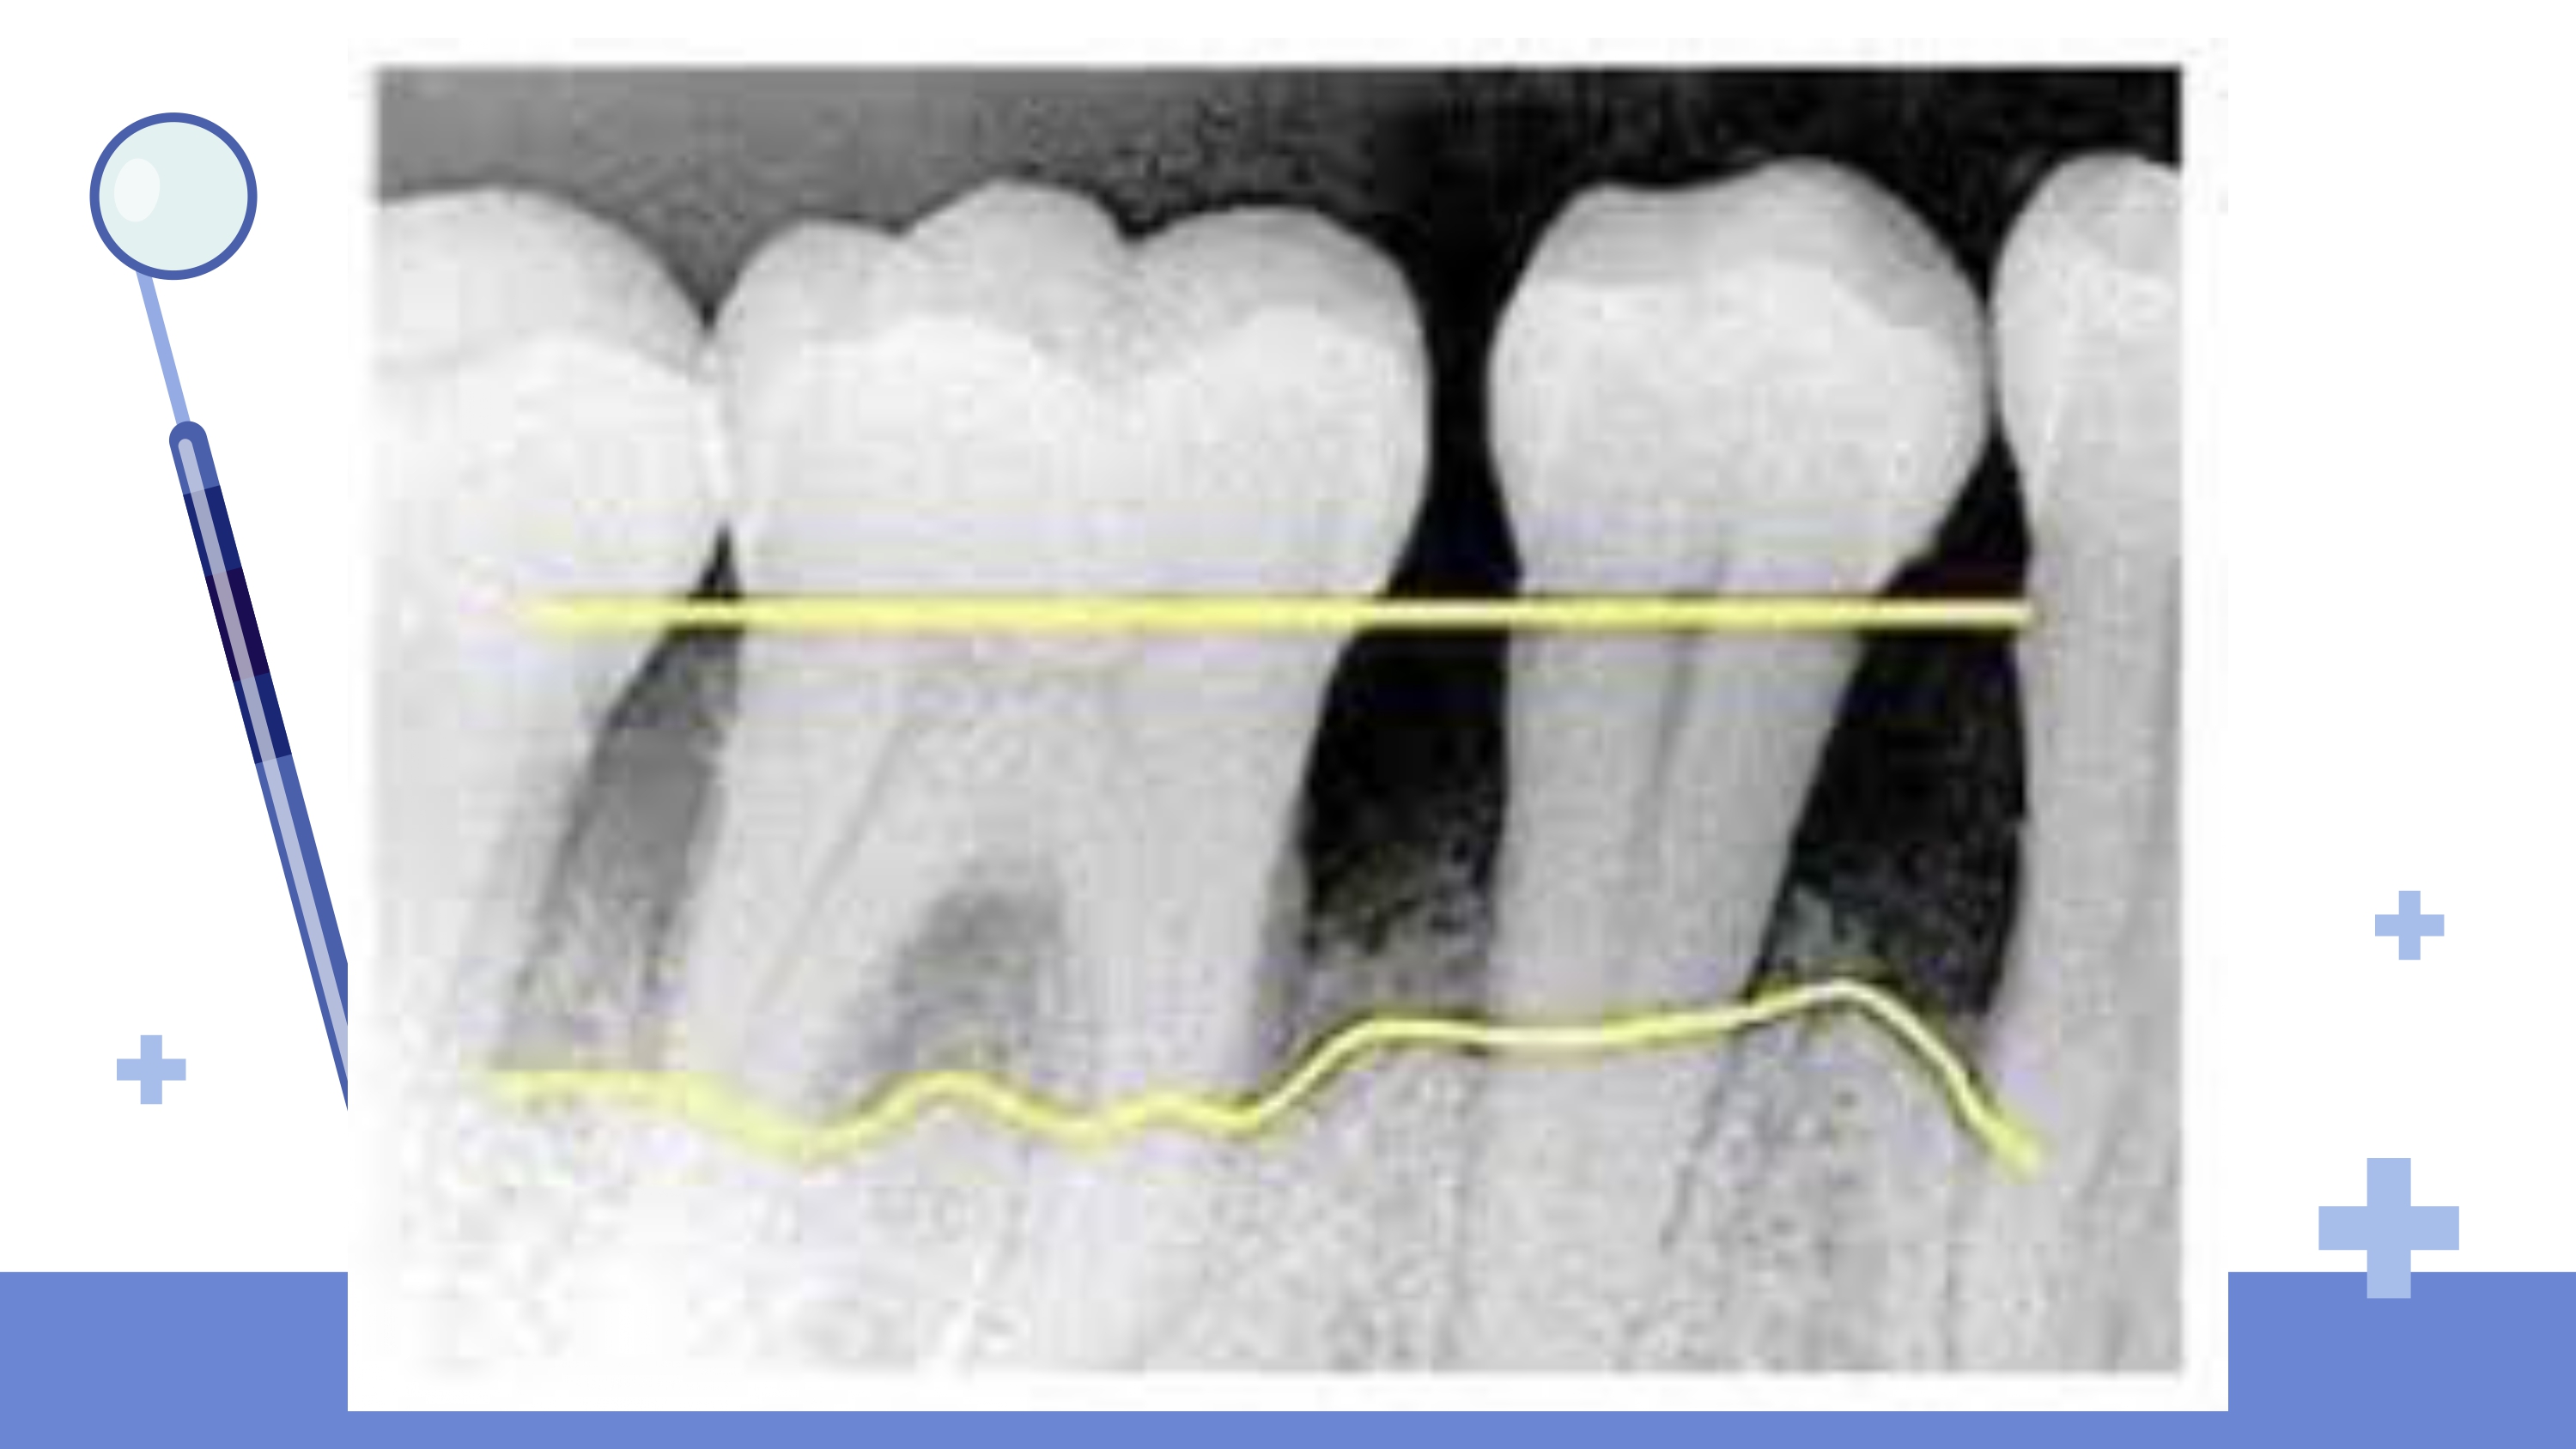
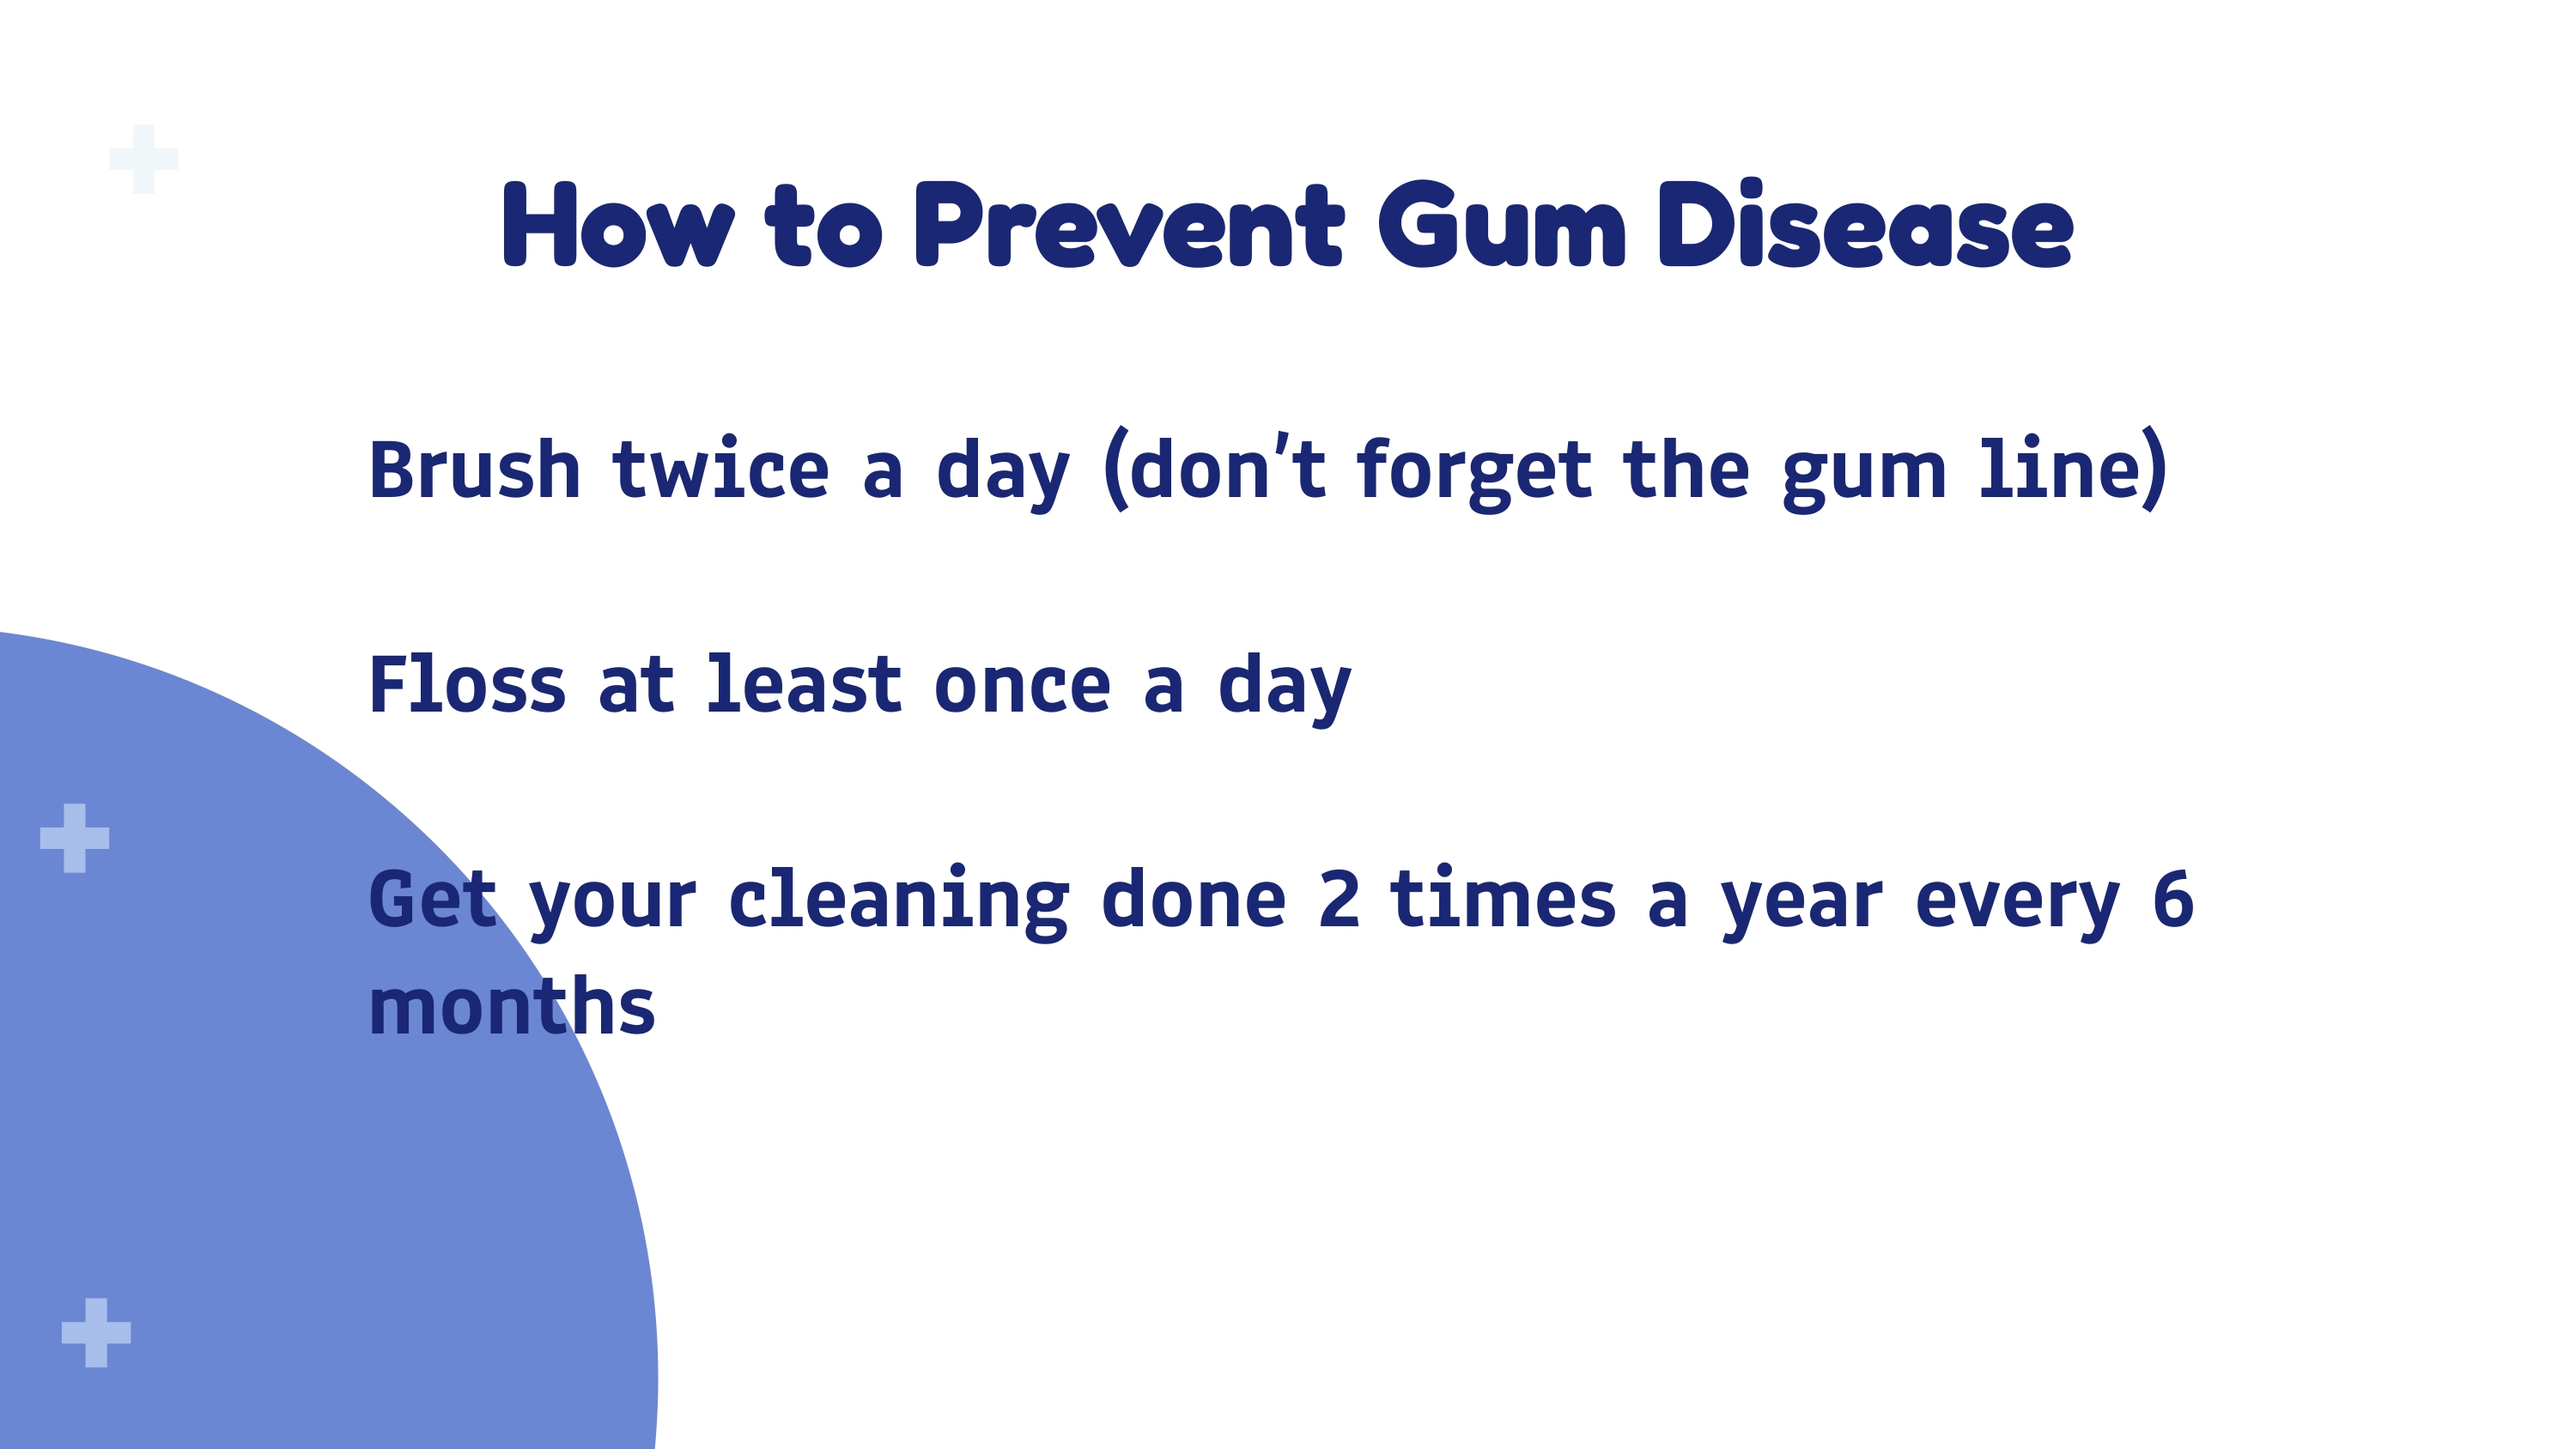
Gingivitis & Periodontitis
Visual patient education guide on gum disease — causes, stages, and what to expect from treatment.
Patient Guide
19 pages
Page 1
Click to zoom
Page 2
Click to zoom
Page 3
Click to zoom
Page 4
Click to zoom
Page 5
Click to zoom
Page 6
Click to zoom
Page 7
Click to zoom
Page 8
Click to zoom
Page 9
Click to zoom
Page 10
Click to zoom
Page 11
Click to zoom
Page 12
Click to zoom
Page 13
Click to zoom
Page 14
Click to zoom
Page 15
Click to zoom
Page 16
Click to zoom
Page 17
Click to zoom
Page 18
Click to zoom

Page 19
Click to zoom
Invisalign & Clear Aligner Care
Post-placement instructions for patients receiving Invisalign or orthodontic attachments. Available in English and 한국어.
Welcome to Invisalign & Clear Aligner Attachments
It is common to experience some minor discomfort or a “scratchy” sensation immediately after having attachments (buttons) placed for your clear aligners. Here are the standard post-operative instructions to ensure a smooth recovery.
1 · Managing Initial Discomfort
Pain & Sensitivity: Your teeth may feel more sensitive or “tight” for the first 24–48 hours as the attachments create new pressure. This is completely normal.
Mouth Irritation: The attachments may feel rough against your lips or cheeks when aligners are out. The tissue will adapt within a few days. Until then, apply orthodontic wax to any sharp areas.
Mouth Irritation: The attachments may feel rough against your lips or cheeks when aligners are out. The tissue will adapt within a few days. Until then, apply orthodontic wax to any sharp areas.
2 · Eating & Drinking
Water Only While Wearing: Do not drink hot coffee, tea, or soda with aligners in. Heat can warp the plastic, and sugar or acids trapped under the tray can cause rapid tooth decay.
No Food With Aligners: Always remove your aligners before eating.
Staining Caution: The resin attachment material can stain. Limit coffee, tea, and strongly coloured foods while in treatment.
No Food With Aligners: Always remove your aligners before eating.
Staining Caution: The resin attachment material can stain. Limit coffee, tea, and strongly coloured foods while in treatment.
3 · Wearing Your Aligners — The 22-Hour Rule
Wear aligners for 22 hours per day. Remove only to eat, drink (anything other than water), and brush/floss.
Inserting: Push the front teeth in first, then press the back teeth down until you feel a click. Use “chewies” (silicone sticks) to seat the tray fully against your teeth.
Removing: Use your fingertips to gently lift from the inner edge of your back molars. Never use sharp tools or excessive force.
Inserting: Push the front teeth in first, then press the back teeth down until you feel a click. Use “chewies” (silicone sticks) to seat the tray fully against your teeth.
Removing: Use your fingertips to gently lift from the inner edge of your back molars. Never use sharp tools or excessive force.
4 · Oral Hygiene & Aligner Care
Brush Before Replacing: Always brush and floss after eating before putting aligners back in. This prevents food particles from being trapped against your teeth.
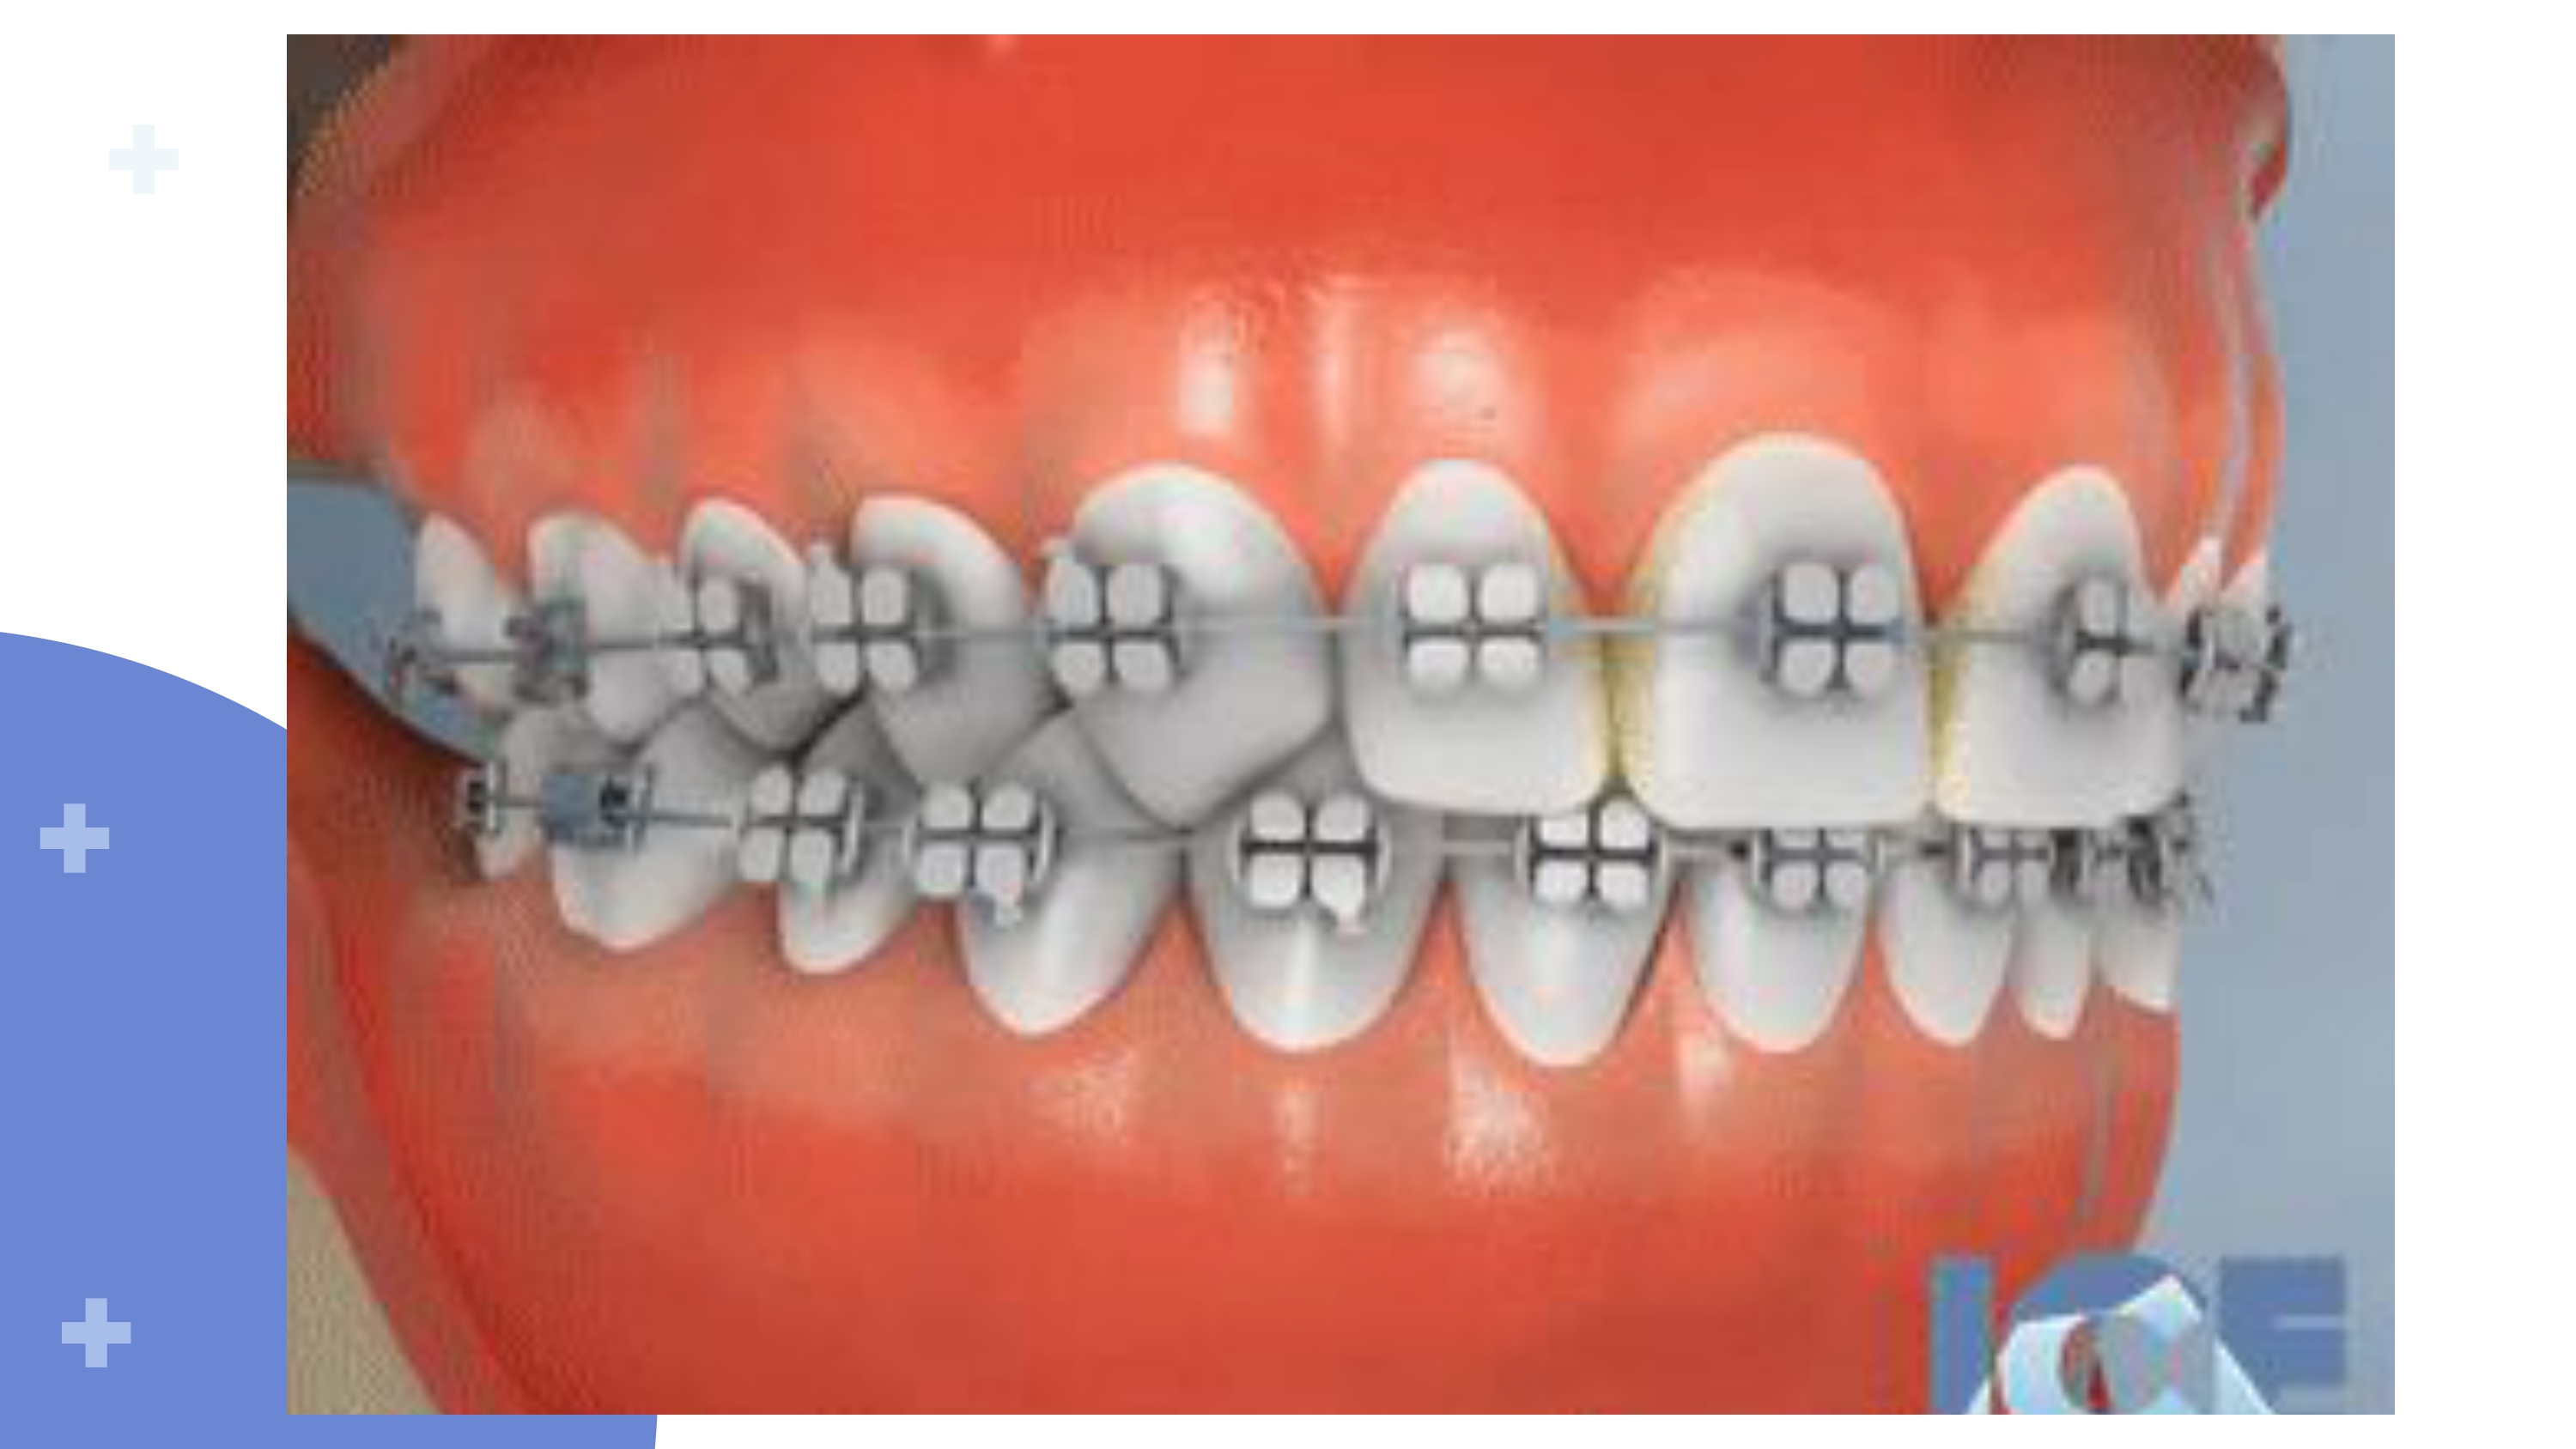
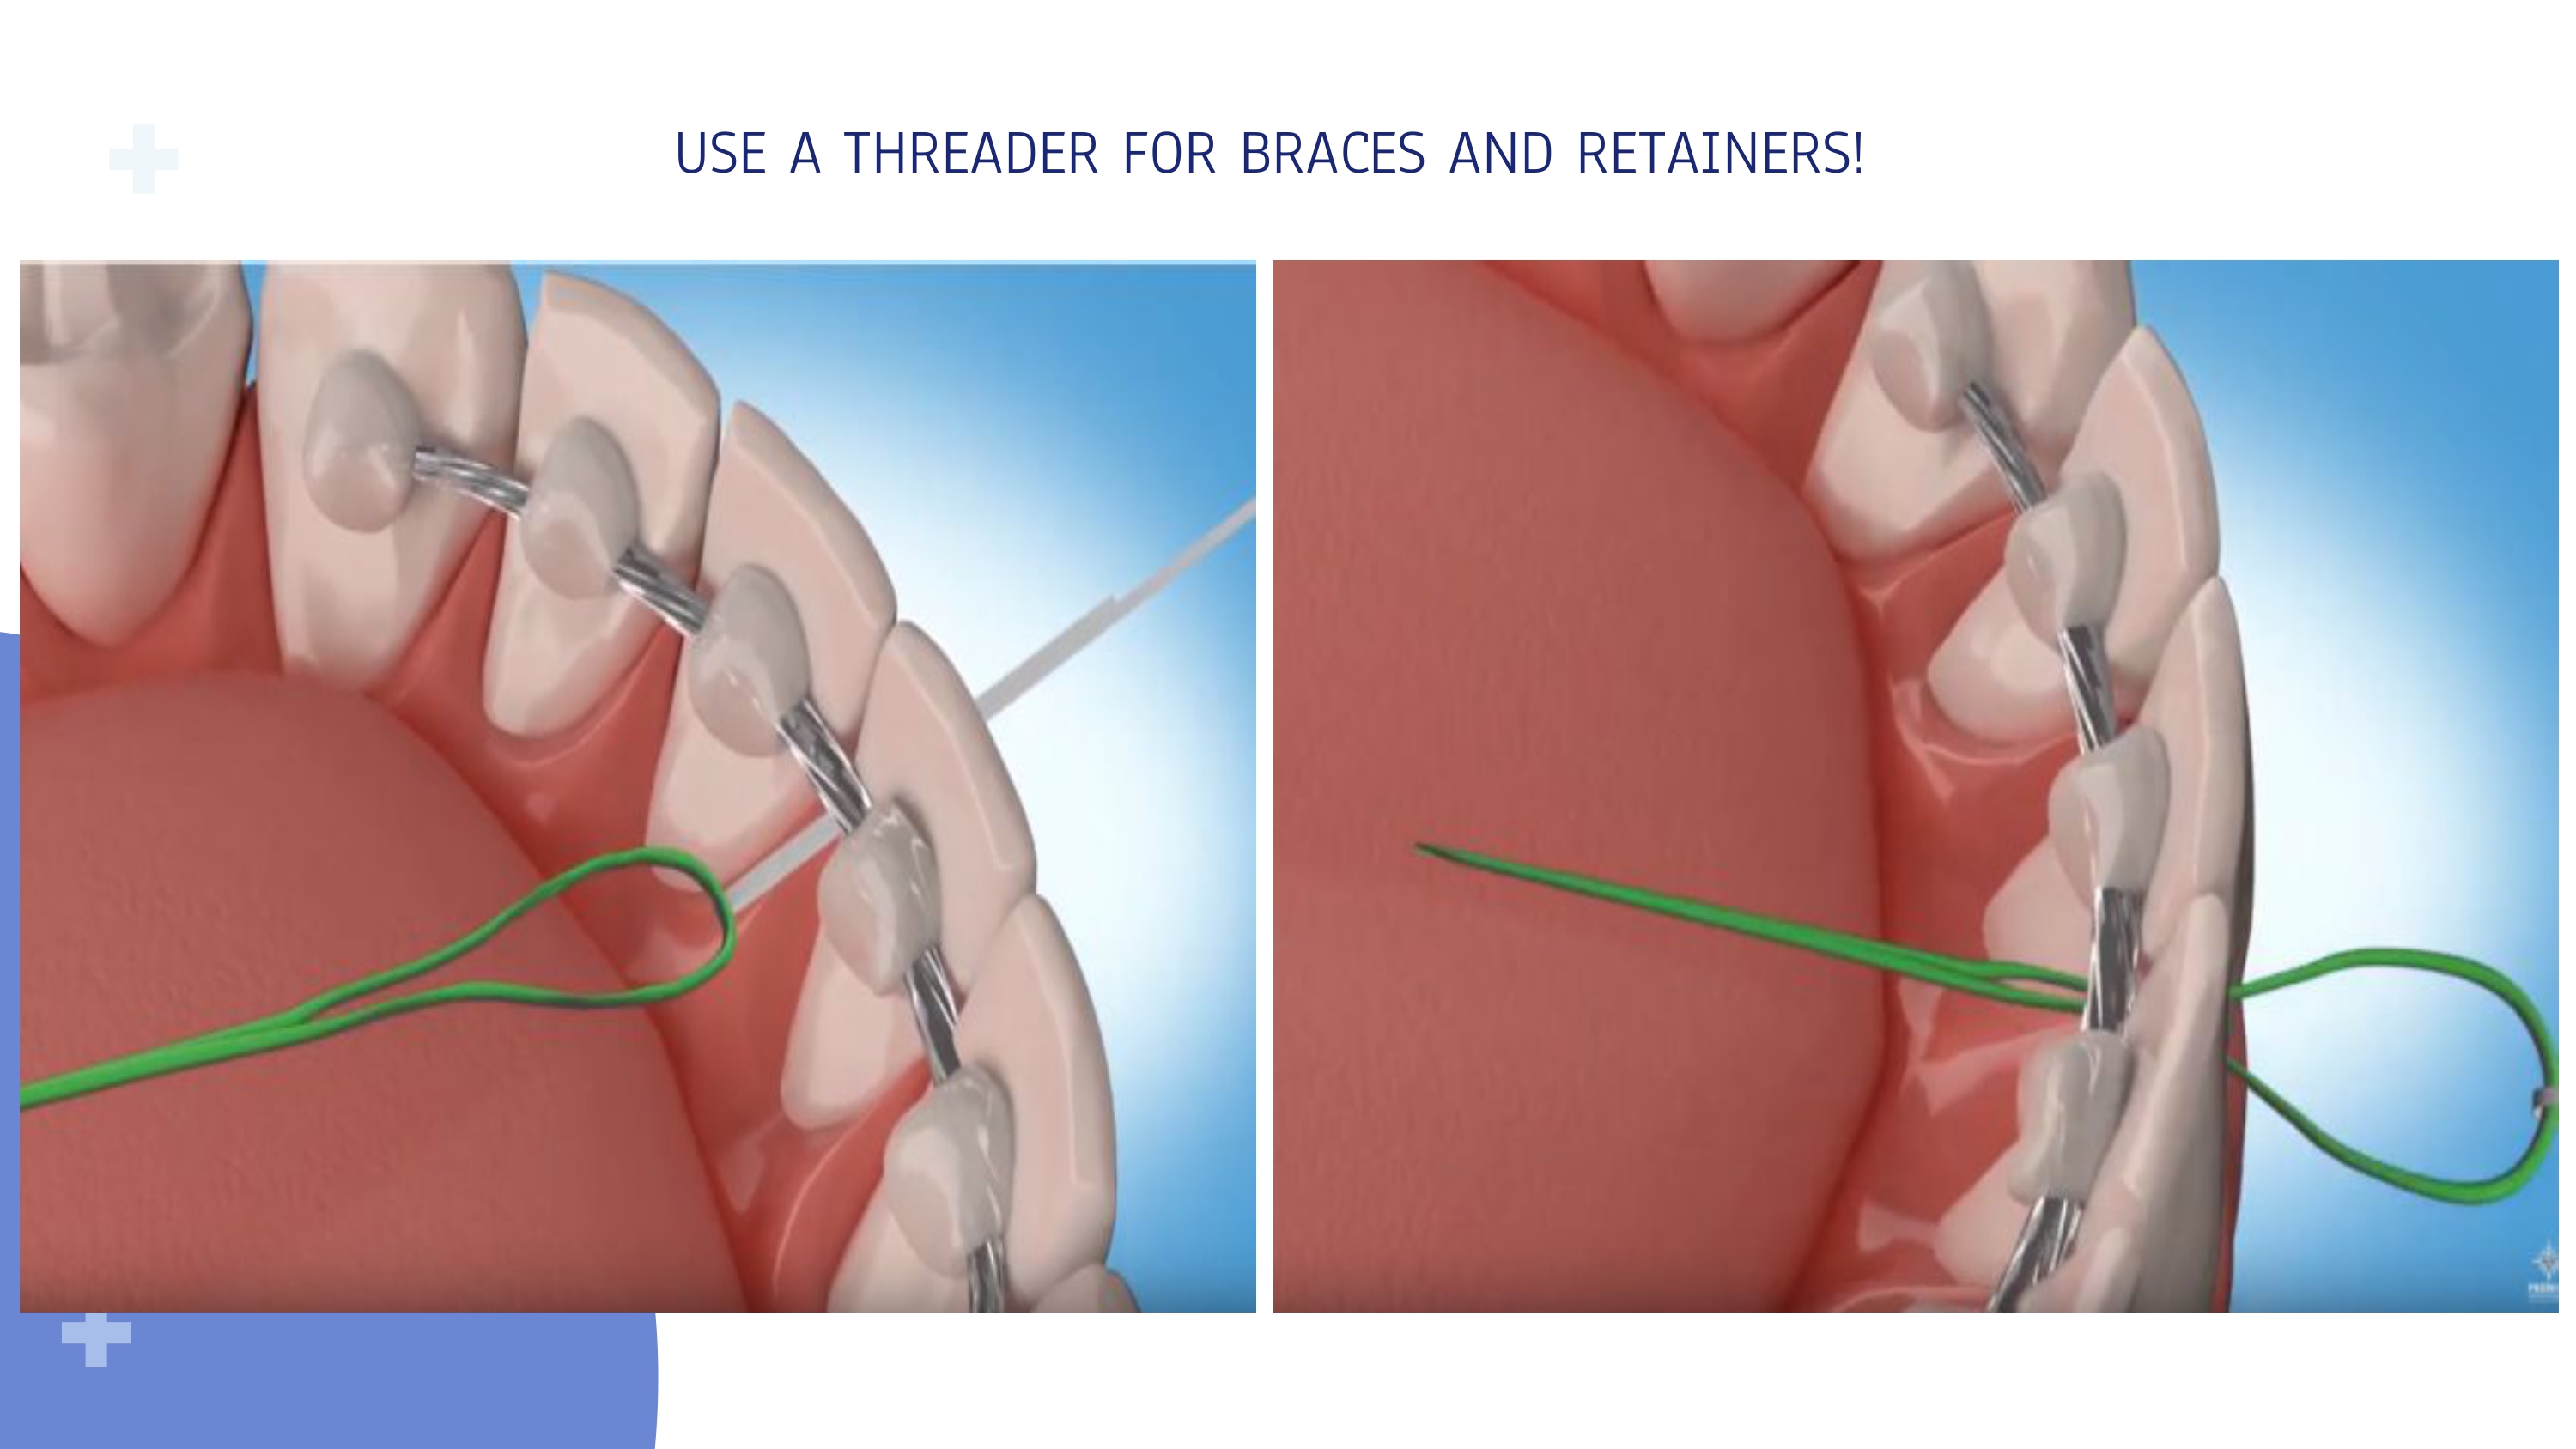
Cleaning Attachments: Brush thoroughly around each attachment with a soft-bristled brush to clear plaque at the base of the resin. Continue to floss daily — attachments should not interfere with flossing.
Cleaning Aligners: Rinse with cool water and gently brush with a soft toothbrush. Avoid hot water and toothpaste (can scratch the tray).
5 · What to Expect
Soreness: Expect pressure for the first 48 hours of each new tray. Over-the-counter pain relief (ibuprofen / acetaminophen) can help.
Speech: You may have a slight lisp initially. Keep talking — your tongue adapts quickly.
Rough Edges: If a tray edge feels sharp, gently smooth it with an emery board.
Keep the Previous Tray: Always save the most recently completed tray. If the current tray is lost or broken, it acts as a temporary retainer while you contact the office.
6 · If an Attachment Falls Off
Don’t Panic: A loose attachment is not a dental emergency, but it does need to be replaced promptly so teeth move as planned.
Keep Wearing: Continue wearing your aligners as directed — do not pause treatment.
Call the Office: Contact us during business hours to schedule a quick reattachment appointment.
Keep Wearing: Continue wearing your aligners as directed — do not pause treatment.
Call the Office: Contact us during business hours to schedule a quick reattachment appointment.
7 · Lost Aligner
If you lose a tray, contact the office immediately. Do not skip to the next tray without guidance — your teeth may not be ready for it yet.
When to Call Us
Contact the office if you experience: severe pain not relieved by OTC medication • an attachment or temporary that has completely come off • a lost aligner • a tray edge causing significant tissue injury • bite feels noticeably off after several days.